
The venue looks perfect in the walkthrough. Then guests arrive, phones come out, and the photo area becomes the busiest visual point in the room. A backdrop that looked polished on a design screen can wrinkle during transport, disappear in a wide camera frame, throw glare across faces, or block the only practical path between the bar and the dance floor.
A custom photoshoot backdrop has to do more than look good in a preview. It needs to support the event's visual identity, photograph well under real lighting, fit the venue, and survive load-in, guest traffic, breakdown, and possibly another event later. The best designs balance visual ambition with the unglamorous details that keep production from failing.
What a Custom Photoshoot Backdrop Really Is
At a wedding reception, the backdrop may sit behind the couple during formal portraits, frame a photo booth, or become the place where nearly every guest takes a group picture. At a corporate event, it may carry a repeating sponsor pattern, introduce a product campaign, or create the background for executive portraits. In each case, it's more than wall decoration. It's a controlled visual environment for photographs.
A custom photoshoot backdrop is a background designed, printed, painted, or fabricated for a particular event, brand, theme, or camera use. A generic cloth backdrop gives you a colour or broad style. A custom version can use a monogram, venue-inspired artwork, branded colour blocking, florals, a campaign message, or a complete scene built around the event's purpose.
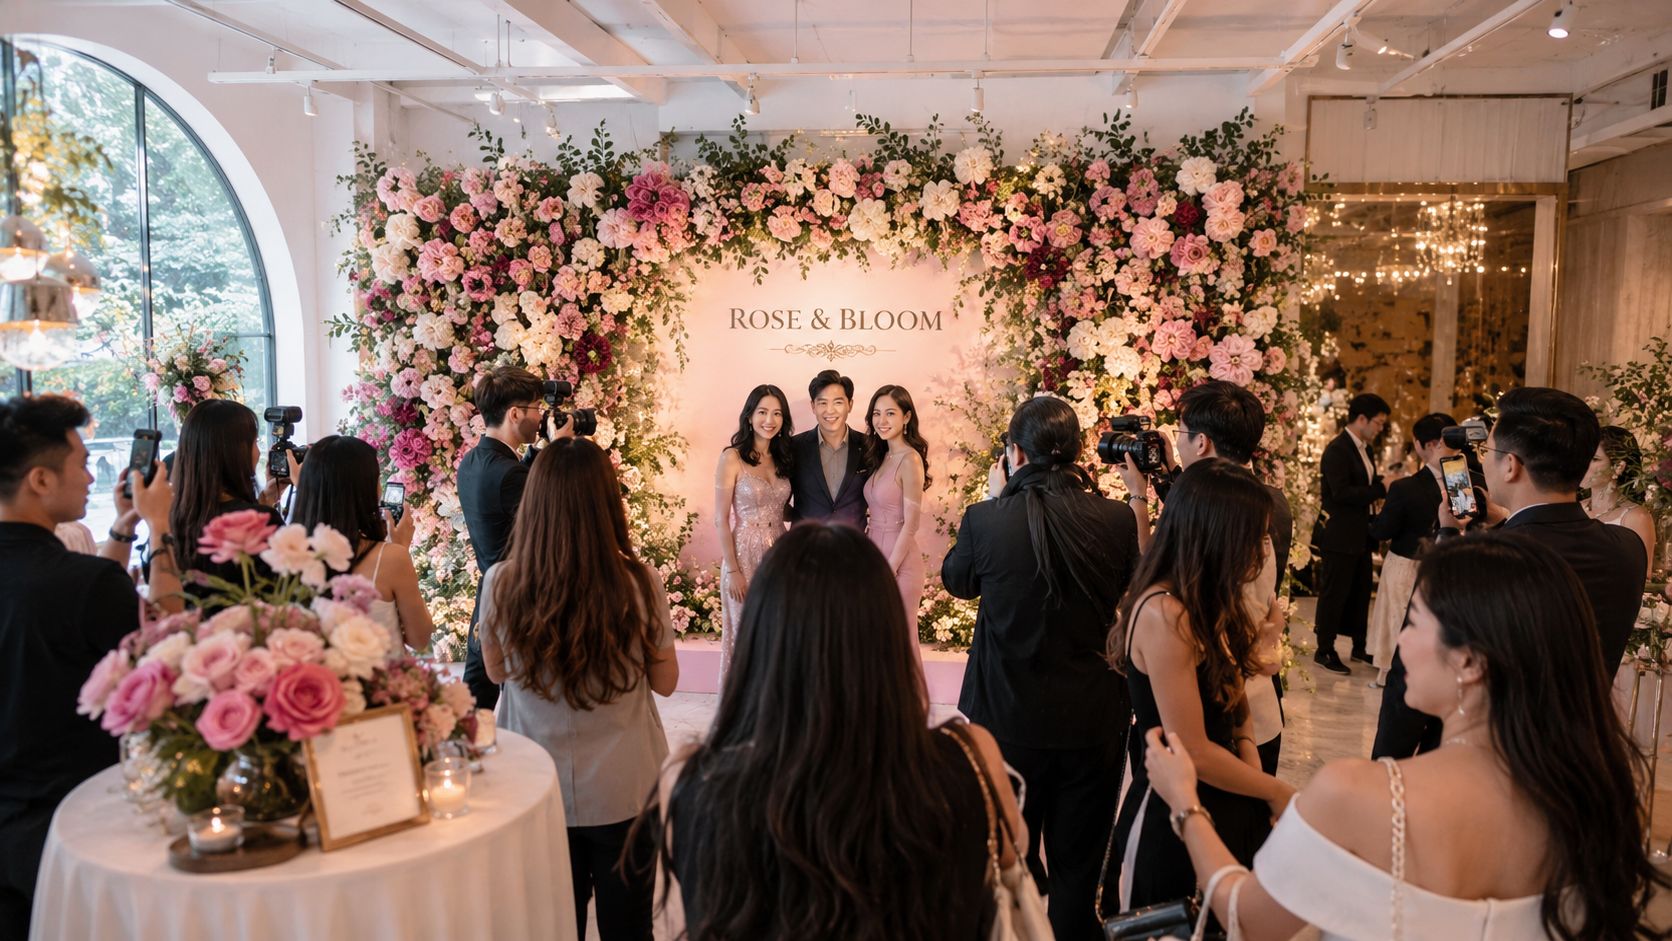
That personalisation matters because the backdrop appears repeatedly in the event's visual record. Guests may share images, the photographer may deliver portraits, and the organiser may reuse selected photographs for marketing or internal communications. A step-and-repeat layout prioritises consistent logo visibility, while a scenic custom design prioritises atmosphere and storytelling. Choosing between those approaches depends on whether the event needs brand repetition, a memorable setting, or both.
A long photographic tradition
The idea has deep roots. Decorative painted backgrounds were already used in photo studios in the mid-1800s, and Smithsonian archival material documents hand-painted photography backgrounds from the early 1900s in its history of painted backgrounds for turn-of-the-century photographers. Another historical account places the photographic backdrop's emergence in the United States around 1910, adapted from theatre curtain design.
That history explains why modern backdrops borrow from stagecraft. Scale, colour blocking, framing, and scene-setting still determine how a subject reads in front of the background. The difference is that today's systems can be folded, tensioned, printed, lit, projected onto, or combined with interactive effects.
The surrounding market also supports this evolution. The portable backdrop stand segment was valued at about $0.4 billion in 2025 and is projected to reach $0.6 billion by 2034, representing a 5.8% CAGR, according to the Smithsonian-referenced backdrop industry data. A broader photo booth estimate places the global market at USD 671.02 million in 2025, with a projection of USD 1,255.93 million by 2032 at a 9.37% CAGR in the same verified market context. Those figures point to a wider shift from fixed studio portraits toward portable, social, event-based photo experiences.
For planning inspiration, compare the difference between creative photo booth backdrops and standard setups, then ask what your backdrop must accomplish after the first photograph is taken. If it can't be transported, installed, lit, and removed without damage, the design is unfinished.
Choosing Materials and Printing Options
Material determines how a backdrop behaves before anyone steps in front of it. It affects reflections, wrinkles, colour, cleaning, folding, storage, and the amount of effort required during setup. A design can be excellent and still fail if the surface fights the lighting or arrives with creases that show in every portrait.
Compare the surface before the artwork
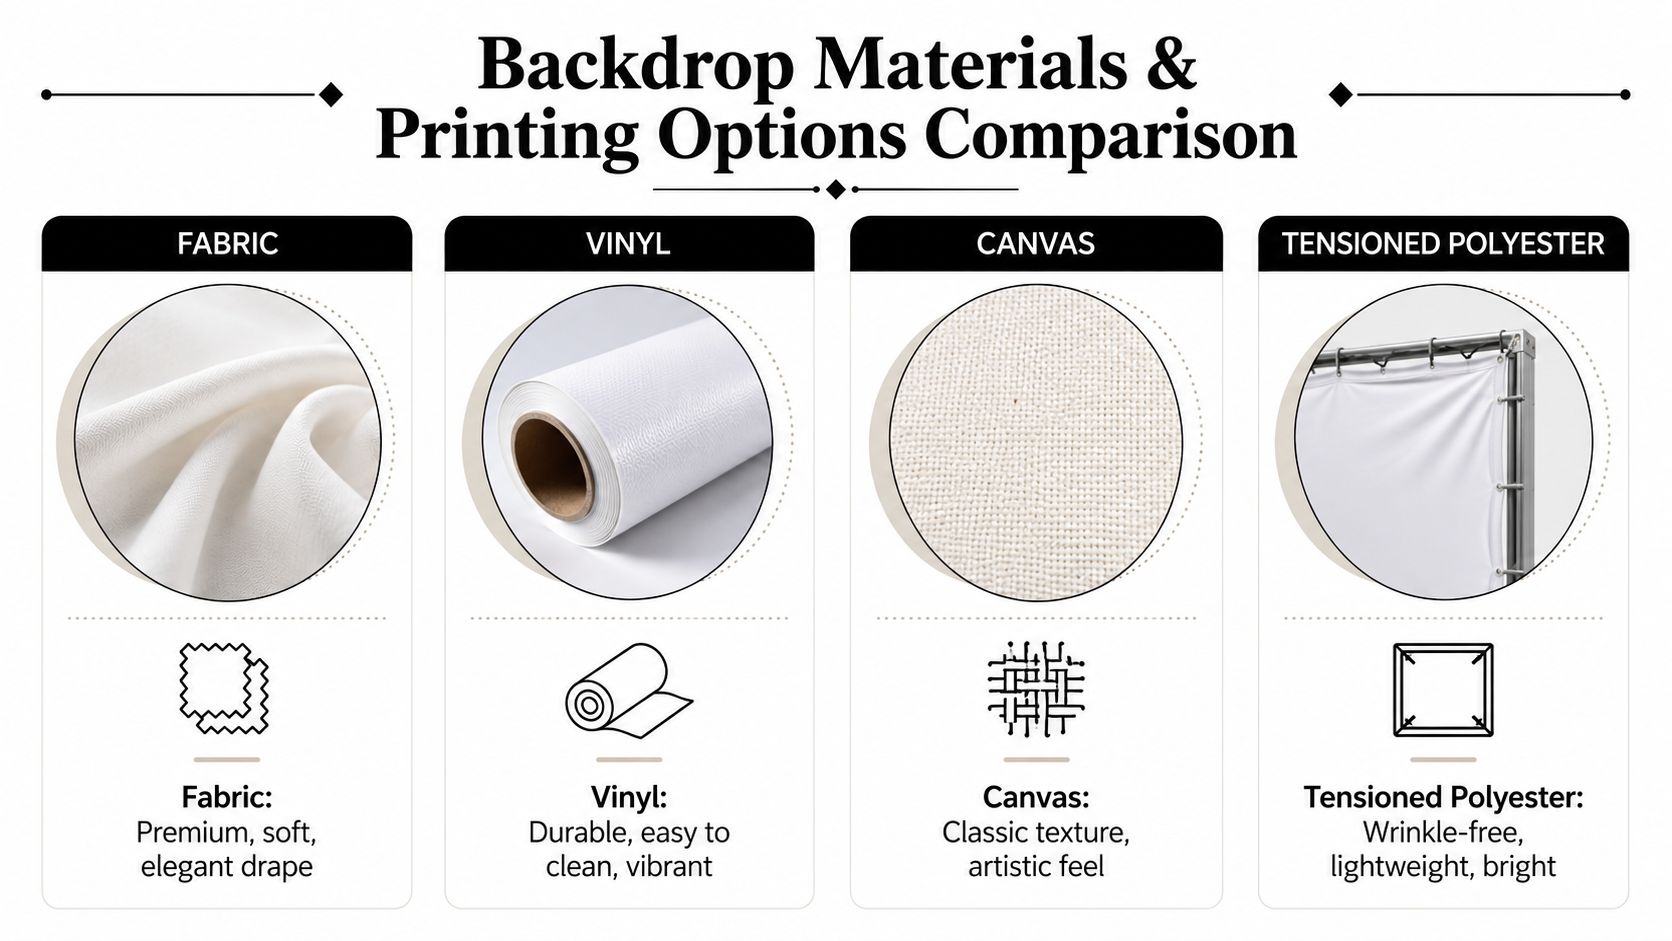
| Material | What it does well | Where it can struggle |
|---|---|---|
| Fabric | Soft, elegant, and easy to fold or drape | Wrinkles need management, especially in close portraits |
| Vinyl | Durable, easy to clean, and capable of vibrant colour | Reflective finishes can produce glare and feel less refined |
| Canvas | Adds an artistic, editorial texture | Heavier and less convenient to transport |
| Tensioned polyester | Lightweight, bright, and smooth when properly stretched | Requires a compatible frame or reliable tensioning system |
For portraits and branded photography, matte or semi-matte surfaces are usually the safer choice. They suppress specular hotspots, keep the subject visually dominant, and reduce the chance that a flash creates a bright patch across a logo or face. Reflective materials can look energetic in person but may bounce light back into the lens or contaminate nearby colours.
Neutral, low-texture surfaces protect skin tones and garment colours. Canvas, heavily textured fabric, or deliberately distressed materials make more sense when the texture is part of the creative direction. They can add depth, but busy texture becomes distracting when guests stand close to the camera.
Production rule: If the photographer needs to shoot close portraits, prioritise a controlled, low-reflection surface over a finish that looks dramatic under showroom lighting.
Fabric works well when the backdrop needs to travel frequently or drape naturally. Vinyl earns its place at events where spills, fingerprints, or repeated handling are likely. Canvas creates character but adds weight. Tensioned polyester is often a strong compromise for a clean, professional appearance, particularly when a rigid frame is available.
Specify the print for the viewing distance
Large-format artwork is commonly specified at about 150 to 300 DPI at final size, according to event backdrop printing guidance. 150 DPI can be acceptable for temporary indoor viewing from a greater distance, while 300 DPI is preferred when logos and text need to remain sharp for close guest portraits or step-and-repeat photography.
The correct file should match the actual print dimensions, not a small screen mock-up. Supply vector logos whenever possible, and use high-resolution artwork for photographs and raster elements. A logo that looks crisp on a laptop can develop soft edges once enlarged across a wall.
For practical file preparation, e-commerce backdrop tips from MerchLoom can help teams think through composition, surface choice, and product-facing photography. Ask the printer for a proof at final dimensions, confirm colour expectations, and request guidance on the finished hem, pole pockets, grommets, or frame attachment before approving production. You'll find more event-specific options in this guide to custom photo booth backdrops.
A proof tells you whether the composition works. A material sample tells you whether the production will work.
Sizing and Mounting for Your Venue
A backdrop's finished dimensions should come from the camera frame and guest movement, not from an attractive catalogue image. A narrow panel may look substantial in a hallway but crop people at the shoulders once a photographer steps back for a group portrait. A wide wall can solve the framing problem but create a new one by blocking a service corridor or competing with the stage.
Measure the room as a working environment
Start with the usable width and height, then mark doors, columns, fire exits, sprinklers, ceiling fixtures, furniture, and power access. Measure the space after the venue has placed its tables and staging equipment. Empty-room dimensions rarely reflect the area you'll receive.
Use the intended camera position as a fixed planning point. Individual portraits need enough height for headroom and enough width for natural posing. Group photographs require additional visual coverage because people spread sideways and photographers often widen the frame. Keep the lower edge practical as well. A backdrop that drags across the floor becomes a trip risk and collects dirt during guest traffic.
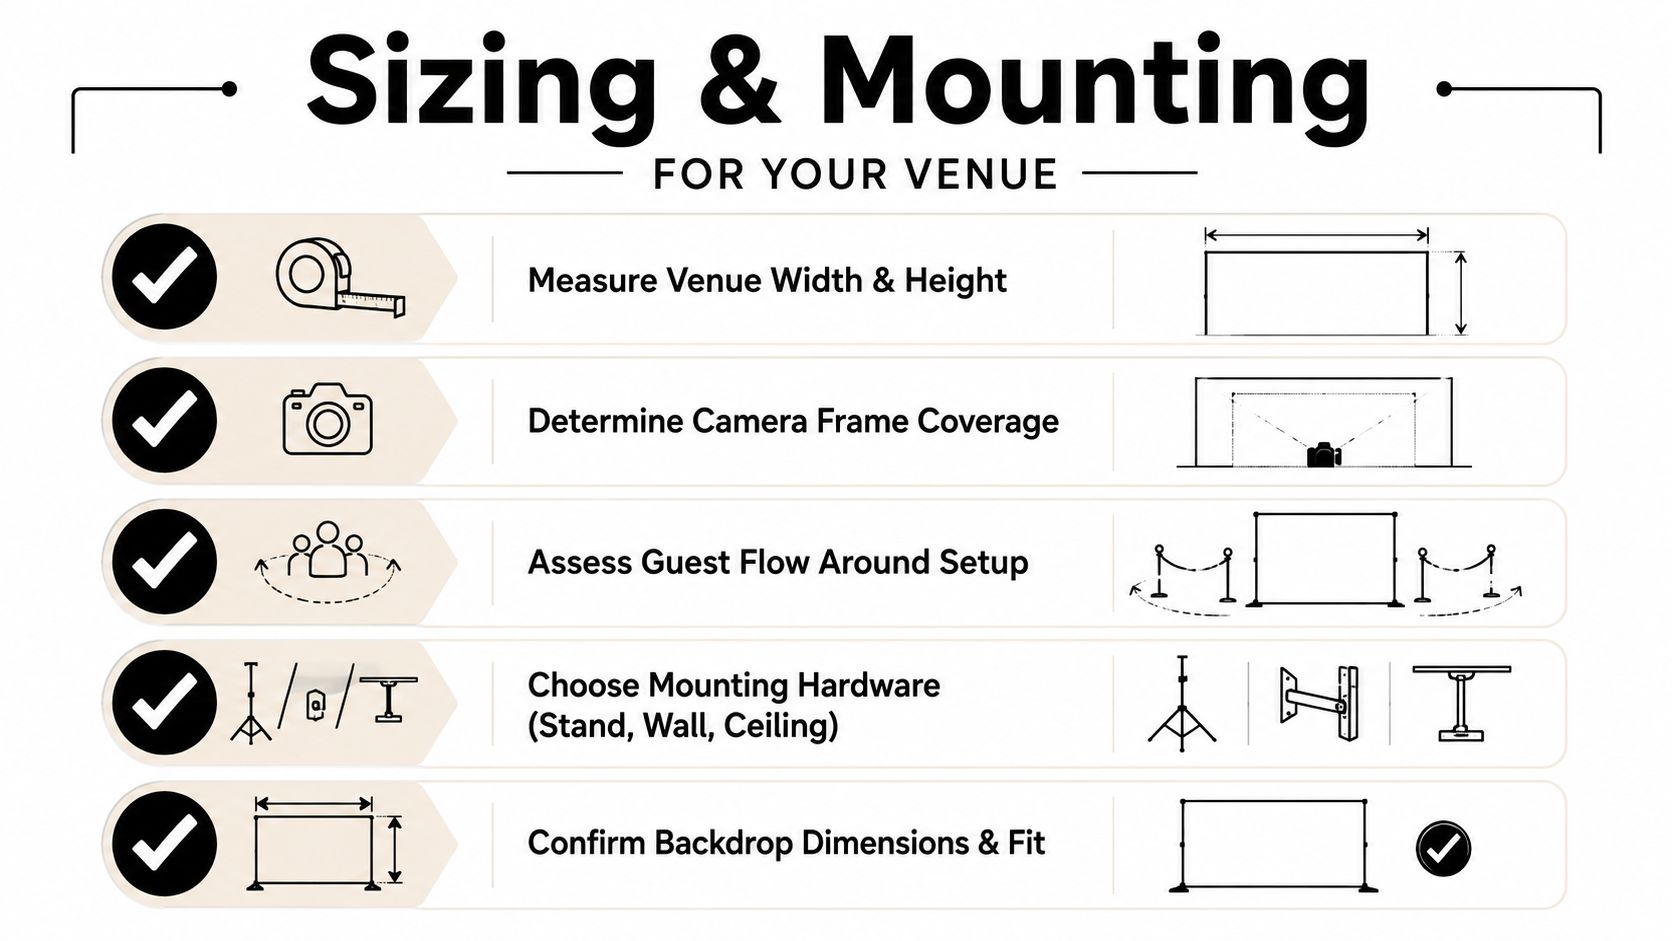
A useful venue check includes:
- Camera coverage: Stand where the photographer will work and identify the widest likely frame.
- Subject depth: Leave enough space for people to stand clear of the surface and for the photographer to move.
- Guest flow: Make sure queues don't spill into dining, bar, stage, or emergency access routes.
- Load-in route: Confirm that the packed frame, poles, and cases can pass through lifts, doors, and corridors.
- Removal plan: Know whether the system can come down without moving half the room.
Match the mount to the conditions
Pipe-and-drape systems are adaptable and useful when the venue already has event rigging support. Tension frames create a clean, architectural finish and help fabric stay smooth, but they need accurate assembly and a suitable footprint. Wall-mounted rigs save floor space in tight ballrooms, although the venue must approve attachment points. Freestanding structures offer flexibility, but their stability depends on the base, frame, ballast, and local conditions.
Outdoor installations deserve extra caution. Wind turns fabric into a sail, so a light decorative stand that behaves perfectly indoors may shift or fail outside. Use a structure designed for outdoor conditions, secure the base properly, and follow the venue or production supplier's safety requirements rather than improvising with household weights.
Before ordering, review practical construction ideas in this guide on how to make a backdrop for photos. A professional-looking finish starts with a support system that remains square, tensioned, and stable after guests begin using it.
Design Ideas for Every Event Type
The strongest backdrop designs begin with the audience's behaviour. Wedding guests want a flattering place to gather. Corporate attendees need a clear brand environment that doesn't make every photograph look like an advertisement. Party guests respond to atmosphere, colour, and the chance to participate.
Weddings need framing, not visual competition
A wedding backdrop should support the couple's existing palette and styling. Soft florals, restrained greenery, a monogram, or tonal fabric can create a romantic setting without competing with the dress, flowers, or table design. A projection of the couple's initials can add personal detail while leaving the physical background relatively simple.
Minimalism often photographs better than an overloaded floral wall. If the arrangement has strong depth, keep the central area calm enough for faces to remain readable. If the couple wants a statement installation, place the highest visual detail around the edges and protect the middle of the camera frame.
For related ideas, this bridal shower style guide offers useful direction on coordinating colour, pattern, and celebration details. Adapt those ideas to the camera rather than copying a room-only decoration scheme.
Corporate events need a deliberate hierarchy
A step-and-repeat wall works when sponsor recognition and repeated brand exposure are the priority. Use consistent logo spacing, a readable background tone, and enough contrast for both professional cameras and phones. A product launch may need a different treatment, such as a large campaign image, product silhouette, launch message, or dimensional logo that creates a stronger scene.
Branding should remain visible without placing critical text where heads will cover it. Keep the main message above likely shoulder height, and test the design with sample silhouettes before printing. If several sponsors are involved, establish a clear hierarchy so the wall doesn't become a field of competing marks.
Parties benefit from layers and interaction
A themed party gives you more freedom to build a scene. Colour blocking can establish the setting quickly, while layered panels, cut-out shapes, textured sections, and practical props add depth. A tropical theme might use oversized leaves and saturated colour fields. A retro event might use geometric forms, a controlled palette, and a few dimensional elements instead of a literal printed room.
Interactive details work best when they're easy to understand. A frame, movable sign, oversized prop, or reveal panel can encourage participation, but every added piece needs storage, transport protection, and a safe footprint. The design should still read clearly when half the guests are standing in front of it.
Lighting and Photography Techniques That Make It Work
Lighting should treat the subject and backdrop as separate surfaces. If one bright source washes over everything from the camera position, the person and the background flatten into a single layer. If the backdrop receives no light at all, printed colour can look dull or uneven even when the material is excellent.
Give the subject and background different jobs
Place the subject far enough from the backdrop to reduce hard shadows. The exact distance depends on the room, lens, and light intensity, but the principle is consistent. More separation gives the photographer greater control over shadow falloff and lets the background remain visually distinct.
Light the subject first. Then add controlled background illumination if the artwork needs more brightness or evenness. Side light or a subtle edge light can create depth around the person without turning the backdrop into a bright distraction. A gobo projection can add a monogram or pattern, but it should be tested against the backdrop's colour and texture before guests arrive.
Check the result from a phone position
Professional cameras and smartphones don't always react the same way. A surface that looks balanced through the photographer's lens may appear too dark on a phone, while a reflective section can flare in a casual snapshot. Walk through the photo area with the actual camera types guests will use.
Common failures include:
- On-camera flash: It can flatten the scene and produce direct reflections.
- Subjects too close: Faces and clothing may cast hard shadows onto the background.
- Unlit edges: People at the sides of a group can fall into darker areas.
- Uneven colour: A textured or tensioned surface can show changes in brightness.
- Bright background, dark subject: The camera may expose for the backdrop and lose facial detail.
Ask the event photographer to test a solo portrait, a group frame, and a phone image. The backdrop should remain legible without overpowering expressions or clothing.
A dedicated photo area benefits from a planned lighting arrangement rather than whatever fixtures happen to be in the ballroom. Review this guide to a photo booth lighting setup when coordinating the booth, camera position, and ambient light. The photographer and production team should agree on the final subject mark before guests enter, because moving the booth later can disrupt both lighting and traffic flow.
Integrating Backdrops with Photo Booths and Event Effects
A backdrop becomes more effective when the rest of the photo experience supports it. The booth camera, print template, props, queue position, lighting, and effects should share a visual logic. When every element demands attention, the result feels cluttered rather than immersive.
Place the booth far enough from the backdrop for guests to pose comfortably and for the camera to capture the intended composition. Keep props in a defined location, not scattered across the floor. If instant prints are part of the experience, carry the backdrop's colour or graphic language into the print border so the physical takeaway feels connected to the room.
Effects need restraint
Atmospheric haze can reveal light beams and add depth, but too much haze can soften images and trigger venue concerns. Cold sparks can create a strong entrance or portrait moment, yet they need approved equipment, controlled placement, and a clear separation from guests and fabric. Gobo projections work particularly well with simpler surfaces because the projected pattern remains readable instead of competing with dense artwork.
Use effects to create a moment, not to run every visual treatment at full intensity. A projection may be ideal during a grand entrance, while a clean, evenly lit backdrop works better for the rest of the evening's portraits.
Coordination check: Confirm the backdrop footprint, booth position, effect zones, power routes, and fire-safety requirements on one venue plan.
A production team should also decide who controls each element. The booth operator can manage the camera and print experience, while the lighting operator handles projection or atmosphere. Without clear ownership, one operator may change a setting that makes another element unreadable.
For a useful example of how event details can be coordinated across a wider installation, review this event planning case study. The practical lesson is simple. Design the photo moment as a system, then remove anything that doesn't improve the guest action or the photograph.
Pricing Factors and Ordering Timeline
Backdrop pricing depends on the complete production package, not just the printed rectangle. Material, finished size, artwork complexity, edge treatment, mounting hardware, packing method, delivery, venue access, and installation labour can all change the quote.
Separate the one-time and reusable costs
A budget-friendly printed fabric may suit a single themed party, especially when the artwork is tied to one date. A reusable tensioned system costs more to plan and transport but can serve several corporate events, weddings, or charity activations if the graphic skin can be replaced or adapted.
Ask suppliers to separate:
- Artwork preparation: New design, logo cleanup, proofing, and revisions.
- Print production: The selected material, ink process, finishing, and final dimensions.
- Structure: Stand, frame, pipe-and-drape components, bases, clamps, or wall hardware.
- Logistics: Packing, delivery, lift access, venue restrictions, and return transport.
- On-site work: Assembly, tensioning, lighting adjustments, strike, and storage.
This breakdown shows where a cheaper quote may shift work onto your team. A low material price doesn't help if the venue requires professional installation or if the backdrop arrives without a stable support system.
Build time around approvals
A smooth order usually moves through design approval, material selection, production proofing, manufacture, delivery, and venue setup. Start by confirming the event date, access window, camera use, final dimensions, and artwork owner. Then request a physical material sample when the surface finish affects lighting.
The verified production guidance for large-format backdrops recommends planning artwork around final dimensions and choosing source resolution according to viewing distance. That makes early proofing particularly important for logos, small text, and close-up photography. Rushing approval can force compromises in artwork quality, material choice, or delivery options.
The infographic supplied for this planning workflow includes indicative figures such as a $150 to $800 base price, material additions of 10% to 30%, size premiums of 15% to 25%, and rush fees of 20% to 50%. Those figures are part of the provided visual specification, not a universal quote. Treat them as prompts for asking a supplier how its pricing is constructed, then request a written total that includes delivery and setup.
If you're searching locally, compare suppliers through custom photo backdrops near me and ask each one about venue access, replacement graphics, storage, and strike procedures. Those details often matter more than a small difference in the initial print price.
Planning a custom photo backdrop or photo booth experience in Fort Atkinson, Southern Wisconsin, or Northern Illinois? Explore 1021 Events backdrop, photo booth, lighting, photography, and event options on our Services page, then share your theme, venue, and event date.