

Let's be honest, a generic backdrop is a huge missed opportunity. A personalized photo booth backdrop turns a simple photo op into a core memory, perfectly nailing your event's theme and getting guests excited to snap and share pictures that scream your style. It's that special touch that takes an event from just another party to something truly unforgettable.
Why a Personalized Backdrop Changes Everything
The photo booth is usually where the real fun happens, right? It’s where people let their guard down, laugh, and make memories they can actually hold onto. A personalized backdrop is what pulls that whole experience together. It's more than just a background—it becomes an interactive centerpiece of your event.
This single detail reinforces your theme better than almost any other decoration. Think about it: a wedding backdrop with the couple's new monogram and wedding date, or a company party with a sharp, branded step-and-repeat. These details make the whole event feel polished, intentional, and incredibly thoughtful.
Getting People Talking (and Posting)
A killer custom backdrop is like a magnet for your guests. It gives them a natural place to gather and interact, breaking the ice and getting people to mingle. Plus, in the age of social media, it's a social sharing machine. When guests are obsessed with the setup, they can't wait to post their photos, spreading organic buzz about your event or brand without you even having to ask.
This isn't just a fleeting trend; people are actively looking for unique, customized experiences. The global photo booth market is booming and is expected to hit over $1.5 billion by 2033. That kind of growth shows just how much people value creating those one-of-a-kind, shareable moments.
A personalized backdrop isn't just about looking good in photos—it creates an entire vibe. It tells your story and invites your guests to be part of it, making sure the memories they capture are tied directly to your special day.
The enclosed setup really puts the focus on the guests and the backdrop, which is why a custom design makes such a massive impact. Especially for weddings, looking into different photo booth backdrop ideas can help you find a style that perfectly captures that romantic, celebratory feel you're going for. It's a small detail that honestly makes all the difference.
2. Choosing the Right Material and Style for Your Backdrop
The foundation of any show-stopping photo booth backdrop is the material. Seriously, this one choice affects everything—the vibe, how long it'll last, and most importantly, how it looks in photos. Getting this right is the first real step to bringing your vision to life.
Think about the atmosphere you're trying to build. A rustic barn wedding needs a totally different feel than a slick corporate launch party. The material itself sets the tone before a single picture is taken.
Popular Backdrop Materials To Consider
Let's dive into the most common options I see out in the field.
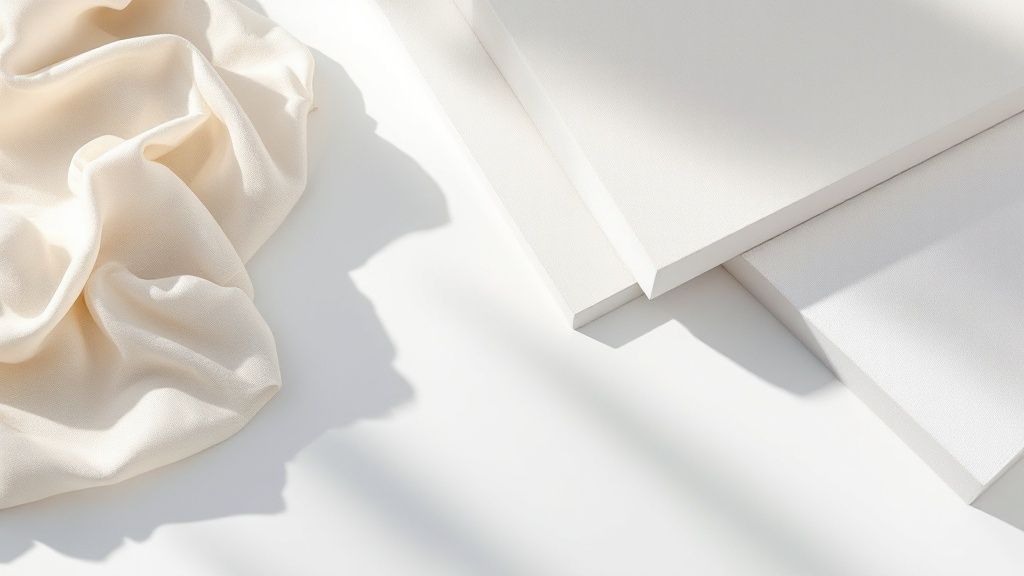
Vinyl is the industry workhorse for a reason. It's tough, easy to clean, and prints colors that really pop. This makes it a fantastic choice for busy events or anything happening outdoors where you might have to contend with weather. The only catch? Its glossy surface can sometimes throw a nasty glare with flash photography if you're not careful with your lighting.
Fabric backdrops, like polyester or canvas, give off a much more elegant, high-end vibe. They have a beautiful matte finish, which means zero glare—a photographer's dream. They also hang beautifully. The trade-off is that they can wrinkle, so you have to be mindful of how you store and transport them.
Then you have the life of the party: sequins. A sequin or shimmer wall is pure glamour and fun. The way it plays with light creates this incredible, dynamic effect that’s perfect for big birthday bashes, New Year's Eve parties, or any event that just needs a little extra sparkle.
To make it easier, here's a quick cheat sheet comparing the most popular materials.
Backdrop Material Comparison Guide
| Material | Best For | Pros | Cons |
|---|---|---|---|
| Vinyl | High-traffic events, outdoor use, bold & bright graphics. | Durable, waterproof, vibrant color printing, easy to clean. | Can cause glare with direct flash, can look less premium. |
| Fabric (Polyester/Canvas) | Weddings, upscale events, professional photography. | Matte finish (no glare), elegant drape, lightweight. | Prone to wrinkles, can be harder to clean. |
| Sequin/Shimmer Wall | Parties, celebrations, glamorous or festive themes. | Eye-catching, interactive with light, adds texture. | Can be expensive, sequins can sometimes fall off. |
| Paper/Cardstock | DIY projects, one-time use, budget-friendly setups. | Inexpensive, highly customizable, wide color variety. | Not durable, easily damaged, for indoor use only. |
Ultimately, the right material balances the practical needs of your event with the look you're going for.
Matching the Style to Your Event
Once you've picked a material, the design is where you really bring your theme to life. A custom backdrop is a powerful piece of visual storytelling.
Take this design, for instance. It's a simple, elegant floral pattern on a vinyl backdrop—a hugely popular choice for weddings and bridal showers.
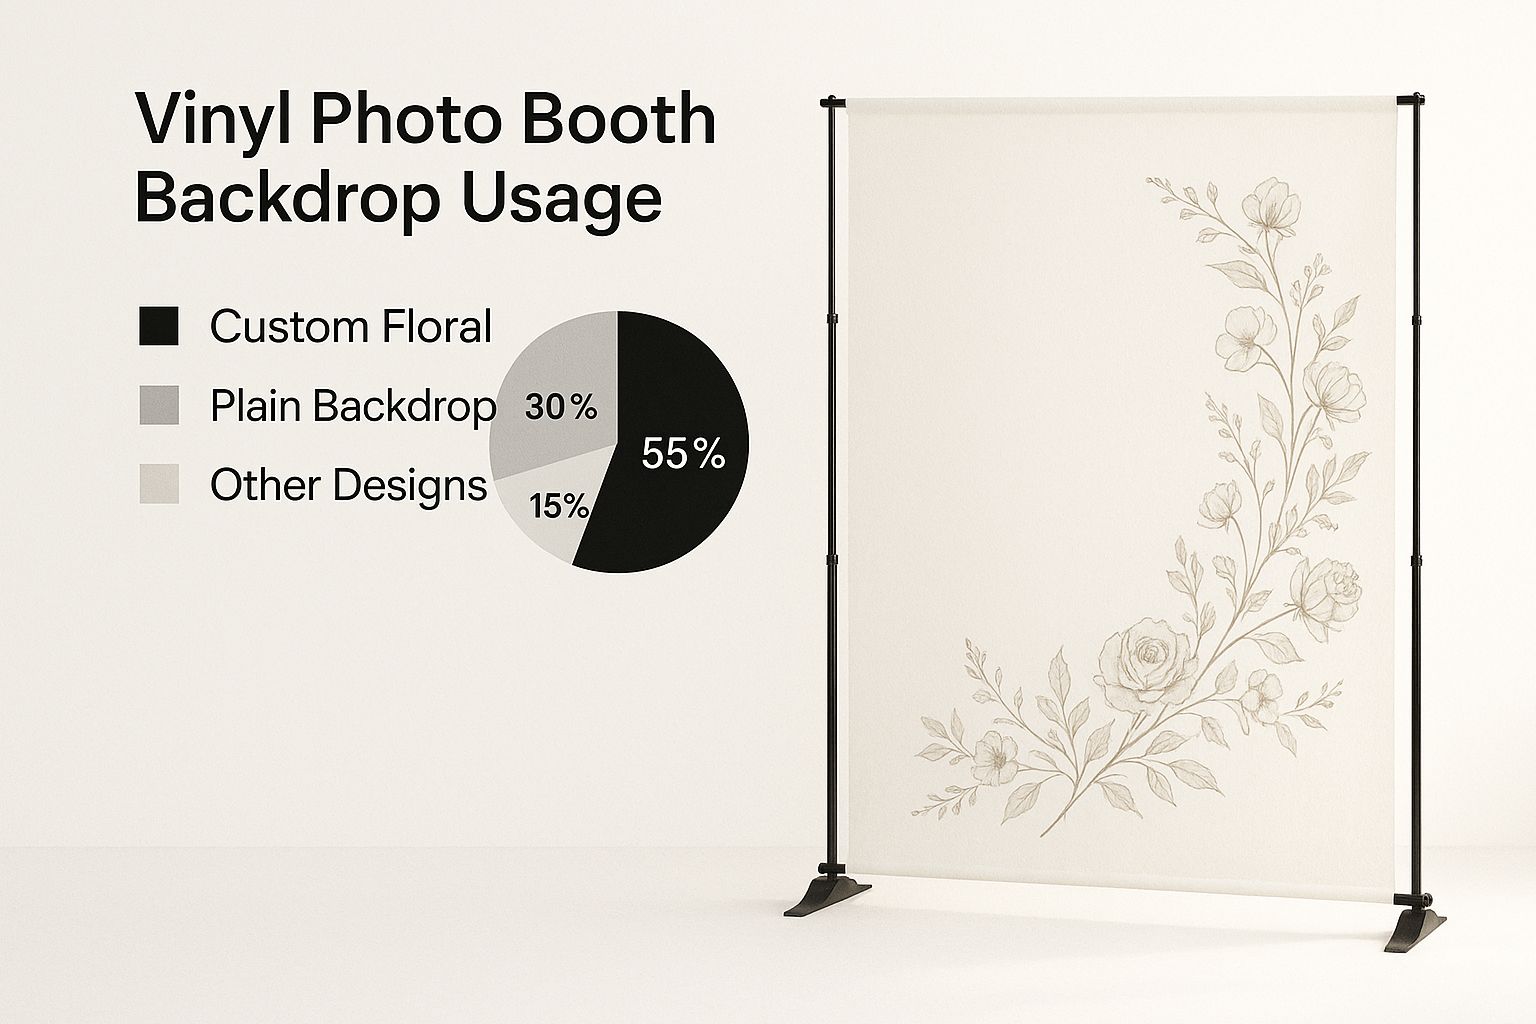
The clean look keeps the focus on the people in the photo while still reinforcing that romantic, celebratory feel of the day.
And the data backs this up. A unique backdrop seriously boosts how much your guests interact with the photo booth. We've seen that well over 70% of people will share their photos on social media if the backdrop is cool and memorable. Styles like rustic wood, elegant florals, and sharp geometric patterns are practically guaranteed to get people snapping and sharing.
Here are a few styles that always kill it:
- Greenery & Floral Walls: For weddings, garden parties, or bridal showers, you can't go wrong with a lush wall of flowers or greenery. It adds a beautiful, natural texture to photos.
- Geometric Patterns: This is a go-to for corporate gigs or modern parties. Clean lines and bold shapes create a look that's sophisticated and perfectly on-brand.
- Rustic Wood: Planning a barn wedding or an outdoor event? A wood panel backdrop brings a warm, cozy, and timeless feel.
Feeling crafty? If you want to take a shot at building your own, our guide on how to make a backdrop for photos has some great DIY tips to get you started. Nailing the right combo of material and style is your ticket to making the photo booth a true highlight of your event.
How to Design a Backdrop That Wows Your Guests
Alright, this is where the real fun begins. Designing your own photo booth backdrop is your chance to really inject some personality into the event, tie the whole theme together, and create something guests will be talking about long after the party's over.
It doesn’t matter if you’re a total DIY pro or working with a designer—a few simple principles will make sure your backdrop is absolutely picture-perfect. The trick is to create something that enhances the photos, not overpowers them. Think of it as the perfect supporting actor that makes your guests—the real stars—look their best.
Nailing the Visuals: Color, Fonts, and Graphics
First things first: your color palette. You want it to feel like it belongs at your event, not like it just landed from outer space. A great rule of thumb is to pick two or three main colors from your event's decor and maybe an accent color or two. This keeps the design looking sharp, not chaotic.
Next up, let's talk fonts. Legibility is everything. Seriously. That fancy script might look incredible up close on your screen, but if people can't read the names or date from a few feet away, it's not doing its job. I always suggest sticking to clean, clear fonts for the important stuff and saving the decorative ones for smaller, stylistic touches.
When it comes to graphics, less is almost always more. A company logo, a wedding monogram, or a cool illustration can add a fantastic personal touch. Just be smart about where you put it. You don’t want a logo hovering directly behind someone’s head in every single photo. A subtle step-and-repeat pattern or placing graphics in the corners is usually a safe and stylish bet.
A great backdrop design guides the eye without demanding all the attention. It should be interesting enough to draw people in but simple enough to let the people in the photo remain the focal point.
Getting Your Files Print-Ready
This part's a bit technical, but it’s absolutely crucial. To avoid that dreaded blurry, pixelated look, your design file has to be high-resolution. That means creating it at 300 DPI (dots per inch) and saving it in a professional format like PDF, AI, or EPS. If you're using photos in your design, please use the high-quality originals—not a screenshot from Instagram!
Thinking about using some cherished photos? Getting creative and learning how to turn a photo into a painting digitally can add a completely unique, artistic vibe to your backdrop. It’s a personal touch that really stands out.
Also, and this is a big one, make sure you design in the correct dimensions from the start. If you’re ordering an 8×8 foot backdrop, your digital file needs to be set to those exact measurements. Trying to stretch a small design to fit a huge print is a guaranteed recipe for a low-quality disaster.
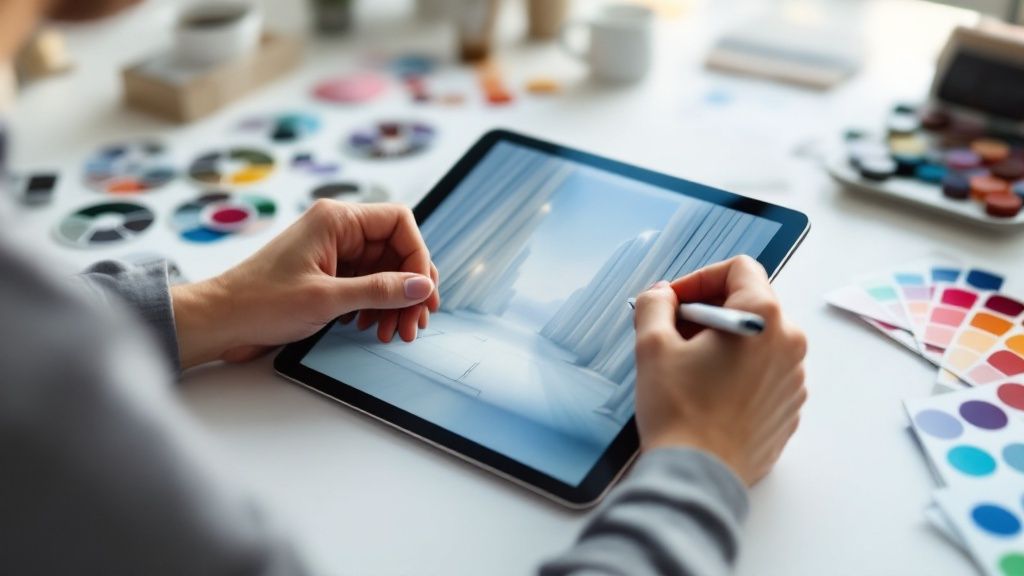
Design Tools for Every Skill Level
The good news? You don't need a graphic design degree to create something awesome. There are some incredible tools out there for everyone.
- For Beginners (Canva): I recommend Canva to clients all the time. It’s super user-friendly, packed with templates, and has a simple drag-and-drop interface. It’s perfect for creating clean, elegant designs without a steep learning curve.
- For Advanced Users (Adobe Illustrator): If you want to go all out and have complete creative freedom, Illustrator is the industry standard. It lets you create vector graphics that can be scaled to any size without ever losing quality.
No matter which tool you use, just have fun with it! A backdrop you put thought and creativity into can completely elevate the guest experience. Of course, if you want to pair a stunning custom design with a totally seamless setup, exploring a full-service photo booth rental for events can bring your vision to life without any of the logistical headaches.
Let's Talk High-Tech and Interactive Backdrops
Look, a static banner is a classic for a reason, but let's be honest—technology has completely changed the game. We're talking about moving beyond simple fabric and vinyl into a world of digital experiences that can make your event unforgettable.
These aren't just backgrounds anymore; they're activities. This is the stuff that gets people talking, making it perfect for corporate events that need to make a splash or anyone who just wants to give their guests a seriously cool, futuristic photo op.
Diving Into a Digital World
The king of high-tech backdrops is definitely green screen technology. And no, it's not just for Hollywood blockbusters anymore. With a simple green backdrop, you can digitally drop your guests anywhere in the world—or even out of it. One minute they're at the Eiffel Tower, the next they're on a branded virtual landscape showing off your new product. The possibilities are endless.
Then you have augmented reality (AR) filters, which are always a huge hit. Think of them as your event's very own custom Snapchat or Instagram filter. Guests can see themselves on screen wearing virtual branded hats, funky glasses, or even interacting with little animated characters. It brings a playful, interactive element that people absolutely love.
The explosion in photo booth tech is what's really driving this. Over 50% of new photo booth systems are now built with instant social sharing and animated GIFs in mind, and these features thrive on dynamic, eye-catching backdrops.
Pro Tip: High-tech backdrops shift the photo booth from just a place to take pictures into an immersive entertainment hub. The experience itself becomes the main event, creating moments that guests are excited to share.
Getting Creative with AI and Animation
And it doesn't stop there. AI-powered features are pushing the envelope even further. Imagine a backdrop that reacts to your guests, changing colors or patterns as they move. Or picture a digital mosaic that builds itself in real-time using the photos taken throughout the night. It's a fantastic way to create visuals that are truly one-of-a-kind.
If you want to really get into the weeds of creating these kinds of dynamic visuals, checking out tools for interactive animation with Rive can give you some incredible ideas.
Of course, going high-tech means you have a few more things to think about:
- Cost: All this cool tech—the software, the hardware—means digital setups typically have a higher price tag than a standard printed backdrop.
- Technical Needs: You'll need a solid power source and a stable internet connection, especially for social sharing. You might even want an on-site technician to keep things running smoothly.
- Space: Green screens can be a bit finicky. They need the right lighting and enough distance between the screen and your guests to work their magic, so plan your floor layout carefully.
If you're feeling adventurous and thinking about putting together your own rig, our guide on how to create a photo booth is packed with tips to help you map everything out. It's a bit more work, but making the jump to a high-tech backdrop is one of the best ways to make a lasting impression.
Installation and Lighting: Getting That Picture-Perfect Setup
So, you’ve designed a killer personalized photo booth backdrop, and it’s finally here. It looks amazing. But hold on—the job isn't done yet. Even the most incredible design can fall flat with a sloppy setup or terrible lighting.
Nailing the installation and lighting is what separates a good photo booth from a great one. It’s the final step that turns a simple banner into a pro-level photo spot your guests will flock to. Think about it: wrinkles, sagging fabric, or weird shadows are instant photo-killers. Luckily, getting it right is totally doable with a few insider tricks.
Choosing Your Support System
First things first, you need something to hold your backdrop up. What you choose really comes down to your backdrop's material, its weight, and where you're setting up.
-
Telescopic Pipe and Drape Stands: Honestly, these are the industry workhorse for a reason. They adjust for both height and width, making them perfect for almost any fabric or lightweight vinyl backdrop you throw at them. Plus, their solid bases keep things stable, which is a must-have when guests are getting a little rowdy.
-
Wall Mounts or Adhesives: Got a nice, flat wall you can use? Mounting the backdrop directly can give you a super clean, built-in look. For something light like paper or fabric, you can often get away with strong, removable adhesive hooks. If you're dealing with heavier vinyl or wood, you'll need to break out some more serious mounting hardware.
Whatever you choose, do a test run! Assemble the stand and hang the backdrop well before the event kicks off. This gives you time to steam out any creases in the fabric or pull a vinyl backdrop taut to get rid of any ripples. A little tip from experience: use some weights or gaffer tape on the bottom edge to stop it from curling up.
A well-secured backdrop is a safe backdrop. Make sure your stand is sturdy and not sitting in a major walkway where it could get bumped over by an enthusiastic guest doing the cha-cha slide.
Let's Talk About Lighting
Lighting can make or break your photos. I’m not exaggerating. Bad lighting creates awkward shadows, washes out all the beautiful colors in your design, and makes everyone look tired. The goal is to get soft, even light that flatters your guests' faces without being harsh or blinding.
And no, you don't need a massive, Hollywood-style lighting budget to make it happen. Some simple, affordable gear can completely change the game.
Easy Lighting Setups That Actually Work
Here are a couple of my go-to, no-fail lighting options:
-
Ring Lights: A big ring light positioned right in front of your backdrop is a fantastic all-in-one solution. It delivers beautiful, shadowless light and creates that cool circular "catchlight" in your guests' eyes. It’s pretty much foolproof.
-
Softboxes: To step it up a notch, grab two softboxes. Place one on each side of the camera and angle them down at about a 45-degree angle toward your subjects. This classic setup wraps light around them, filling in any potential shadows and creating a soft, flattering glow.
Whatever you do, try to avoid relying only on the venue's overhead lights. They almost always cast nasty shadows under people's eyes and chins. By bringing your own lights, you take control and guarantee that every photo taken at your personalized photo booth backdrop is share-worthy.
Got Questions About Photo Booth Backdrops? We've Got Answers
Still have a few things you're wondering about? Totally understandable. Getting into the details of custom backdrops can bring up a lot of specific questions, and you want everything to be perfect.
Let's clear up some of the most common questions we hear from clients. My goal is to give you straightforward, practical answers so you can feel confident moving forward.
What’s the Standard Size for a Photo Booth Backdrop?
While there isn't one single "official" size, the industry gold standard is definitely 8×8 feet. It's the most popular choice for a reason—it’s the perfect sweet spot for fitting small groups of 3 to 5 people comfortably. No one gets awkwardly cut off at the edges, and it just works for most parties and weddings.
Now, if you're hosting a big corporate bash or you just know your family is going to try and cram 10 people into every shot, upgrading to a 10×8 feet backdrop is a smart move. That extra couple of feet horizontally makes a huge difference.
Quick tip from experience: Think about your venue and your guests. If you have the space and you’re on the fence, always go a little bigger. You’ll never regret having more room, but you might regret not having enough.
How Far in Advance Should I Order a Custom Backdrop?
When it comes to custom anything, planning ahead is your best friend. For a printed backdrop, whether it's vinyl or fabric, I always tell people to place their order at least 3-4 weeks before the event. Trust me, this buffer is a lifesaver.
Here’s what that timeline accounts for:
- The Design Phase: This gives us time to create a mockup and go back and forth on any tweaks you want to make.
- Printing & Production: You don't want to rush the actual printing process. Good quality takes time.
- Shipping: This builds in a cushion so your backdrop arrives with days to spare, not hours.
And if you’re dreaming of something more complex, like a custom-built flower wall or a unique neon sign installation? You'll want to get the ball rolling even earlier, probably around 6-8 weeks out. Rushing is just a recipe for stress and compromises you don't want to make.
Can I Reuse My Personalized Photo Booth Backdrop?
Absolutely! Whether you can reuse your backdrop really comes down to two things: what it’s made of and what’s printed on it.
Backdrops made from durable materials like vinyl or high-quality fabric are designed for the long haul. As long as you take care of it—always roll it for storage, never fold it!—you can use it again and again.
If your design is something timeless like a chic pattern or your company logo, it's a fantastic investment for future corporate events or holiday parties. On the other hand, a backdrop with "Jen & Mike's Wedding – 10.21.23" is probably a one-and-done deal. To see how these choices fit into your budget, check out our guide on photo booth rental prices.
Ready to create a stunning, memorable photo experience for your next event? The team at 1021 Events specializes in crafting personalized backdrops and complete photo booth setups that will wow your guests. https://www.1021events.com

