
Defining Your Photobooth Vision and Purpose
Before you even start gathering materials, think about the kind of photobooth experience you want to create. I've learned the hard way that skipping this planning stage can lead to a disappointing photobooth. A little planning makes a huge difference. Think about the event itself: a casual birthday party calls for something different than a fancy wedding reception or a corporate event, right?
For example, a kids' birthday party might involve silly props and a bright, fun backdrop. A wedding, however, might need something more elegant, perhaps with personalized details for the happy couple. Knowing your audience is key. Check out these DIY photo booth backdrop ideas for inspiration! Will your guests be tech-savvy, or will they need a simple, easy-to-use setup? These are the kinds of questions that will guide you as you choose everything from the camera to the overall look and feel of your photobooth.
Budget and Cost Distribution
Let's talk budget. It's easy to get excited about all the possibilities and end up spending way more than you planned. Visualizing your budget can help you make smart choices. The infographic below shows how costs are typically distributed when building a DIY photobooth.
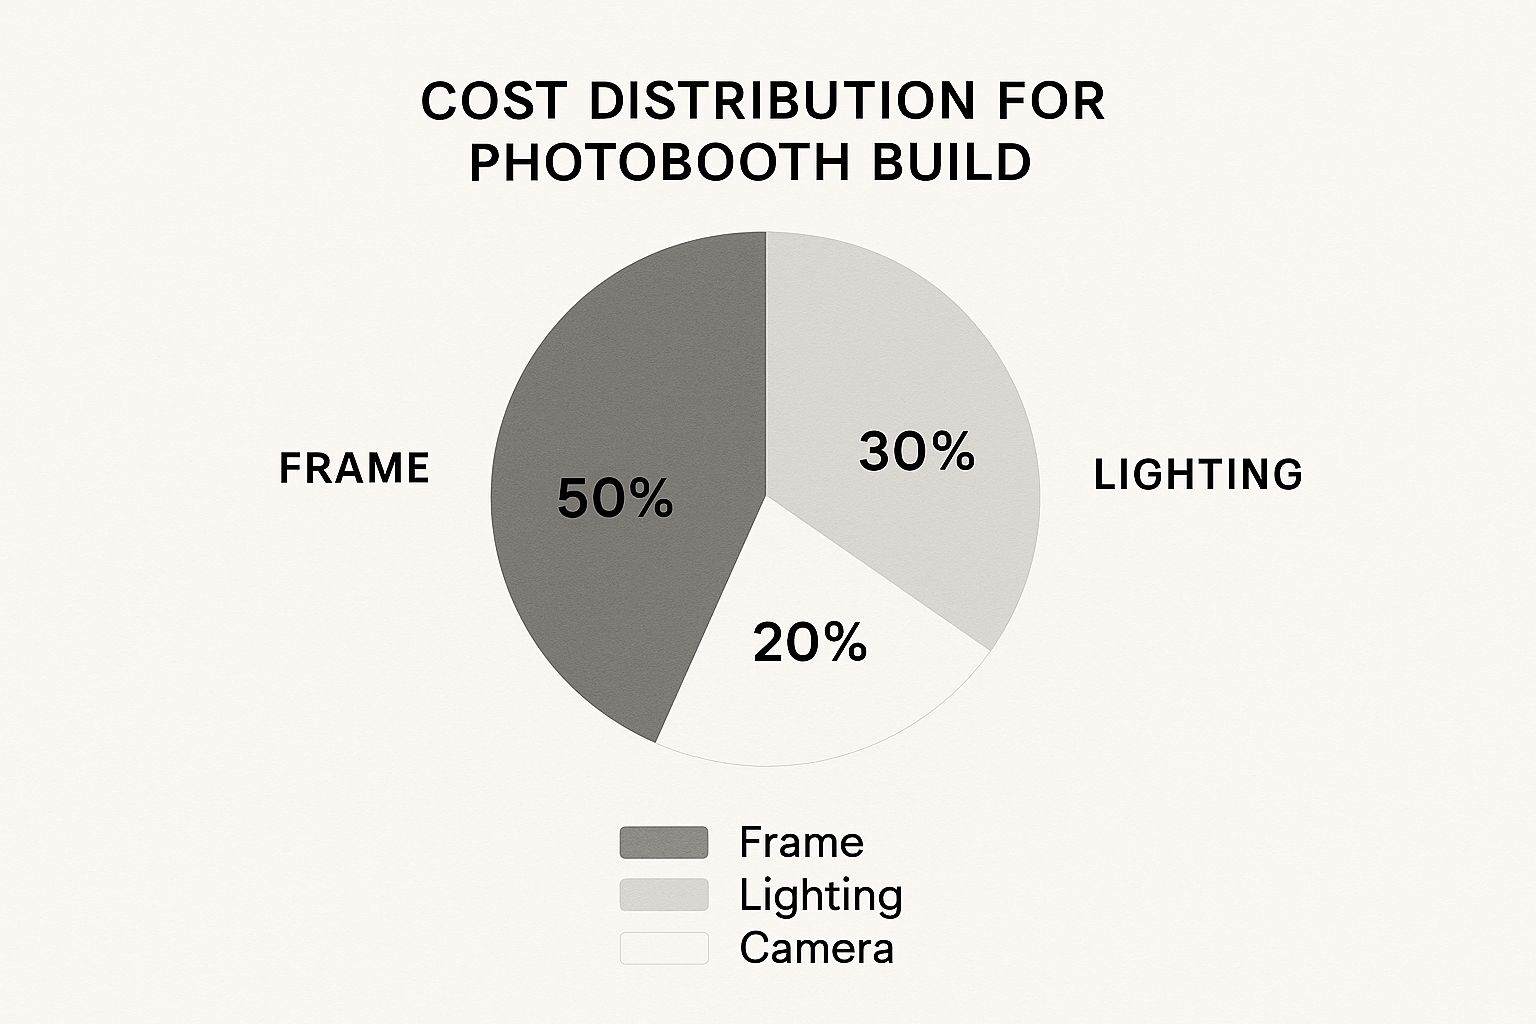
Notice how the frame usually takes up 50% of the budget. Lighting comes next at 30%, followed by the camera at 20%. This shows how important a strong, well-built frame is. People often focus on expensive cameras, but the structure itself is the foundation of a great photobooth. And speaking of photobooths, did you know the global photo booth market is now estimated to be worth between USD 584.60 million and USD 818.2 million? That just shows how popular photobooths have become for all kinds of events! You can find more about the growing photo booth market here.
Digital or Instant Prints?
Another important decision: digital or instant prints? Digital gives you flexibility. You can share photos online instantly, which is great for social media. Instant prints, though, give guests a physical souvenir to take home. Each option has its trade-offs. Instant prints can get pricey, and you'll need to keep buying film. Digital requires a solid internet connection and a way for guests to download their photos. Think about your audience and the overall feel of your event to help you decide what's best. With a little pre-planning, your photobooth will be more than just a fun activity—it'll be a truly memorable experience.
To help you visualize the different options and their suitability for various events, take a look at this comparison table:
Photobooth Types and Target Markets: Comparison of different photobooth styles and their ideal use cases
| Photobooth Type | Best For | Average Cost | Setup Time | Popularity Rating |
|---|---|---|---|---|
| Open-Air/Backdrop | Casual events, large groups | $200 – $500 | 1-2 hours | High |
| Enclosed Booth | Weddings, corporate events | $600 – $1200 | 2-3 hours | Medium |
| Inflatable Booth | Kids parties, festivals | $400 – $800 | 1-2 hours | Medium |
| Vintage Camper | Weddings, themed events | $1000+ | 3-4 hours | Low |
| GIF Booth | Social media savvy events | $800 – $1500 | 2-3 hours | High |
This table summarizes some key differences between photobooth styles. Open-air booths are great for casual events due to their lower cost and quick setup. Enclosed booths offer more privacy, which is often preferred at weddings and corporate events, but they come at a higher price and require longer setup. Inflatable booths are fun and engaging, while vintage campers offer a unique aesthetic. GIF booths are trending for events with a social media focus. Consider your budget, event type, and guest preferences when choosing the right type of booth for your needs.
Smart Shopping for Materials and Equipment
This is where the fun begins—building your DIY photo booth! It's also where your budget can either make you smile or make you wince. Surprisingly, a lot of people new to DIY photo booths get caught up in thinking they need everything under the sun. Let’s skip the marketing hype and get real about what actually matters for taking awesome photos.
Finding Deals and Stretching Your Budget
Forget retail prices. I mean it. Experienced photo booth builders almost never pay full price. They've got the inside scoop, and I'm sharing it with you. Facebook groups focused on crafts, DIY projects, or even photography equipment are treasure troves for gently used materials. Your local thrift stores, community marketplaces, and even garage sales can also turn up some amazing finds.
I once met a builder who snagged a gorgeous vintage trunk for her photobooth props at a garage sale for just $20! It added so much personality, and she saved a bundle compared to buying a new prop storage box. And don’t forget about borrowing tools. Ask your friends, family, or neighbors if you can borrow a drill, saw, or anything else you only need briefly. This can save you serious cash.
Investing Wisely vs. Unnecessary Spending
Knowing where to splurge and where to save is key. Borrowing a hammer is fine, but skimping on crucial components like lighting will hurt your final photos. Think of it like baking: you can borrow a mixing bowl, but using cheap ingredients will affect the taste.
Here’s a pro tip: prioritize your lighting. Even a basic DSLR camera can take stunning pictures with good lighting, but a fancy camera will struggle in a dimly lit space. Investing in good lighting is one of the smartest moves you can make. You probably already own some essentials. Chances are you have a smartphone, tablet, or laptop you can use as your camera, and a lamp or two can help with your lighting setup.
Portability and Durability: Finding the Sweet Spot
Your awesome photo booth is no good if it’s a pain to move or breaks down after a couple of uses. So how do you build a photo booth that’s both portable and durable? Balance is key. Use lightweight but strong materials for the frame, like PVC pipes or aluminum tubing. Design your backdrop system so it’s easy to put together and take apart.
Don't underestimate enthusiastic party guests! Reinforce key connection points so your structure can handle some bumps and nudges. Imagine your photo booth at a wedding reception; it needs to survive a conga line, not just a few polite poses. Building with durability in mind will make your photo booth a worthwhile investment for years to come.
To help you budget effectively, I've put together a cost breakdown for essential photo booth components. This table outlines budget-friendly, mid-range, and premium options, along with a "must-have" rating to guide your decisions.
Essential Photobooth Components Cost Breakdown
Complete pricing guide for all necessary photobooth materials and equipment
| Component | Budget Option | Mid-Range | Premium | Must-Have Level |
|---|---|---|---|---|
| Backdrop Stand | $20 (DIY PVC Pipes) | $50 (Amazon Basics Stand) | $100 (Professional Stand) | High |
| Backdrop Fabric | $10 (Fabric from a craft store) | $30 (Wrinkle-resistant fabric) | $75 (Custom-printed backdrop) | High |
| Lighting | $25 (Existing lamps/work lights) | $75 (Neewer LED Panel) | $150 (Studio Lighting Kit) | Essential |
| Camera | $0 (Existing smartphone/tablet) | $200 (Entry-Level DSLR) | $1000 (Professional DSLR) | High |
| Props | $15 (DIY props/thrift store finds) | $50 (Prop kit from Amazon) | $100 (Custom-made props) | Medium |
| Printer (optional) | $50 (Compact Photo Printer) | $150 (Photo Printer with Instant Dry Ink) | $300 (Professional Photo Printer) | Low |
As you can see, building a photo booth doesn't have to break the bank. By prioritizing your spending and getting creative, you can create a fantastic photo booth experience without overspending. Remember, the most important thing is to have fun and capture memorable moments!
Building a Structure That Won't Fall Apart
Alright, let's get to the fun part: building your photo booth! But before you start gathering your tools, let's talk about creating a structure that can handle the party chaos. It's gotta be sturdy enough for leaning, group hugs, and maybe even some over-enthusiastic prop action.
Choosing the Right Construction Approach
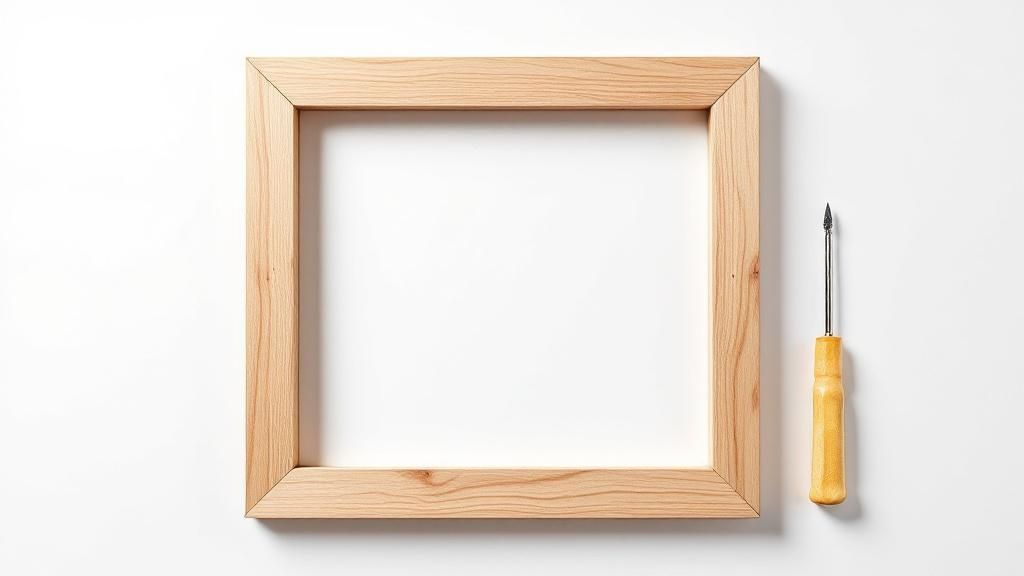
Building a photobooth frame means picking materials and a design that work for you. PVC pipes are a popular go-to because they're lightweight, easy on the wallet, and simple to put together.
But if you're looking for something a bit more heavy-duty, consider aluminum tubing. It's a little pricier, but it's way stronger. Remember, this isn't just about looks; it's about functionality.
I once saw a gorgeous wooden photobooth frame collapse mid-event. The joints weren't reinforced properly, and it was a disaster. So, trust me, reinforcement is key, especially at the joints and base.
Think about how people will actually use your photo booth. Will they lean on it? Will kids try to climb it (hopefully not!)? Design with these real-life situations in mind.
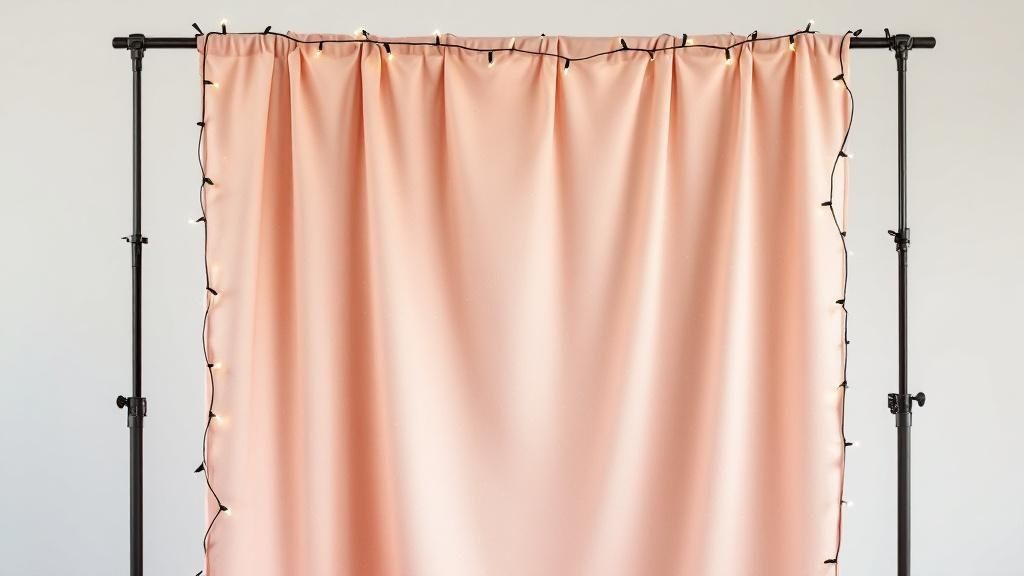
Backdrop Systems That Work
Your backdrop is just as important as the frame. It sets the mood and creates the vibe. A simple pipe and drape system works great for most photo booths. It's portable, adjustable, and doesn't break the bank.
Another option is a freestanding backdrop stand. These are more stable but can be a little less flexible.
Think about the aesthetic you're aiming for. A sleek backdrop stand might be perfect for a corporate event, while a fun, flowing fabric backdrop might be better for a birthday party.
Pro tip: use velcro or clips to attach your backdrop. This makes it super easy to swap backdrops for different events and gives your photo booth a fresh look every time.
Lighting Placement for Flattering Photos
Lighting can make or break your photos. Avoid putting lights directly overhead, which creates harsh shadows. Position them at a 45-degree angle to your backdrop for a more flattering, even light. Softboxes or diffusers can soften the light even more and reduce glare.
The color temperature of your lights also matters. Warm white light is generally better for portraits than cool white light. Experiment with different lighting placements and see what works for you.
Take some test shots with a mock setup. A little extra effort with lighting makes a huge difference in the final photos. Good lighting makes everyone look good, and that's always a win! This kind of planning will help ensure your how to make a photobooth project is a total success.
Mastering the Photography Technology
This is where your DIY photo booth can really make or break your event. A fancy, high-end camera won't do you any good if your guests can’t even figure out how to use it, or worse, the whole system crashes mid-party. I’ve been there, and it's not pretty. So, let’s talk about some reliable options, from professional DSLR setups to surprisingly good tablet-based booths. Pick what works for your tech skills, not what looks the most professional.
Triggering, Processing, and Backup Strategies
User-friendliness is key. A super-complicated setup might seem impressive, but a simple, intuitive system will be much more popular with your guests. Think about a remote trigger, which is way easier than having people fiddle with the camera itself.
Automatic photo processing is a total game-changer. I've used software that instantly applies filters, creates fun GIFs, and even sends photos directly to people's phones. This means you get to enjoy the party instead of being stuck managing the photo booth all night. And speaking of avoiding disasters, always, always have a backup plan. A second camera, an extra battery, or even just a printout of instructions can be a lifesaver. Trust me on this one!
Lighting and Positioning: The Unsung Heroes
Even the best camera can't fix bad lighting. I learned this the hard way at an outdoor wedding where the sun was setting. The photos? Let's just say they weren’t Instagram-worthy. Position your lights strategically. Two softboxes at 45-degree angles create a soft, even light that minimizes harsh shadows.
For outdoor setups, a reflector can be super helpful to bounce natural light back onto your subjects. Always test your lighting beforehand. Take a few practice shots and adjust as needed. Grab some friends and make a test run party out of it!
Camera positioning is just as important. Too high, and everyone looks like they’re looking up at the sky. Too low, and you’re getting a lot of unflattering chin angles. Experiment to find the sweet spot that works with your backdrop and overall setup. A few inches can make a world of difference. Speaking of backdrops, if you're feeling adventurous, you could even explore green screen options.
Choosing the Right Camera System
There’s no single right answer when it comes to cameras. A DSLR camera gives you the highest image quality, but it requires more technical knowledge. A tablet or smartphone is a much simpler option, and you'd be surprised how great the photos can look with good lighting and the right apps. I've even seen photo booths built using instant cameras for a cool retro feel.
Consider your budget and how comfortable you are with technology. There are even places that rent out photo booth equipment if you don't want to buy everything. Remember, the point is to capture fun memories, not to become a professional photographer overnight. With a little planning and the right equipment, your DIY photo booth will be the hit of the party.
Creating an Experience People Actually Want to Use
You could build the most technically impressive photo booth imaginable, but if it sits unused, what’s the point? I’ve learned this the hard way! A truly successful photo booth isn't just about the tech; it's about crafting a fun, engaging experience from beginning to end. Think about how people will actually interact with your creation. Is it easy to understand? Is it enjoyable? These are the key questions to ask.
Designing an Intuitive and Rewarding Interface
Picture this: Your photo booth is set up at a bustling event with guests of all ages and technical skills. Grandma might be hesitant to approach a touchscreen, while teenagers will expect instant social media sharing. Your interface needs to work for everyone. Think clear, simple instructions, big buttons, and as few steps as possible.
Consider the flow. How do guests approach the booth? How do they start a session? How do they get their photos? Each step should feel natural and effortless. A smooth, enjoyable experience is what brings people back for more, especially at events like weddings where you want all generations to feel comfortable.
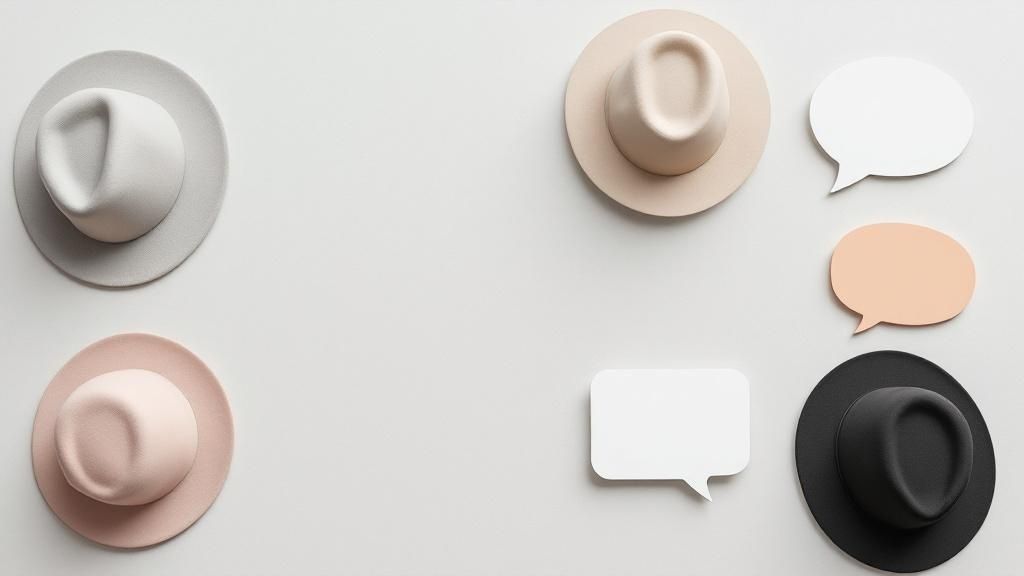
Prop Selection: Encouraging Creativity Without Overwhelm
Props can add a ton of personality, but too many options can actually be paralyzing. I've seen prop boxes overflowing to the point where people get overwhelmed and don't even bother. A carefully chosen selection, neatly organized and themed to your event, is so much better.
For example, a wedding might call for elegant hats, feather boas, and personalized signs. A kid’s birthday party could have superhero masks, goofy glasses, and inflatable toys. The right props spark creativity and make the experience truly memorable.
Managing Crowds and Keeping it Fresh
At a popular event, your photo booth can quickly become the hot spot. Managing the flow of people is key to keeping things running smoothly. A designated waiting area or a simple queuing system can work wonders. For larger events, you might even want to check out this guide on party planning.
Keeping the setup fresh throughout a long event is important too. Changing the backdrop, swapping out props, or adding new filters can re-engage people throughout the event. Even small tweaks can make a big difference. By the way, did you know the European photo booth market is expected to reach USD 393.31 million by 2028? That’s a lot of photo booth action! Learn more about this growing market here.
Clear Instructions That Actually Get Followed
Never underestimate the importance of clear, concise instructions. I've seen gorgeous photo booths rendered useless by complicated instructions that no one reads. Keep it simple! Use visuals, large fonts, and minimal text.
Strategically placed instructions are also crucial – near the start button, by the props, and where people pick up their photos. Testing your instructions beforehand with a few friends can help you catch any confusing spots. Simple instructions mean more people enjoying your photo booth and having a blast.
Testing Everything Before the Big Day
So, you’ve built this awesome photo booth. Congrats! But now comes the really important part that everyone seems to skip: testing. Seriously, I can't emphasize this enough. I've seen so many amazing photo booths fall flat on their faces at the actual event. Don't let that happen to you! Let's talk about making sure your photo booth is ready for prime time before you're staring down a line of eager guests.
Stress-Testing Your Equipment: Finding the Weak Links
Think of this as a dress rehearsal, only way more chaotic. Don't just plug everything in and snap a few pics. You’ve got to push your setup to its limits. Run the software for hours on end. Take a ton of photos in rapid succession. Get your friends to pretend they're a real party crowd (and tell them not to hold back – polite friends won’t truly replicate the mayhem of a real party). This will help you find any hidden problems while you still have time to fix them.
For example, I once built a photo booth with this really cool touchscreen. Worked like a charm in my quiet living room. Then came the party. Loud music, people bumping into the booth… the screen completely froze. Total disaster. Now, I always test my photo booths in loud, chaotic environments. Lesson learned!
Backup Plans: Murphy's Law is Real
Let’s face it, something is bound to go wrong. It’s just inevitable. A power outage, a software glitch, someone trips over a cable… it happens. The trick is to be ready for anything. Have backup batteries on hand. Print out a copy of your software instructions. Even having a simple point-and-shoot camera as a last resort can save the day. You might even consider learning more about how to rent photo booths as a backup plan!
I knew a guy whose laptop crashed in the middle of a wedding reception. Nightmare, right? Luckily, he had a spare laptop already loaded with the software, ready to go. Crisis averted! Having a Plan B (and maybe even a Plan C) is what separates the pros from the amateurs.
Real-World Testing With Actual Users
Testing with friends is a great starting point, but real-world conditions are a whole different ball game. If you can, set up your photo booth at a smaller get-together before its big debut. This lets you see how people really interact with it. You’ll be surprised what you learn!
For example, I noticed people kept having trouble finding the start button on my first photo booth build. A simple repositioning and a larger button design fixed the problem. Real-world testing gives you insights you just can’t get any other way. This kind of pre-planning is key for anyone learning how to make a photobooth. Interestingly, the global photo booth market is projected to reach between USD 1338.85 million and USD 145.91 million by 2032 or 2033. You can find more info on the photo booth market here.
Troubleshooting Guides: Your Future Self Will Thank You
Create a simple troubleshooting guide for yourself. Just list common problems and their solutions. When you're stressed and under pressure at the actual event, this guide will be a lifesaver. It also means someone else can step in and help if you're busy with other things. Think of it as your photo booth's emergency manual.
This guide doesn't need to be fancy. A few bullet points covering things like "screen not responding," "printer jammed," or "camera not focusing" can save you valuable time and a whole lot of stress. Thorough testing and careful planning will make sure your photo booth isn’t just something you built, but something that's a total hit.
Key Takeaways for Long-Term Success
Building your own photo booth is a seriously fun project, but building one that people actually love using? That takes a bit more planning and attention to detail. These insights, pulled together from seasoned DIY photo booth builders, will help you turn your photo booth from a neat idea into a total hit.
Checklists and Timelines for Each Phase
A clear roadmap is essential to avoiding those unexpected project potholes and keeping everything on schedule. I recommend starting with a detailed checklist for each step, from the initial brainstorming of your photo booth vision all the way to testing the final product. Realistically, most builders spend 20-30 hours on their first build, and that includes everything from planning and gathering materials to construction and the all-important software setup. Trust me, factoring in extra time for those inevitable hiccups and learning curves is always a smart move.
Practical Advice From the Trenches
Let's be honest, building a photo booth can be trickier than it looks. One common mistake is underestimating the time needed for software setup and testing. I’ve been there! So plan for it, and always have a backup plan. Need some inspiration? Check out some creative party photo booth ideas. I once heard a story from a builder who thought his software was all set, only to discover at the event that it wasn’t playing nice with the venue's Wi-Fi. Luckily, a quick-thinking friend saved the day with a mobile hotspot, but a pre-event test would have completely avoided that near-disaster.
Success Indicators and Troubleshooting
So how do you know if your photo booth is a success? Look for enthusiastic feedback from your users, reliable performance from your equipment, and a smooth, enjoyable experience for everyone. If your guests are having a blast, snapping tons of photos, and sharing them effortlessly, you're definitely doing something right.
Troubleshooting is just part of the DIY process. Put together a simple troubleshooting guide for yourself, addressing common issues like software crashes, printer jams, and those frustrating camera focusing problems. A friend of mine who's built a few photo booths keeps a small toolkit on hand with essentials like tape, zip ties, and a screwdriver, ready for any on-the-spot fixes. This is a brilliant idea!
Improving Your Setup Based on Feedback
Never be afraid to ask for feedback! Constantly refining your photo booth based on real-world use is key. Pay close attention to what’s working and what’s not. Are people struggling with the interface? Are certain props more popular than others? This is how you take your photo booth from good to great.
For example, another builder I know added a small sign with instructions on how to use the props after noticing some guests looking a bit confused. This simple tweak made a huge difference in how people interacted with the booth.
Building a photo booth is about way more than just putting together a structure; it’s about creating memorable experiences. With a little planning, attention to detail, and a willingness to learn and adapt, your DIY photo booth will be the life of the party.
Ready to kick your event up a notch? Check out 1021 Events for professional DJ services, amazing lighting, and photo booth experiences that will make your celebration truly unforgettable. Learn more about 1021 Events and how they can create a magical experience for your next event.