

Building a photo booth from scratch really comes down to four key areas: nailing down your concept, picking the right tech (camera, software, the works), setting up a great-looking backdrop with flattering light, and, of course, gathering a killer prop collection. It's a fun project that's part creative, part tech, but getting both right is what makes it a huge hit.
Your Photo Booth Game Plan
Before you even think about buying a feather boa or downloading an app, you need a solid plan. A truly awesome photo booth isn't just a camera stuck in a corner; it's a whole experience you've designed from the ground up. And that all starts with a few big decisions.
Choosing Your Photo Booth Camera
The camera is the heart of your setup. Your choice here will influence everything else, from software to lighting. Are you going for a simple tablet setup? They're super easy for guests to use and the big screen lets everyone see the shot as it happens, which is perfect for a casual party. Or, are you aiming for pro-level shots for a wedding or a big corporate gig? In that case, a DSLR is your best bet for those crisp, high-quality photos.
To help you decide, here’s a quick rundown of the most common camera choices for a DIY photo booth.
| Camera Type | Best For | Pros | Cons |
|---|---|---|---|
| Tablet (iPad) | Casual events, social sharing, budget builds. | User-friendly, large live-view screen, tons of compatible apps. | Lower image quality, limited creative control. |
| DSLR | Weddings, corporate events, high-quality prints. | Professional-grade photos, full manual control. | More expensive, requires more technical know-how. |
| Webcam | Ultra-budget setups, basic functionality. | Very inexpensive, easy to connect to a laptop. | Poor image quality, especially in low light. |
Ultimately, the right camera depends on your event's vibe and your quality standards. A DSLR will always give you the best photos, but don't underestimate the fun and simplicity of a modern tablet!
Defining Your Booth's Purpose
Next up is the brains of the operation: the software. If you're just throwing a small birthday party, a simple, free app might be all you need. But for a bigger event, you'll probably want software that can do more—think animated GIFs, Boomerangs, or instant sharing to guests' phones. Figure out what you want the final product to be before you commit.
Nailing this planning stage is everything. It's the foundation for your whole project. Making these key decisions now will save you a ton of headaches down the line and ensure your booth is the life of the party. For a much more detailed walkthrough on all the gear and steps, check out our complete guide on how to make a photobooth.
Understanding the Modern Photo Booth Market
Believe it or not, photo booths are a booming business. The global market was valued at around USD 586.65 million in 2024 and is expected to explode to USD 1.575 billion by 2033. What's driving this? Events. Weddings and corporate gatherings make up over 60% of all bookings.
The biggest shift we've seen is the move to digital. Guests don't just want a printout anymore; they want to share their photos now. In fact, studies show that over 70% of people post their photo booth pictures online almost immediately. This makes choosing software with great digital sharing options absolutely essential.
This demand for instant, shareable content is what makes your initial tech choices so important. If you build your photo booth with modern guest expectations in mind, you're not just creating a fun activity—you're creating a viral moment for your event.
Assembling Your Tech Toolkit
Alright, let's talk about the gear. The technology is what makes the whole photo booth experience tick, but you don't need a degree in computer science to pull it off. A few key pieces of equipment are all you need to build a setup that's both reliable and a ton of fun.
The heart of your operation is the camera and whatever's holding it up. We’ve already talked about camera options, but whatever you choose, pair it with a sturdy tripod. A cheap, wobbly tripod is a fast track to blurry photos and unhappy guests. Find one with a solid base and an adjustable head so you can easily frame your shots, whether people are standing or sitting.
This image lays out all the essential materials you'll need to get started.
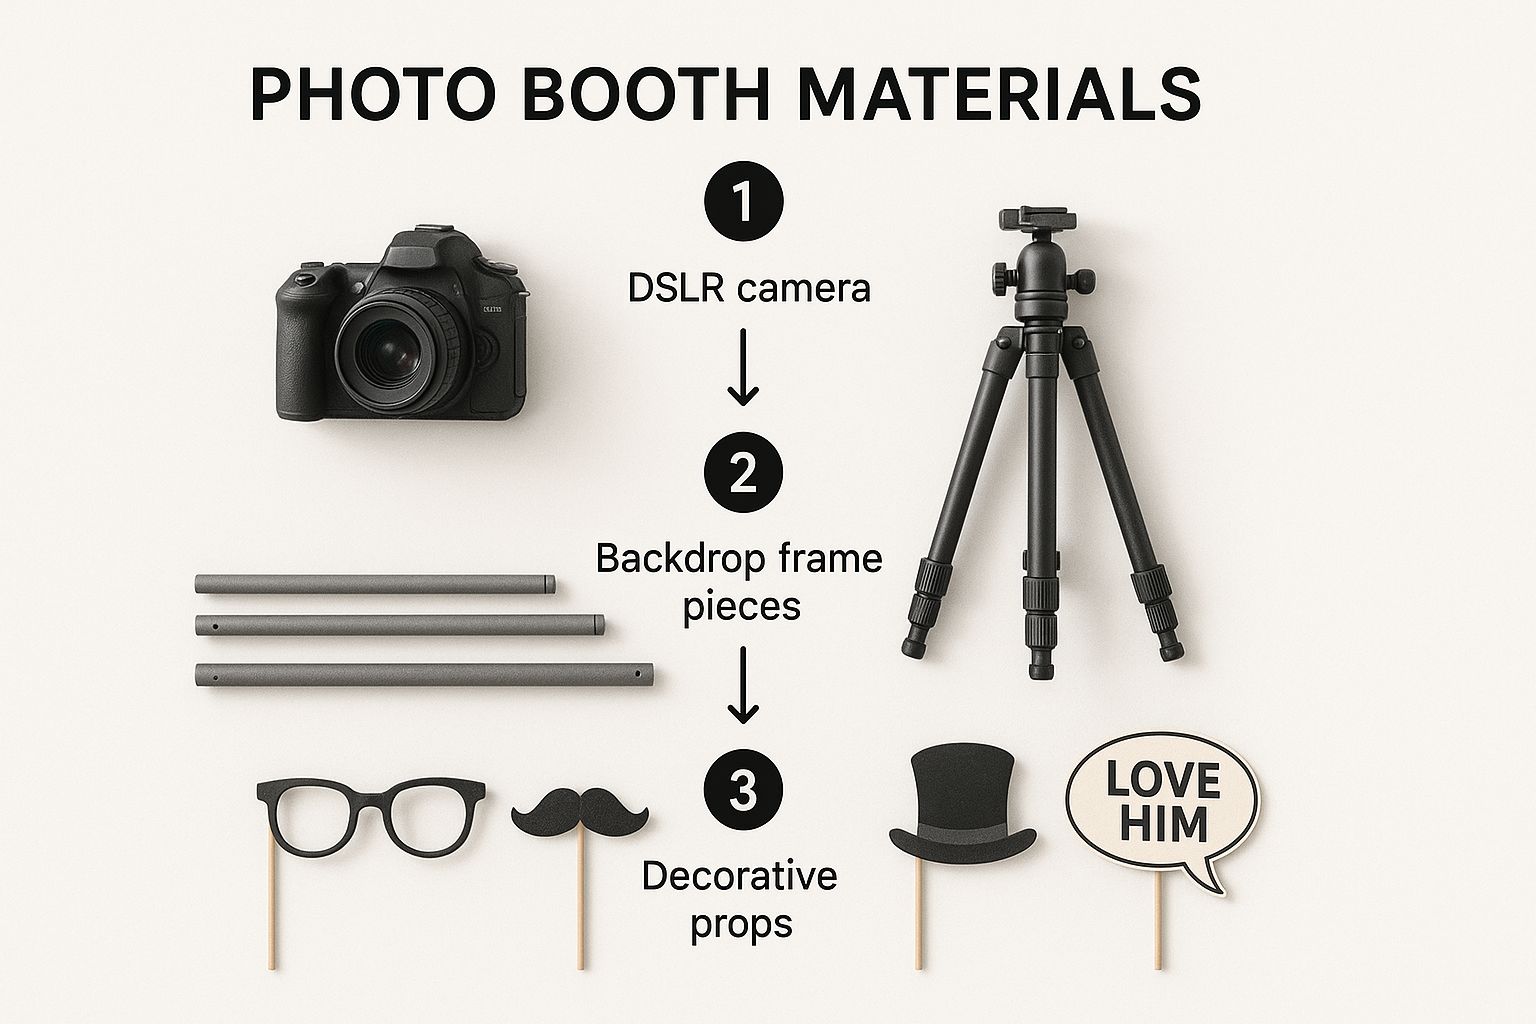
Seeing it all together shows you how just a few core items—the camera, tripod, and props—really are the foundation for the entire experience.
Choosing the Right Software and Screen
The software is where the magic really happens for your guests. It’s what lets you offer simple photos, animated GIFs, or even short video clips. I've found that a tablet, usually an iPad, is the best bet for the screen your guests will interact with. They're intuitive, and there are tons of great photo booth apps to choose from.
When you're picking an app, here’s what you should be looking for:
- Is it dead simple? A guest should be able to walk up and use it without a single word of instruction. A clean, simple interface is everything.
- How easy is sharing? Instant sharing via text, email, or a QR code is non-negotiable for modern events. People want their photos now.
- Can you make it your own? Look for features that let you add an event logo or a custom photo strip template. A little personalization goes a long way.
Today’s software can do some pretty incredible stuff, like instant social media uploads and digital GIF creation. These are huge draws, especially for younger crowds who live to share content on the spot.
Getting the Lighting Just Right
Good lighting is not a suggestion—it's a requirement. It’s the one thing that can make or break every single picture that comes out of your booth. The good news is you don't need a Hollywood-level lighting rig. A single, well-placed light source is often all it takes.
For most DIY setups, a ring light is your best friend. It gives you that soft, even, and flattering light that kills harsh shadows and creates that nice little sparkle in people's eyes. They're affordable, a breeze to set up, and deliver professional-looking results without a lot of fuss.
If you want to get a bit fancier, you could try using two small LED panels placed at 45-degree angles to your subject. This is a classic "key" and "fill" lighting setup that erases almost every shadow and creates a beautifully balanced look. Just remember, great lighting is your secret weapon.
As you build out your tech toolkit, it’s also a good idea to think about how guests will get their photos. Exploring options like The Easiest Photo Sharing App for Events can make the whole process completely seamless.
Designing a Picture-Perfect Scene
This is the fun part. It’s where you take a camera on a stand and turn it into a real experience. While the tech is the engine, the backdrop and lighting are what create the magic and make your photos look incredible. A great setup doesn't just look good; it pulls people in.
Your backdrop is the canvas for every single shot. It doesn’t need to be complex or cost a fortune, but it absolutely should match the vibe of your event. Trust me, a simple, tasteful backdrop is always better than a chaotic one that steals the show from your guests.
Creative and Budget-Friendly Backdrop Ideas
You can pull off a jaw-dropping backdrop without draining your wallet. It all comes down to getting creative with your materials and theme.
Think about it: for a rustic wedding, you could hang delicate fairy lights over a reclaimed wooden pallet wall. Or, for a slick corporate party, a clean, custom-printed banner featuring the company logo looks sharp and doubles as great branding.
Here are a few of my go-to options that work for almost any budget:
- Fabric Drapes: So simple, but so elegant. Grab a tension rod or a portable stand and hang some flowing fabric like velvet or tulle. It creates a soft, classic look instantly.
- Flower or Greenery Walls: These look a million bucks but can be a great DIY project. Faux flowers and some boxwood panels create a lush, high-end feel that’s perfect for weddings or bridal showers.
- Green Screens: If you want total creative control, this is your answer. A green screen lets you drop in any digital background you can dream up—from a sandy beach to the surface of the moon.
If you need more inspiration, especially for bigger events, you can find tons of photo booth backdrop ideas for a wedding that are easy to adapt for any party.
Mastering Your Photo Booth Lighting
If the backdrop is your canvas, then lighting is the artist’s brush. I’m not exaggerating when I say it’s the single most important element for getting flattering photos. Bad lighting will ruin even the most amazing backdrop.
Your main goal is to kill any harsh, unflattering shadows. You're aiming for soft, even light that makes everyone's faces glow. This is exactly why the on-camera flash is your enemy—it’s just too direct and harsh.
The secret to photos that look professional is diffused light. A simple ring light is the MVP for most DIY booths for a reason. It wraps a soft, even glow around the subject, erasing shadows and creating that little sparkle in their eyes.
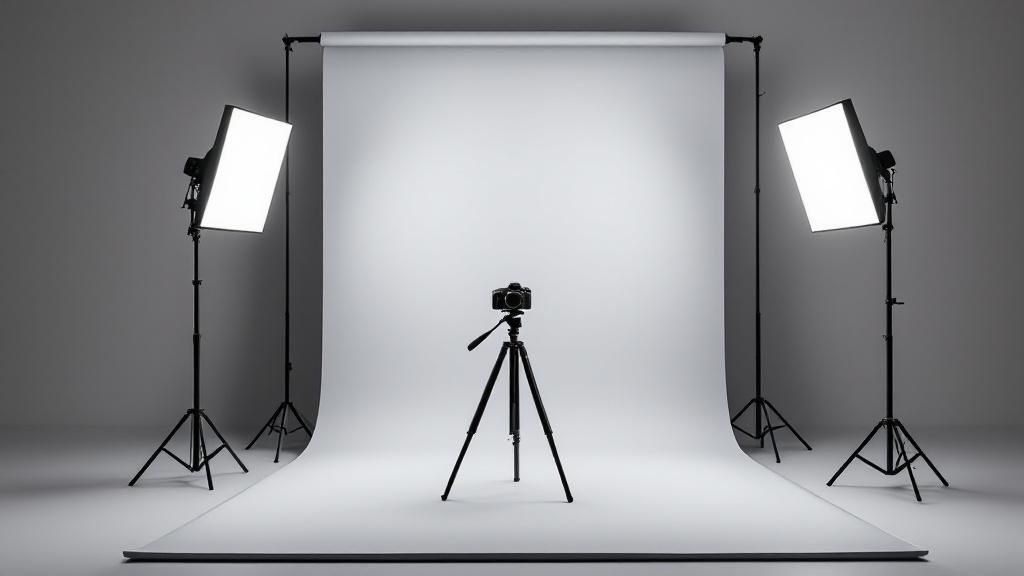
Want to level up? Try a two-light setup. Place two continuous LED light panels at 45-degree angles to your guests. One light serves as the main "key" light, while the other acts as a "fill" light, smoothing out any leftover shadows. It’s a classic photography trick that’s surprisingly simple to pull off, and it delivers that studio-quality finish every single time.
Curating Fun Props and Personal Touches
Alright, let's get to the fun part—giving your photo booth its personality. Props are the secret sauce. They're the ultimate icebreaker, giving even the shyest guests an excuse to let loose and get a little weird.
Sure, you can always fall back on the classic feather boas and giant sunglasses. They work! But if you really want the booth to be a hit, think thematically. It makes the whole experience feel more intentional and way more memorable.
Picture a retro 80s movie night. You could have inflatable boomboxes, shutter shades, maybe even a replica hoverboard. Or for something classier, a Gatsby-themed party would be incredible with faux pearl necklaces, long cigarette holders, and art deco hand fans. The trick is to match the props to the event's overall vibe.
Organizing Your Prop Station
Nobody wants to dig through a messy, tangled pile of props. It’s chaotic and, frankly, a little unappealing. A well-organized prop station is far more inviting and keeps the line moving. A small table or even a cool vintage trunk can do the job perfectly.
I've learned to group similar items together using containers. It's a game-changer.
- Vases or buckets are perfect for holding all your stick props—mustaches, lips, and those hilarious signs.
- A hat stand or two keeps hats and wigs from getting squished and sad.
- Grab a few jewelry trays for smaller things like funky glasses, necklaces, and bow ties.
The whole point is to make it dead simple for guests to spot something they love and grab it. A tidy station keeps the fun flowing and the mess contained. If you're drawing a blank, you can find a huge list of fun photo booth props that goes way beyond the usual stuff.
Adding Meaningful Personal Details
Props bring the laughs, but it's the personal details that make the photo booth feel special. These are the little things that transform it from just an activity into a genuinely cherished memory.
A custom welcome sign is a fantastic place to start. A simple chalkboard or a nice print in a pretty frame with a fun message like "Grab a Prop & Strike a Pose" immediately sets the tone and tells people to jump right in.
My favorite personal touch? A unique photo strip template. Most photo booth software lets you upload your own design. Add the event name, the date, a logo, or a little graphic that ties into your theme. This instantly turns a simple photo strip into a personalized keepsake.
Finally, think about how people will get their photos. I like to have a small card with a QR code that links directly to the online gallery. It makes it incredibly easy for guests to find, download, and share their pictures later. It’s these thoughtful little extras that people remember long after the party is over.
The Big Day: Setup and Execution
You’ve done all the hard work planning, designing, and gathering your gear. Now for the fun part—showtime! A smooth setup on the day of your party, wedding, or corporate event all boils down to logistics, timing, and being a little prepared.
https://www.youtube.com/embed/VNg0cIKy9IQ
Finding the Perfect Spot
First thing’s first: when you get to the venue, you need to scout the perfect location. Trust me, location is everything. You’re looking for a spot with high foot traffic so guests actually see it, but you don't want to create a bottleneck right in front of the bar or main entrance. A corner near the dance floor or a little alcove in the main reception area usually hits the sweet spot.
Once you’ve staked your claim, confirm you have two critical things: a working power outlet and enough space. You need room not just for the booth and backdrop, but also for people to gather and queue up without feeling like they're on top of each other. A 10×10 foot area is a great starting point.
The Build and Test Run
With your spot secured, it's time to bring your creation to life. To save yourself a massive headache, follow a logical assembly order. I always start with the big stuff and work my way down to the details.
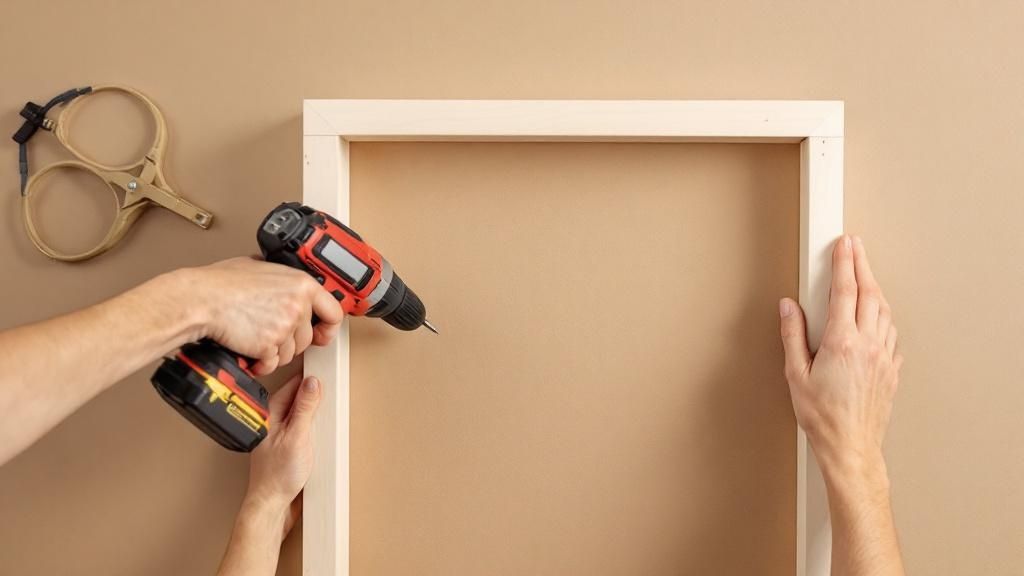
- Backdrop first. Get this up right away. It anchors your space and gives you a clear boundary to work within.
- Assemble the tech. Now, position your tripod, mount the camera and ring light, and get your tablet or laptop in place.
- Cable management. Plug everything in and—this is important—use gaffer tape to secure every single cord to the floor. Safety first! The last thing you want is a guest tripping over a power cable.
- Power on and test. Do a complete run-through of your software. Take a few test shots to dial in the lighting, focus, and framing. Double-check that your sharing features, like email or text, are firing off correctly.
Following these steps in order means you won't have to backtrack, and you can be confident that every piece of tech is working perfectly before the first guest even thinks about taking a picture.
Running a Flawless Photo Booth
Here’s a pro-tip: have a friend or a designated person act as a "booth attendant." They don't need to be a tech wizard. Their main job is to be a friendly face—welcoming guests, encouraging them to jump in, and keeping the prop table from looking like a disaster zone. That little human touch makes the whole experience way more fun and inviting.
And don't just assume people will know what to do. A simple, stylish sign with short, clear instructions can make a world of difference. Something like "Tap the Screen to Start!" or "Grab a Prop & Strike a Pose!" is all you really need.
Post-pandemic, a lot of people still really appreciate contactless options. The industry adapted fast during COVID-19, adding things like QR code sharing and touch-free start screens. It just makes the whole experience feel safer and more modern for everyone.
Before you go all-in, it can be helpful to see how your DIY budget stacks up against professional options. Check out our guide on how much it costs to rent a photo booth for some useful context.
To keep everything straight on the day of, I live by a checklist. It helps ensure nothing falls through the cracks when things get hectic.
Your Event Day Photo Booth Checklist
Here’s a quick rundown of essential tasks and items to manage before, during, and after your event. It’s your secret weapon for a stress-free photo booth experience.
| Phase | Key Tasks | Essential Items |
|---|---|---|
| Pre-Event | Confirm venue details (power, space). Charge all batteries. Pack all equipment and props systematically. | Gaffer tape, extension cords, power strip, charged battery packs, complete tech kit. |
| Setup | Arrive early. Find the best location. Assemble backdrop, then tech. Secure all cables. | Your full setup kit, backdrop, props, signage with instructions. |
| During Event | Run a final test. Greet and guide guests. Tidy props periodically. Monitor for any tech hiccups. | Extra batteries/power bank, cleaning cloth for lens/screen, a smile! |
| Tear Down | Pack equipment carefully in reverse order. Check for any left-behind items. Clean up your area. | Designated cases/bags for all gear, checklist to ensure nothing is forgotten. |
Having a simple checklist like this takes the guesswork out of the process. With a bit of prep, your booth will be the talk of the party
Answering Your Last-Minute Photo Booth Questions
You’ve done the hard work, but a few nagging questions always pop up right before the event. Let's run through some of the most common ones I hear so you can walk into that venue feeling like a pro.
How Much Space Do I Really Need?
This is probably the number one question people ask. While it depends on your specific setup, I always tell people to aim for a 10×10 foot area. It's the sweet spot.
That gives you enough breathing room for your backdrop, the camera on its tripod, your lighting, and a small table for props. More importantly, it gives your guests space to get creative and strike a pose without bumping into each other. You also want a little buffer so random passersby don't become accidental photo-bombers.
Here's a pro tip: Don't forget to account for the line! If you think your booth is going to be popular (and it will be), plan for where the queue will form. You don't want it blocking a fire exit or the path to the bar.
What If the Venue Lighting Is Terrible?
Simple: never, ever rely on the venue's lighting. It’s a classic rookie mistake. Most venue lighting is too dark, casts a weird color, or creates harsh, unflattering shadows. That's why bringing your own lighting isn't just a good idea—it's essential.
A good ring light or a couple of portable LED light panels will be your best friend. This setup gives you total control over the look and feel of your photos, ensuring everyone looks amazing in bright, crisp shots, no matter how moody the ambient lighting is. I always bring a beefy portable power bank, too, just in case outlets are scarce.
Should I Bother with a Printer?
Ah, the great print vs. digital debate. A few years ago, instant prints were the whole point. But times have changed. Now, it's all about instant digital sharing. In fact, over 70% of people want to post their photos to social media right away.
Skipping the printer makes your life so much easier. You’ll have less gear to lug around, lower costs, and zero chance of a dreaded paper jam halting the fun. Instead, pour your energy into making digital delivery seamless. A simple QR code, text, or email system is all you need.
If you’re juggling multiple roles at an event, like providing a photo booth and DJ package, keeping the booth tech simple is a huge win. A fully digital experience is modern, fast, and gives people what they actually want: great content for their feed.
At 1021 Events, we specialize in creating unforgettable experiences with professional DJ services, lighting, and photo booths that make any party a hit. Let us handle the details so you can enjoy the celebration. https://www.1021events.com

