
So, you're ready to build your own photo booth? Awesome. It’s a fantastic way to add a ton of fun to any event, but it can feel a little intimidating at first. Let's break it down.
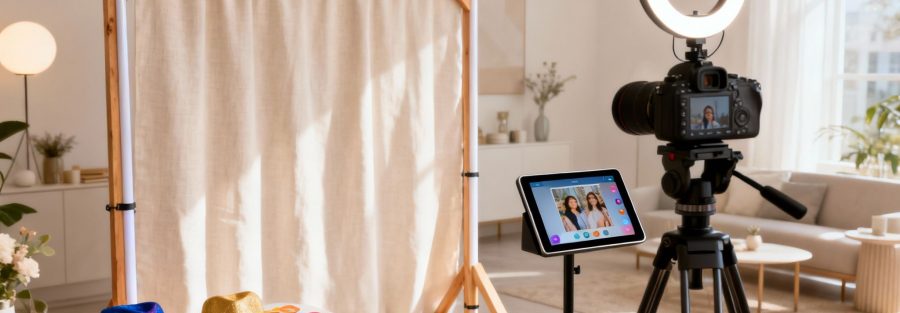
At its core, a great photo booth really comes down to just four things: a camera, solid lighting, a cool backdrop, and software that’s easy for guests to use. The real magic happens when you get these four pieces to play nicely together. Think of it less like a complicated tech project and more like setting up a mini, self-running photo studio designed to make everyone look like a rockstar.
Your Game Plan for a DIY Photo Booth
Ever wondered what's really involved in making a photo booth that people will be talking about long after the party's over? This is your complete roadmap. We’ll start with the big picture, looking at all the essential gear you need to pull this off. More importantly, we'll get into how everything connects to create that seamless, "wow, that was easy!" experience for your guests.
Consider this your project kickoff meeting. The goal is to give you the confidence and the know-how to build an amazing photo booth for a wedding, party, or even a corporate event. Before you spend a dime, you need to understand how all the parts fit together.
The Four Pillars of a Great Photo Booth
A DIY photo booth is basically a system where every part has a job. If one piece falters, the whole experience suffers. A fancy camera won't do you any good if the lighting makes everyone look like they're in a cave, and the slickest software is pointless if the booth itself is wobbly.
Here are the four non-negotiables for any photo booth build:
- The Camera: This is what captures the magic. Your options are pretty broad here, from a pro-level DSLR for ultra-crisp shots to the simple, tap-and-go convenience of an iPad for a more laid-back vibe.
- The Lighting: I can't stress this enough: good lighting is everything. It's the one thing that separates flattering, share-worthy pictures from dark, grainy ones nobody wants to see. A ring light is a super popular and effective choice because it gives you that nice, even glow.
- The Backdrop & Frame: This is your stage. The frame holds everything together, while the backdrop injects the personality. You can go simple with a sparkly sequin curtain or get fancy with a custom-printed wall that matches your theme.
- The Software & Interface: This is the brains of the operation. Your software is what triggers the camera, shows people a live preview of their pose, slaps on fun filters, and lets them print or share their photos. A good, responsive touchscreen is a must-have for a smooth user experience.
The classic rookie mistake? Spending all the money on a high-end camera and skimping on lighting. I’ve seen incredible photos come from a basic iPad with great lighting, and terrible photos come from a pro camera with bad lighting. Trust me on this one.
Let's quickly map out these essential components.
DIY Photo Booth Essential Components
A quick look at the core elements you'll need to gather for your photo booth project.
| Component | What It Does | Key Consideration |
|---|---|---|
| Camera | Captures the images. | DSLR for quality, iPad for simplicity and cost. |
| Lighting | Illuminates your guests. | A ring light provides soft, flattering, and even light. |
| Backdrop & Frame | Provides structure and theme. | Must be stable and match the event's aesthetic. |
| Software & Interface | Runs the booth and user experience. | Needs to be intuitive, reliable, and offer sharing/printing. |
Getting these four things right is the foundation of a successful build.
A Quick Reality Check on Your Resources
Before you start adding things to your shopping cart, let’s be real for a second. Take a hard look at three things: your budget, your timeline, and how comfortable you are with tech.
You can absolutely whip up a simple but effective booth with an iPad and a ring light for a few hundred dollars over a weekend. On the other hand, if you're picturing a DSLR-powered beast with a custom frame, a big touchscreen, and a pro-grade printer, you're looking at a project that could easily run into the thousands and require a bit more technical elbow grease.
Being honest with yourself about what's realistic from the get-go will save you a world of frustration later. A little planning now goes a long way.
Choosing the Right Hardware and Gear
Okay, this is where the fun really begins. You've got the vision, and now it's time to pick the gear that brings it all to life. Honestly, getting the hardware right is probably the most important part of building a photo booth. The bits and pieces you choose will directly affect how good your photos look and how much fun your guests have.
Let’s dive into the gear that can make or break your setup.
The Camera: Your Booth's Eye
The first big choice you have to make is the camera. This single piece of equipment has the biggest impact on your final photo quality, and your decision will probably boil down to your budget, how comfortable you are with tech, and what kind of event you're planning.
If you’re setting up for a wedding or a corporate gig where super sharp, high-res pictures are a must, a DSLR camera is the way to go. It's a bigger investment, for sure, but a DSLR gives you total control over settings like aperture and shutter speed. That kind of control is a lifesaver when you're dealing with tricky lighting. For a closer look at models that are perfect for this, check out our guide on the best camera for a photo booth.
On the flip side, if you're building a more casual, budget-friendly booth for something like a birthday party, an iPad or tablet is an awesome choice. The cameras on modern tablets are surprisingly good, and they give you an all-in-one solution for taking pictures and running the software.
Nailing the Perfect Lighting
Great lighting is the secret ingredient for photos that people actually want to share. It makes skin look great, adds a sparkle to the eyes, and gets rid of those ugly, harsh shadows. Without good light, even a top-of-the-line camera will give you mediocre results. Knowing the basics of lighting for indoor photography is a game-changer when you're picking out your gear.
You've got a couple of main options here:
- Ring Lights: These are popular for a good reason. They give you soft, even light that hits your subject head-on, which cuts down on shadows and creates that cool "catchlight" in their eyes. They’re super easy to use, making them perfect if you’re just starting out.
- Softboxes: If you’re chasing that professional, studio-quality vibe, a couple of softboxes is a fantastic move. They create a much broader, more diffused light that can cover bigger groups way better than a single ring light can.
A quick pro tip: Don't just stick your light anywhere. Place it right in front of your guests, just a little bit above their eye level. It's a universally flattering angle that helps you avoid creating weird shadows under their eyes and nose.
The Brains of the Operation
Your camera and lights need a command center. That's where a computer or tablet comes in, running the software that makes the whole experience happen. A responsive touchscreen is an absolute must-have here. It’s how your guests will interact with the booth, and a slow, confusing interface is a surefire way to kill the mood.
For a DSLR setup, you'll need a laptop or a small mini-PC to run the photo booth software. If you're going the iPad route, the tablet itself is your all-in-one computer and touchscreen, which makes the whole setup a lot simpler.
This decision tree can help you see how your budget and comfort with tech might guide your hardware choices.

As you can see, the path you take really depends on what you're willing to spend, how much time you have, and your personal skill level.
Keeping Everything Stable
Last but not least, let's talk about the unsung heroes: the tripods and mounts that hold all your expensive gear in place. A wobbly camera or a leaning light stand not only looks unprofessional but is also a genuine safety hazard.
Do yourself a favor and invest in a sturdy tripod for your camera and some solid stands for your lights. Make sure everything is mounted securely and can handle the weight of your equipment without any risk of tipping over. It’s a small detail that makes a huge difference.
Constructing Your Booth Frame and Backdrop
Alright, you've got your gear sorted. Now for the fun part: building the actual structure that's going to hold it all together. The frame and backdrop are the stage for your photo booth—they set the vibe and, more importantly, keep your expensive equipment safe. A wobbly setup doesn't just look amateur; it’s a disaster waiting to happen at a busy party.
Let's walk through two solid ways to build a frame. First up is a super simple and budget-friendly PVC pipe frame, which is perfect if you're just starting out. Then, we'll get into a sturdier wooden frame for anyone planning to do this more than once.
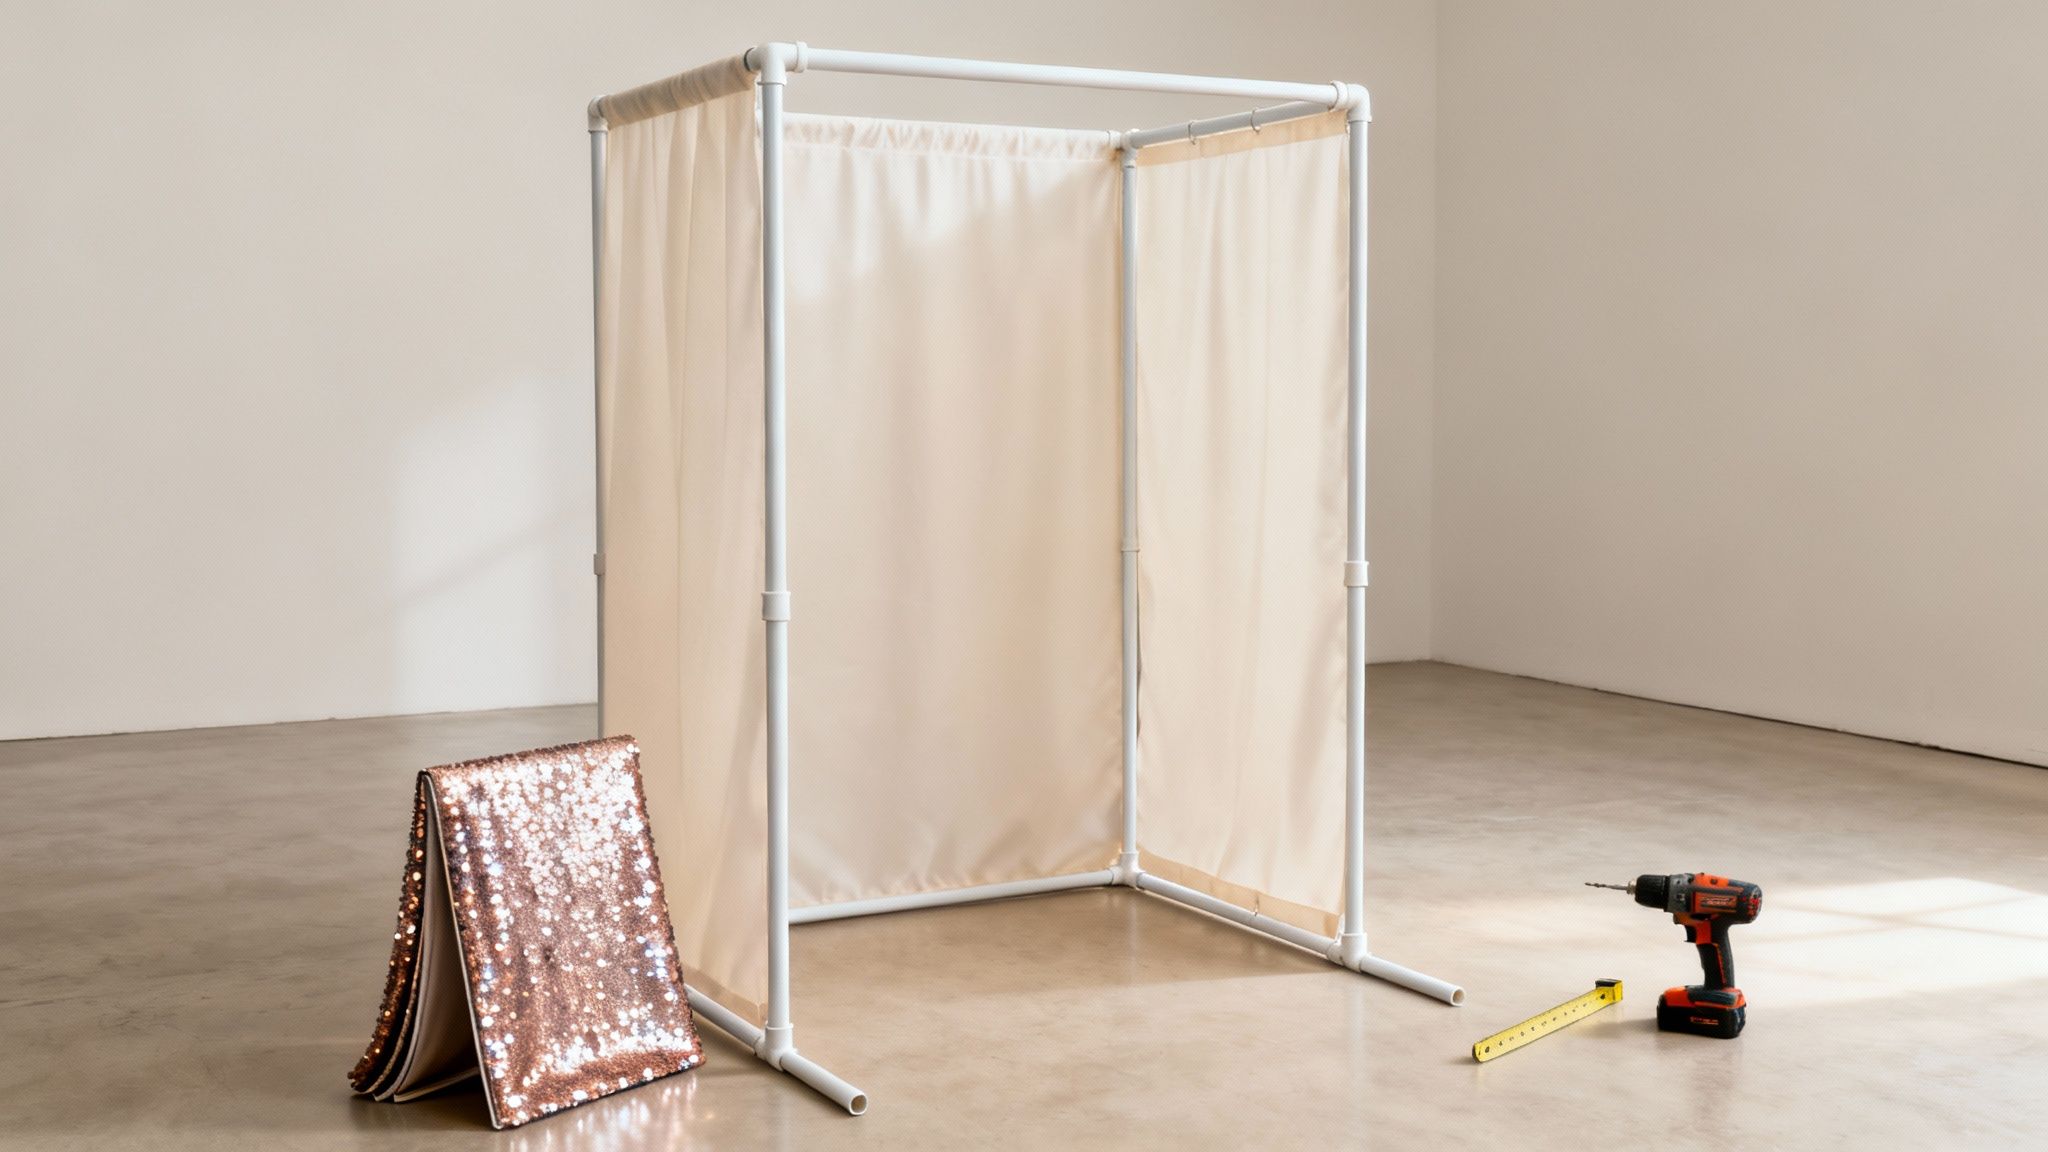
The Quick and Easy PVC Pipe Frame
Honestly, for a first-time build or a one-off event, you really can't beat a PVC frame. It's shockingly lightweight, surprisingly strong, and you can put it together (and take it apart) without a garage full of power tools. Think of it as adult-sized LEGOs.
Your shopping list is pretty straightforward:
- PVC Pipes: Go for 1-inch or 1.5-inch diameter pipes. They hit the sweet spot between strength and weight. You’ll probably need a few 10-foot lengths. Most hardware stores will cut them for you, or you can grab a cheap PVC cutter and do it yourself.
- PVC Fittings: These are the little connectors that bring it all together. You'll mainly need 90-degree elbows for the top corners and three-way "T" connectors for the base and any middle supports.
- Optional Base Supports: If you're setting up outside or just want extra stability, you can build wider "feet" for the frame using a few more T-connectors and short pieces of pipe.
Putting it together is literally just pushing the pipes into the fittings. A good size to aim for is around 7 feet tall and 5 feet wide. Don’t even think about glue! The friction fit is strong enough, and leaving it unglued means you can break it down in minutes and toss it in a bag.
Here’s a pro-tip I learned early on: nobody wants to see the plumbing-aisle look. A quick coat of black or gold spray paint instantly makes the PVC frame look like sleek metal and completely changes the game.
Building a Sturdier Wooden Frame
If you're planning on making your photo booth a regular gig, or you just want something that feels more permanent, wood is the way to go. Yes, it requires a few more tools—you'll definitely need a drill and a saw—but the payoff is a rock-solid structure that can handle heavier backdrops and won't flinch if a guest accidentally bumps into it.
Most people use 2×4 or 2×3 lumber for a basic wooden frame. The design is pretty much the same as the PVC version: two vertical sides connected by horizontal beams at the top and bottom. The big difference is that you'll be using wood screws to join everything, which gives it that serious rigidity. If you want a full walkthrough, our guide on creating a DIY photo booth frame has the step-by-step instructions you'll need.
The best part about a wooden frame is how professional it can look. You can paint it, stain it, or leave it natural to match any event theme, which is a huge plus for high-end events like weddings or corporate parties where aesthetics really matter.
Choosing and Hanging Your Backdrop
Think of the backdrop as the personality of your booth. It's what's behind everyone in the shot and really ties the whole theme together. The frame is just the canvas; the backdrop is the art.
Here are a few popular options that are always a hit:
- Elegant Fabric Drapes: Simple, classic, and cheap. Just make sure to use a heavier, non-shiny fabric like velvet or a thick cotton blend to avoid that awful glare from the camera flash. You can just drape it over the top bar and use clamps to hold it in place.
- Dazzling Sequin Walls: Want some glam? A sequin or "shimmer" wall is a total showstopper. These things catch the light beautifully and bring an amazing energy to every photo.
- Custom Printed Backdrops: This is your top-tier option for themed parties or branded events. You can get anything printed—a company logo, a floral pattern, a funky scene—on a big sheet of vinyl or fabric.
No matter what you choose, pull that backdrop TIGHT. Wrinkles are the absolute enemy of a good photo booth picture. I use a handful of heavy-duty clamps or even zip ties to secure the backdrop to the sides and bottom of the frame. It’s that one small detail that makes the final product look polished and professional, not like a high school project.
Picking the Software That Makes It All Work
Alright, you’ve put together the physical structure of your photo booth. Now for the fun part: bringing it to life. The software is the heart and soul of your setup—it’s what turns a camera on a stand into a real, interactive photo booth experience.
Think of it as the director of the show. It runs the countdown, tells your guests what to do, and handles all the behind-the-scenes magic like creating GIFs or boomerangs. Most importantly, it's what gets those awesome photo strips into your guests' hands and onto their social media feeds.
What to Look For in Photo Booth Software
Jumping into the world of photo booth software can feel a bit overwhelming at first. There are a ton of options, from simple iPad apps to complex programs for high-end DSLR cameras. To make it easier, let's focus on the features that actually matter for a great guest experience.
You'll want software that includes:
- Live View: This is a must-have. It shows a live preview on the screen so people can see themselves and line up the perfect shot. No more guessing games or cut-off heads.
- Customizable Templates: The best part of a photo booth is the branded photo strip. Good software lets you design your own layouts, adding logos, event dates, or custom graphics to make the souvenir truly special.
- Sharing Options: Let's be honest, people want to post their pictures instantly. Look for software that makes it easy for guests to email or text the photos to themselves right from the booth.
- Fun Media Formats: If you want to take your booth to the next level, find software that supports GIFs, boomerangs, or even short video clips. These are wildly popular and get shared like crazy.
I've learned one thing from running countless events: the user interface has to be dead simple. Guests, especially after a drink or two, won't read a manual. A giant, friendly "Tap to Start" button is your greatest asset.
Popular Software Options to Get You Started
The good news is there's software out there for just about any budget or tech skill level. The biggest difference you'll find is usually the pricing model—some are a one-time purchase, while many of the best ones have moved to a monthly or yearly subscription.
Here are a few trusted names in the game:
| Software Name | Best For | Typical Platform | Common Features |
|---|---|---|---|
| Simple Booth | iPad/iPhone Setups | iOS | Easy UI, GIFs, digital props, online galleries |
| DSLR Booth | DSLR Setups | Windows | Powerful template editor, green screen, printing |
| LumaBooth | DSLR & iPad Setups | iOS, Windows | Video, boomerangs, robust sharing features |
Each of these has its own lane. For example, many of the more advanced programs have incredible green screen features built right in. If you're curious, you can see how a photo booth with a green screen can completely change the game by dropping your guests into any scene you can imagine.
Getting Your Software and Sharing Features Dialed In
Once you've made your choice, getting it running is usually pretty simple. You’ll install the app on your tablet or laptop, and it should automatically recognize your camera when you plug it in.
Next, you get to play creative director. In the settings, you’ll upload your custom photo strip designs, decide how many pictures to take in each session, and even change the on-screen text. Instead of a generic "Say Cheese!", you could have it say something like "Show Us Your Best Moves!"
Finally, you’ll set up the printing and sharing. If you’re using a dedicated dye-sublimation printer (which I can't recommend enough for its speed and quality), you'll just connect it and install the drivers. For social sharing, the software will ask for your email or SMS service info so it can send photos directly from the booth. Always, always do a few full test runs of both printing and sharing before your event kicks off.
Adding Props and Perfecting Your Setup
Alright, you’ve sorted out the technical side of your photo booth build. Now for the fun part: injecting some serious personality. The hardware and software are the skeleton, sure, but the props and final setup details are what bring the whole experience to life. This is where a functional machine becomes the unforgettable highlight of the event.
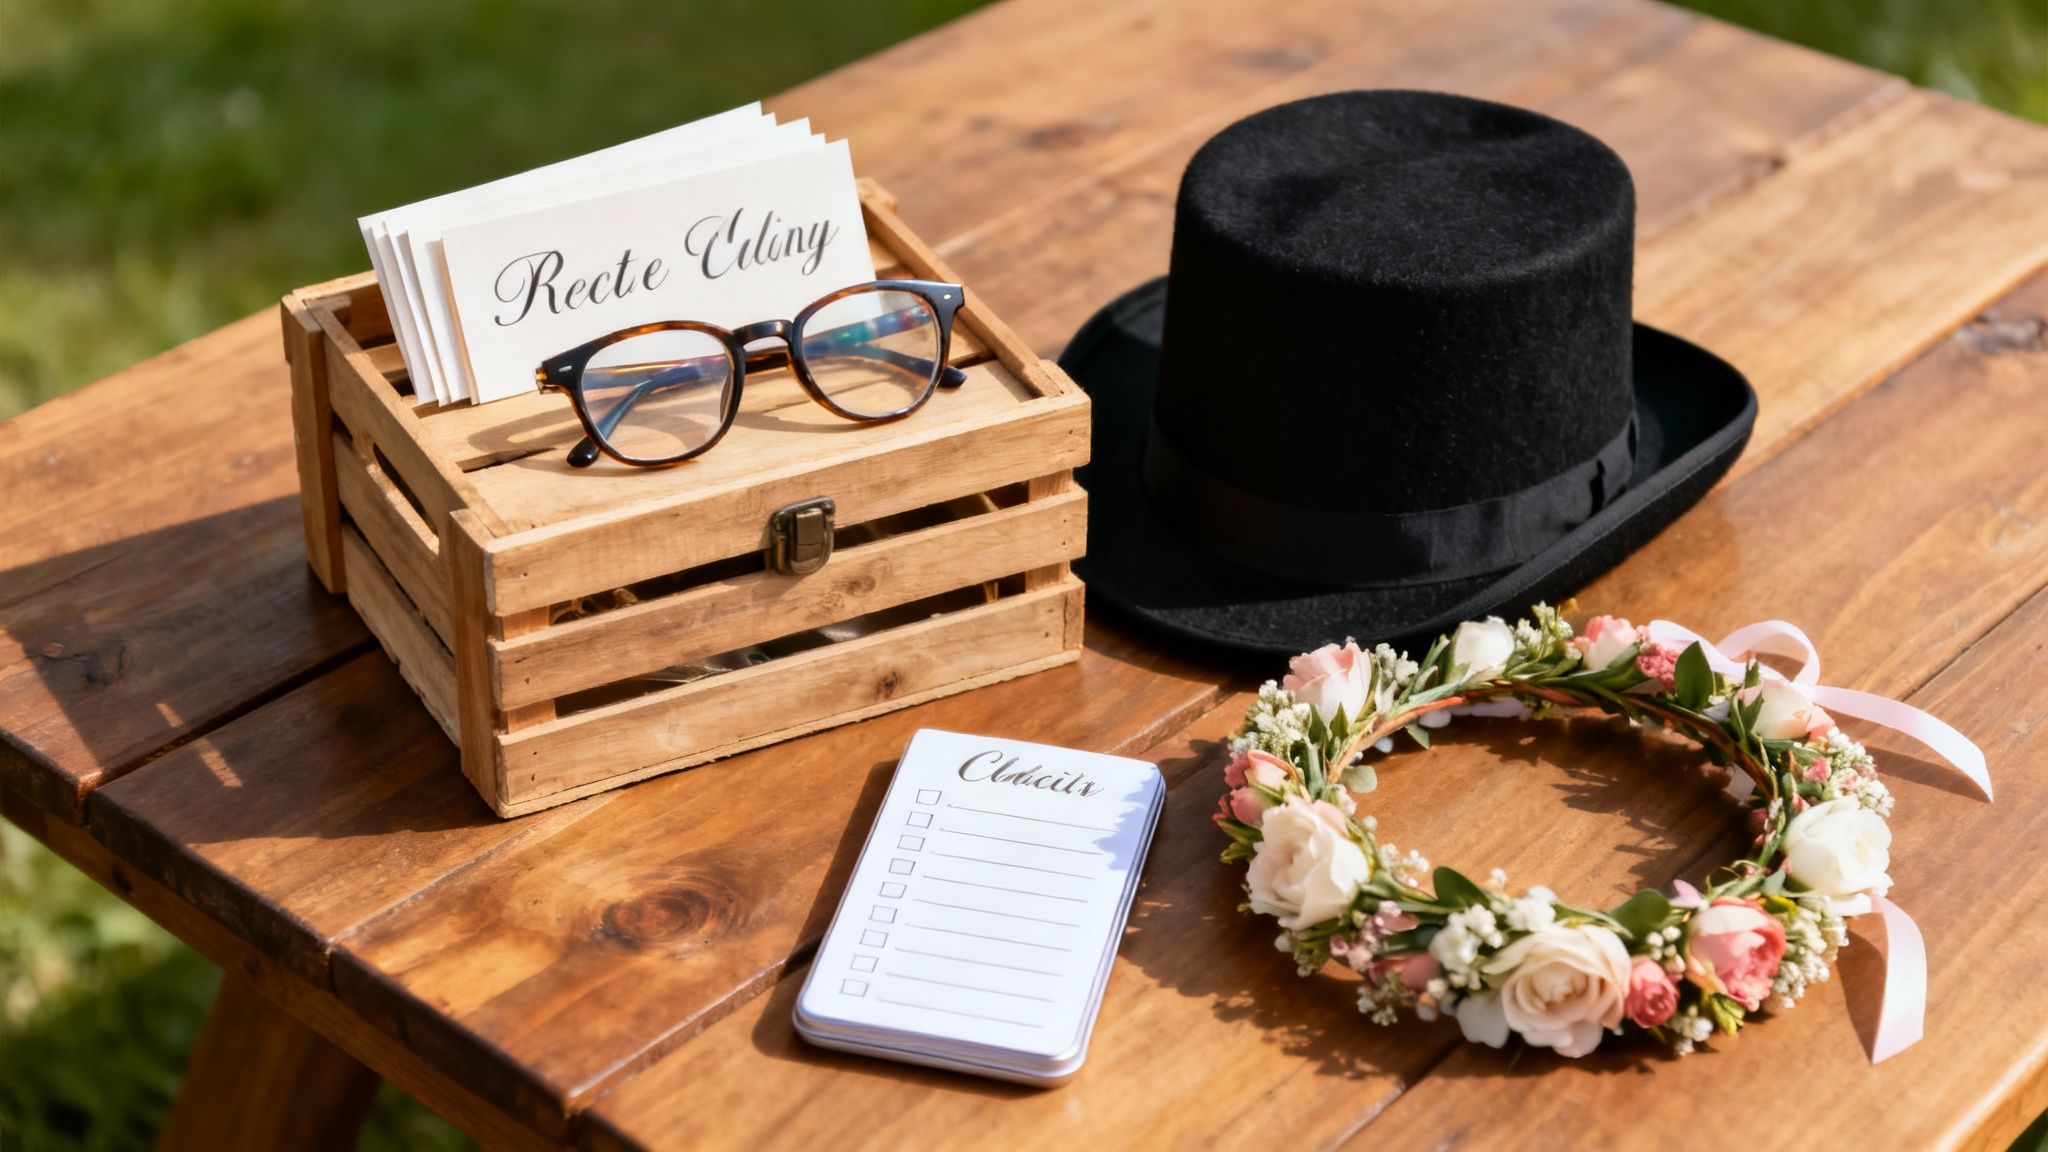
The right props do more than just give people something to hold—they're permission slips to get goofy. A silly hat or some ridiculous glasses can completely lower inhibitions, which is the entire point. It’s also a booming business. The global market is valued somewhere between USD 584.6 million and USD 818.2 million in 2024, and it's only growing. So whether this is for fun or profit, you're on the right track. You can dig into the market trends and industry reports here.
Brainstorming Creative Prop Ideas
Please, step away from the tired feather boas and generic plastic sunglasses. The best props are the ones that feel thoughtful and connect to the event's theme. A well-curated prop collection tells guests you actually put some care into the details.
Think beyond the basics and get specific:
- Wedding: How about custom signs with inside jokes about the couple? Or maybe elegant masquerade masks and chalkboards for guests to write personal messages.
- Corporate Event: Lean into the industry. Think oversized tools for a construction company party or lab coats and beakers for a tech firm. To really get people involved, consider some creative giveaways. You can find some fantastic trade show giveaway ideas to boost booth engagement that work just as well here.
- Holiday Party: Go all-in. I’m talking reindeer antlers, Santa beards, elf hats, and those hilarious "Naughty" and "Nice" signs.
A killer prop collection tells a story. Instead of a random jumble of stuff, curate a themed kit that feels cohesive and special. For more inspiration, check out our guide on unforgettable photo booth props ideas.
Your Pre-Event Checklist and On-Site Setup
I've learned this the hard way: preparation is everything. There’s nothing worse than showing up to an event and realizing you forgot a critical cable or that the printer is completely out of ink. Trust me, a pre-event checklist will be your best friend.
Before you even think about leaving for the venue, pack and test everything. That means all your hardware, every last cable, power strips, and a full stock of printer paper and ink. Your checklist is the final word on what goes in the car.
Once you’re on-site, don’t rush. As a rule of thumb, give yourself at least 90 minutes for a full setup and test run. Get the frame and backdrop up first, then carefully position your camera, lighting, and touchscreen. The last—and most important—step is to run a full cycle. Take a picture, apply the template, print it out, and send a test email. This confirms that every part of the system is talking to each other before the first guest even walks up. A smooth setup means you can actually relax and enjoy the event, knowing your booth will run flawlessly.
DIY or Hire a Pro? Making the Right Call
Building your own photo booth can be an incredibly fun and rewarding project, but let's be honest—it's not the right move for every situation. Deciding whether to build it yourself or bring in a professional really boils down to three things: your time, your budget, and how much you enjoy playing tech support in the middle of a party.
A DIY booth adds a wonderfully personal and quirky touch to a laid-back backyard barbecue or a casual birthday bash. It's a chance to flex your creative muscles and make something truly unique. But for the big moments, like a wedding or a major corporate gathering, the stakes are completely different.
When to Bring in the Experts
For those "this has to be perfect" events, hiring a professional photo booth company is almost always the smartest move. You're not just renting equipment; you're buying a seamless, stress-free experience.
Here’s what you’re really getting when you hire a pro:
- Rock-Solid Gear: Professionals use high-end, reliable equipment that’s been tested time and time again. They handle every aspect of setup, operation, and teardown, leaving you free to actually enjoy your event.
- A Helpful Attendant: This is a game-changer. Having someone on-site to manage the props, help guests, and instantly troubleshoot any tech hiccups means the fun never stops.
- Cooler Toys: Professional setups often include awesome features that are tough to pull off yourself, like green screens, animated GIFs, video messaging, and super-fast printers.
The biggest benefit of hiring a pro is simple: reliability. Knowing that a key piece of your event's entertainment is in expert hands lets you relax and focus on what matters—your guests.
So, What's the Verdict?
At the end of the day, it all comes down to how important the event is. The photo booth business is huge for a reason—North America alone accounts for about 45% of the global market. And what's driving that demand? Weddings and corporate events, which tells you just how essential a flawless photo booth experience is for major celebrations. You can dig into more of these photo booth industry trends here if you're curious.
If you're hosting a casual get-together where a few quirks just add to the charm, absolutely go for the DIY build. But for that once-in-a-lifetime wedding or a critical brand event, the polished, professional experience is worth every penny. If you're wondering what a professional package includes, understanding the factors that shape the photo booth rental cost can give you a much clearer picture.
Answering Your Top DIY Photo Booth Questions
So you're ready to build your own photo booth? Awesome! You probably have a few questions swirling around. Let's get right to them—getting these answers sorted out now will save you a ton of stress later.
The biggest thing people worry about is the tech. Getting a camera, computer, software, and lighting to all play nice can feel a little daunting at first. My best advice? Be patient and plan for a full-on dress rehearsal the day before your event. This isn't just a suggestion; it's a must-do to catch any weird glitches before your guests arrive.
So, What's This Actually Going to Cost?
This is the big one, right? The final price tag can vary a lot, depending on how fancy you want to get.
-
For a simple, fun setup, you can totally pull it off for around $300-$500. This assumes you’re using an iPad or a laptop you already own and focusing your budget on a solid frame, a cool backdrop, and good lighting.
-
If you're aiming for a more pro-level experience, you’ll want to budget between $1,500 and $3,000. This tier gets you a DSLR camera, a dedicated computer or touchscreen, and some of the more powerful software options.
The three things that will really move the needle on your budget are your camera, lighting, and especially the printer. A cheap inkjet just won't cut it. Investing in a high-speed, dye-sublimation printer is a game-changer if you want those classic, instant photo strips.
Can I Just Use My Smartphone?
Absolutely! The cameras in modern phones are seriously impressive and can work great for a photo booth, especially at a casual party or family get-together. You can find tons of fantastic photo booth apps on both the App Store and Google Play that will handle everything for you.
The trickiest parts are making sure the phone stays put (a sturdy tripod or mount is key) and keeping it juiced up for the entire event. While a phone is a fantastic, budget-friendly route, I'll be honest: a DSLR will always deliver better quality photos and give you way more control, particularly if the lighting isn't perfect.
Feeling like the DIY route might be a bit much? If you'd rather just enjoy the party and know everything will run perfectly, let the pros handle it. 1021 Events provides top-notch photo booth rentals with high-end gear and friendly on-site staff to make sure your event is a hit. Check out our event services at https://www.1021events.com.