
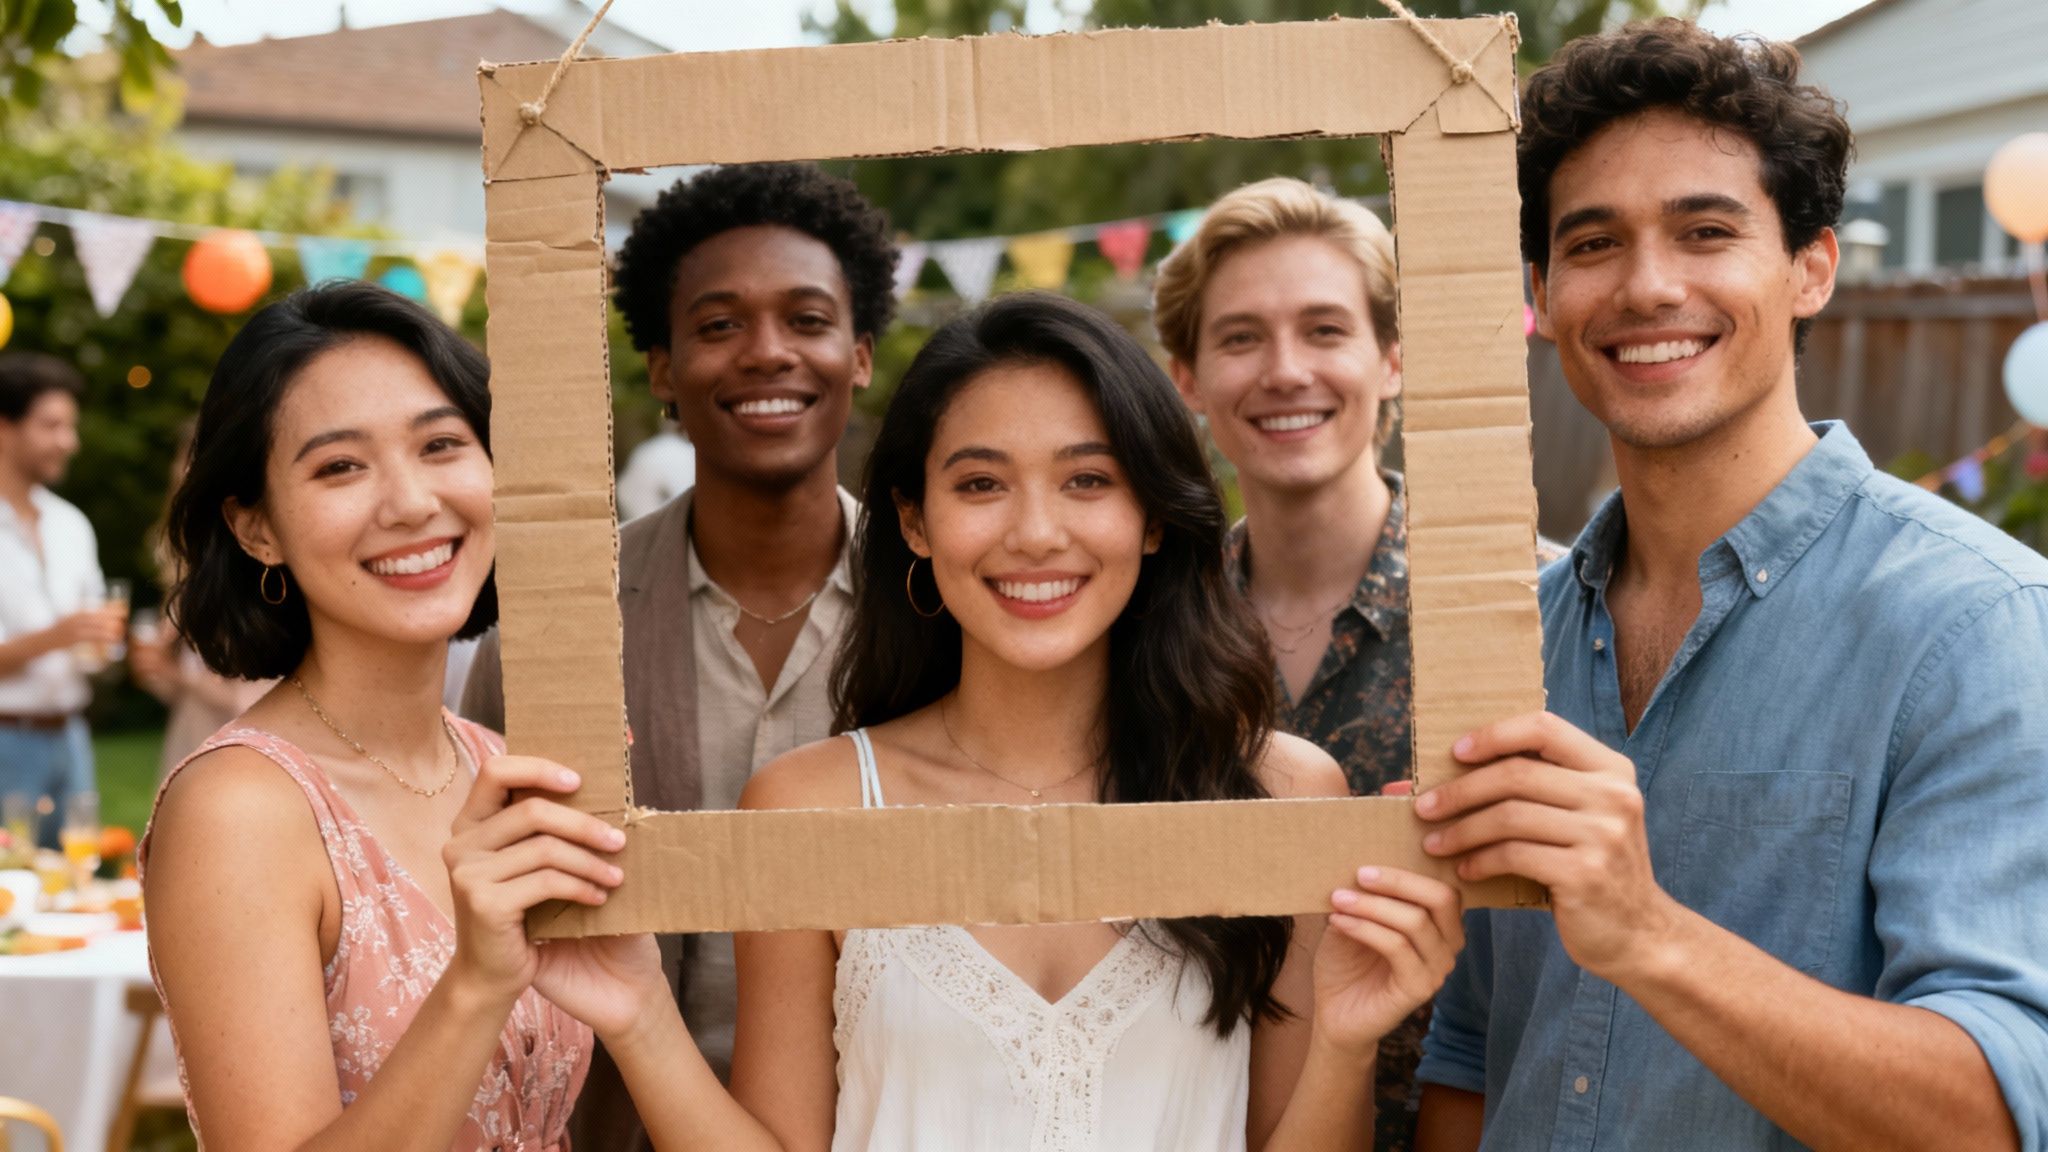
Want to create a fun, interactive centerpiece for your next party without breaking the bank? A DIY photo booth frame is your answer. Using simple materials like foam board or cardboard, you can transform an ordinary corner into the main attraction, getting everyone to let loose and snap some memories.
Why a DIY Frame Is Your Party's Secret Weapon
Let's be real—getting guests to relax and take photos can feel a little awkward. A handmade frame completely flips the script. It’s not just another prop; it's a genuine invitation to have some fun.
When you create a dedicated photo spot, you give people a natural reason to gather, laugh, and interact. Even your most camera-shy friends will find it hard to resist jumping in for a picture when there's a playful frame involved. Think of it as a social magnet for your event, perfect for anything from a sophisticated wedding reception to a laid-back birthday barbecue.
The Power of a Personal Touch
What really makes a DIY photo booth frame special is that you can make it yours. You get to tailor it perfectly to your event’s theme, colors, or even a few inside jokes. That level of customization makes your celebration feel thoughtful and unique, and it’s something your guests will definitely notice.
This isn't just a hunch—people love personalized party elements. We've seen search interest for photo booth frames climb steadily, proving that custom details make a big impact. A simple project like this shows you put thought into the little things, and that’s what people remember.
A great photo booth does more than just take pictures—it creates an experience. Your custom frame is the heart of that experience, setting the stage for genuine smiles and unforgettable moments.
More Than Just a Craft Project
Building a DIY photo booth frame is a surprisingly simple way to elevate your entire party's vibe. It gets people talking, produces fantastic, shareable photos, and doubles as a memorable piece of decor.
When you pair it with the right props and a cool backdrop, it becomes a full-blown entertainment hub. For more ideas on putting together a complete setup, check out our guide on how to create a photo booth. It’s a small investment of your time for a huge return in fun and memories.
Gathering Your Frame-Building Supplies
Alright, let's get you set up for success. Before you start hacking away at a piece of cardboard, a little prep goes a long way. The secret to a photo booth frame that looks amazing and actually survives the party is starting with the right materials.
Choosing Your DIY Frame Material
The material you pick for the frame itself is your biggest decision. It dictates how sturdy it'll be, how much it weighs, and honestly, how much work you're in for. Foam board is the crowd favorite for good reason—it’s light enough for anyone to hold up but rigid enough not to flop over. Cardboard is your super-thrifty option (hello, leftover moving boxes!), but it can be a bit flimsy. Wood? That’s the heirloom-quality choice, perfect if you plan on using the frame again and again, but it definitely requires more muscle and tools.
To make it easier, here's a quick rundown of your options:
| Material | Best For | Pros | Cons |
|---|---|---|---|
| Foam Board | Most events; balances cost and quality | Lightweight, easy to cut, smooth surface for decorating | Can dent or crease if handled roughly |
| Cardboard | Budget-friendly or last-minute projects | Inexpensive (often free!), eco-friendly | Prone to bending, rougher texture |
| Wood | Reusable frames for multiple events | Extremely durable, professional look | Heavy, requires saws and more skill to assemble |
Ultimately, the best choice depends on your event and your DIY comfort level. For most people, a good quality foam board is the perfect starting point. If you want to dive deeper, check out this ultimate guide to foam board supplies to see all the different types out there.
The Must-Have Tools
Once you've got your base material picked out, you'll need a few trusty tools to bring your vision to life. Trust me on this one: a sharp craft knife or box cutter is absolutely essential. A dull blade will just tear your material and leave you with fuzzy, frustrating edges.
Here’s your quick toolkit checklist:
- A long metal ruler (plastic ones are too easy to nick with your knife)
- A self-healing cutting mat to protect your table or floor
- A pencil for marking out your frame dimensions
- A good adhesive—a hot glue gun is my go-to for speed, but heavy-duty craft glue works great too.
This simple infographic lays out the core components you’ll need to get started.
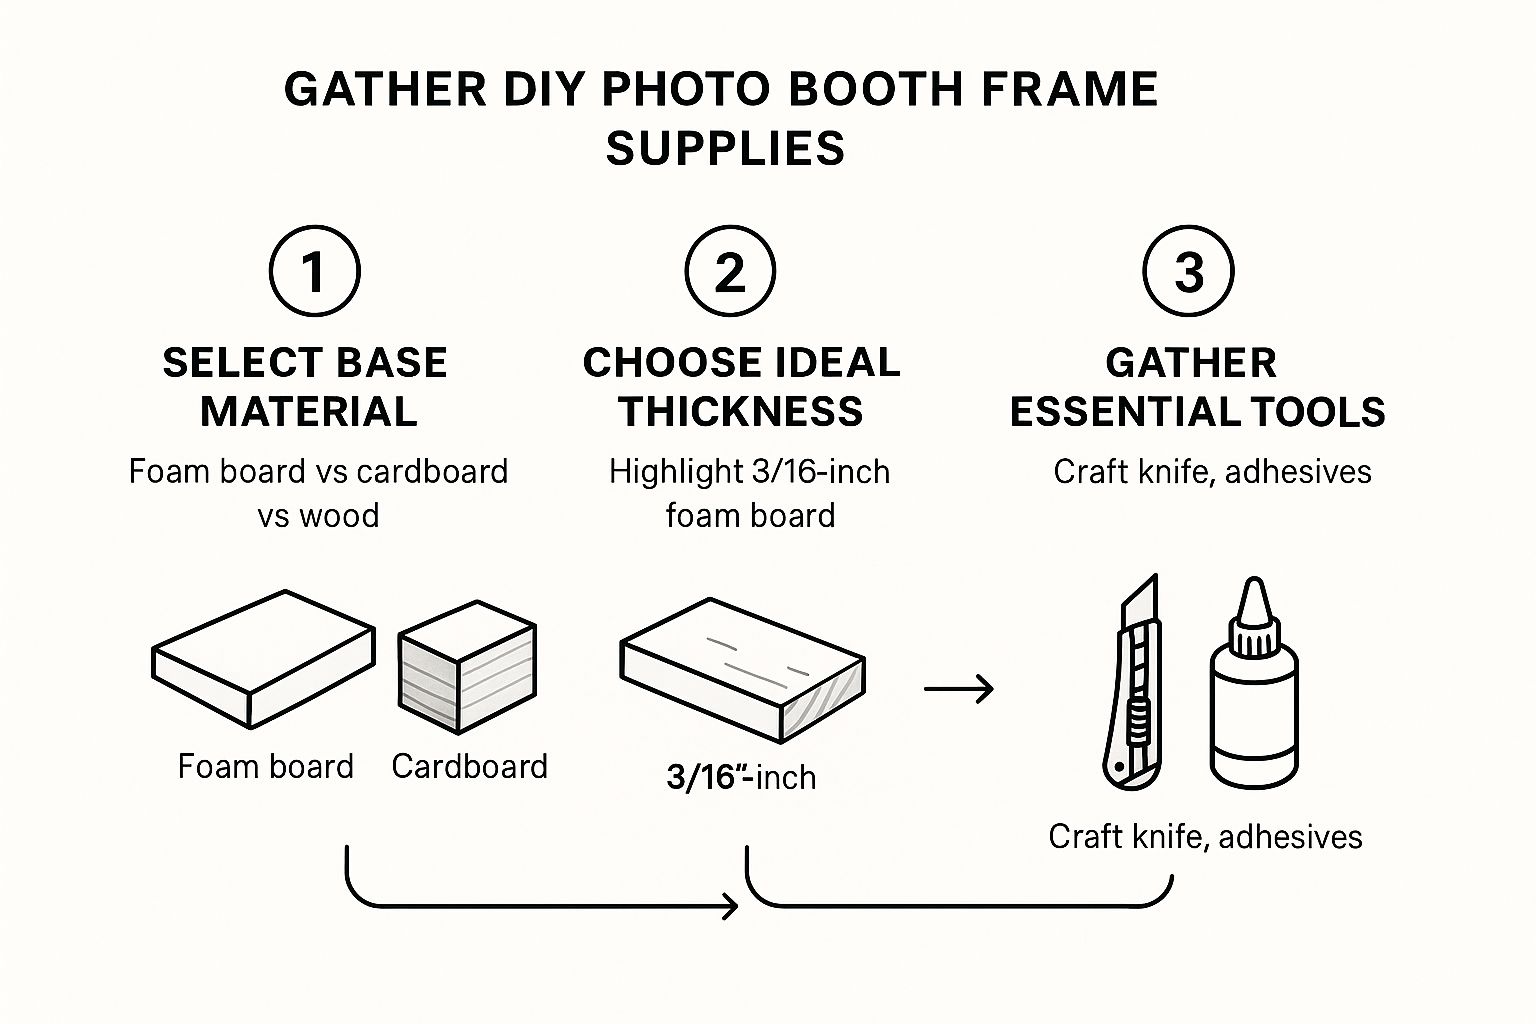
As you can see, you don't need a massive workshop. Just a few key items will get the job done right.
Now for the Fun Stuff: Decorations!
With the boring (but important!) structural stuff sorted, it’s time to think about making your frame pop. This is where you can let your creativity run wild and really tie the frame into your party's theme.
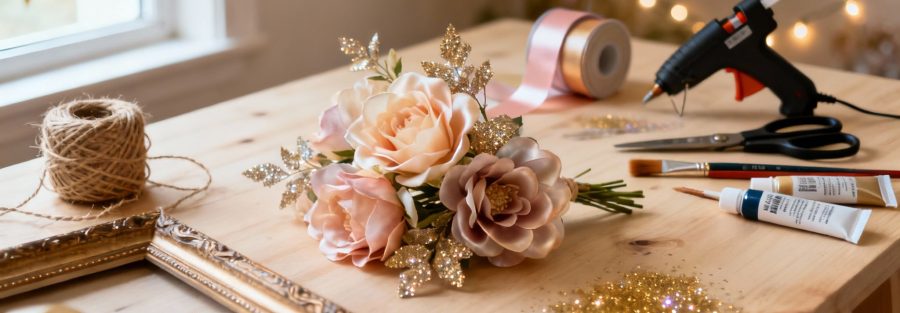
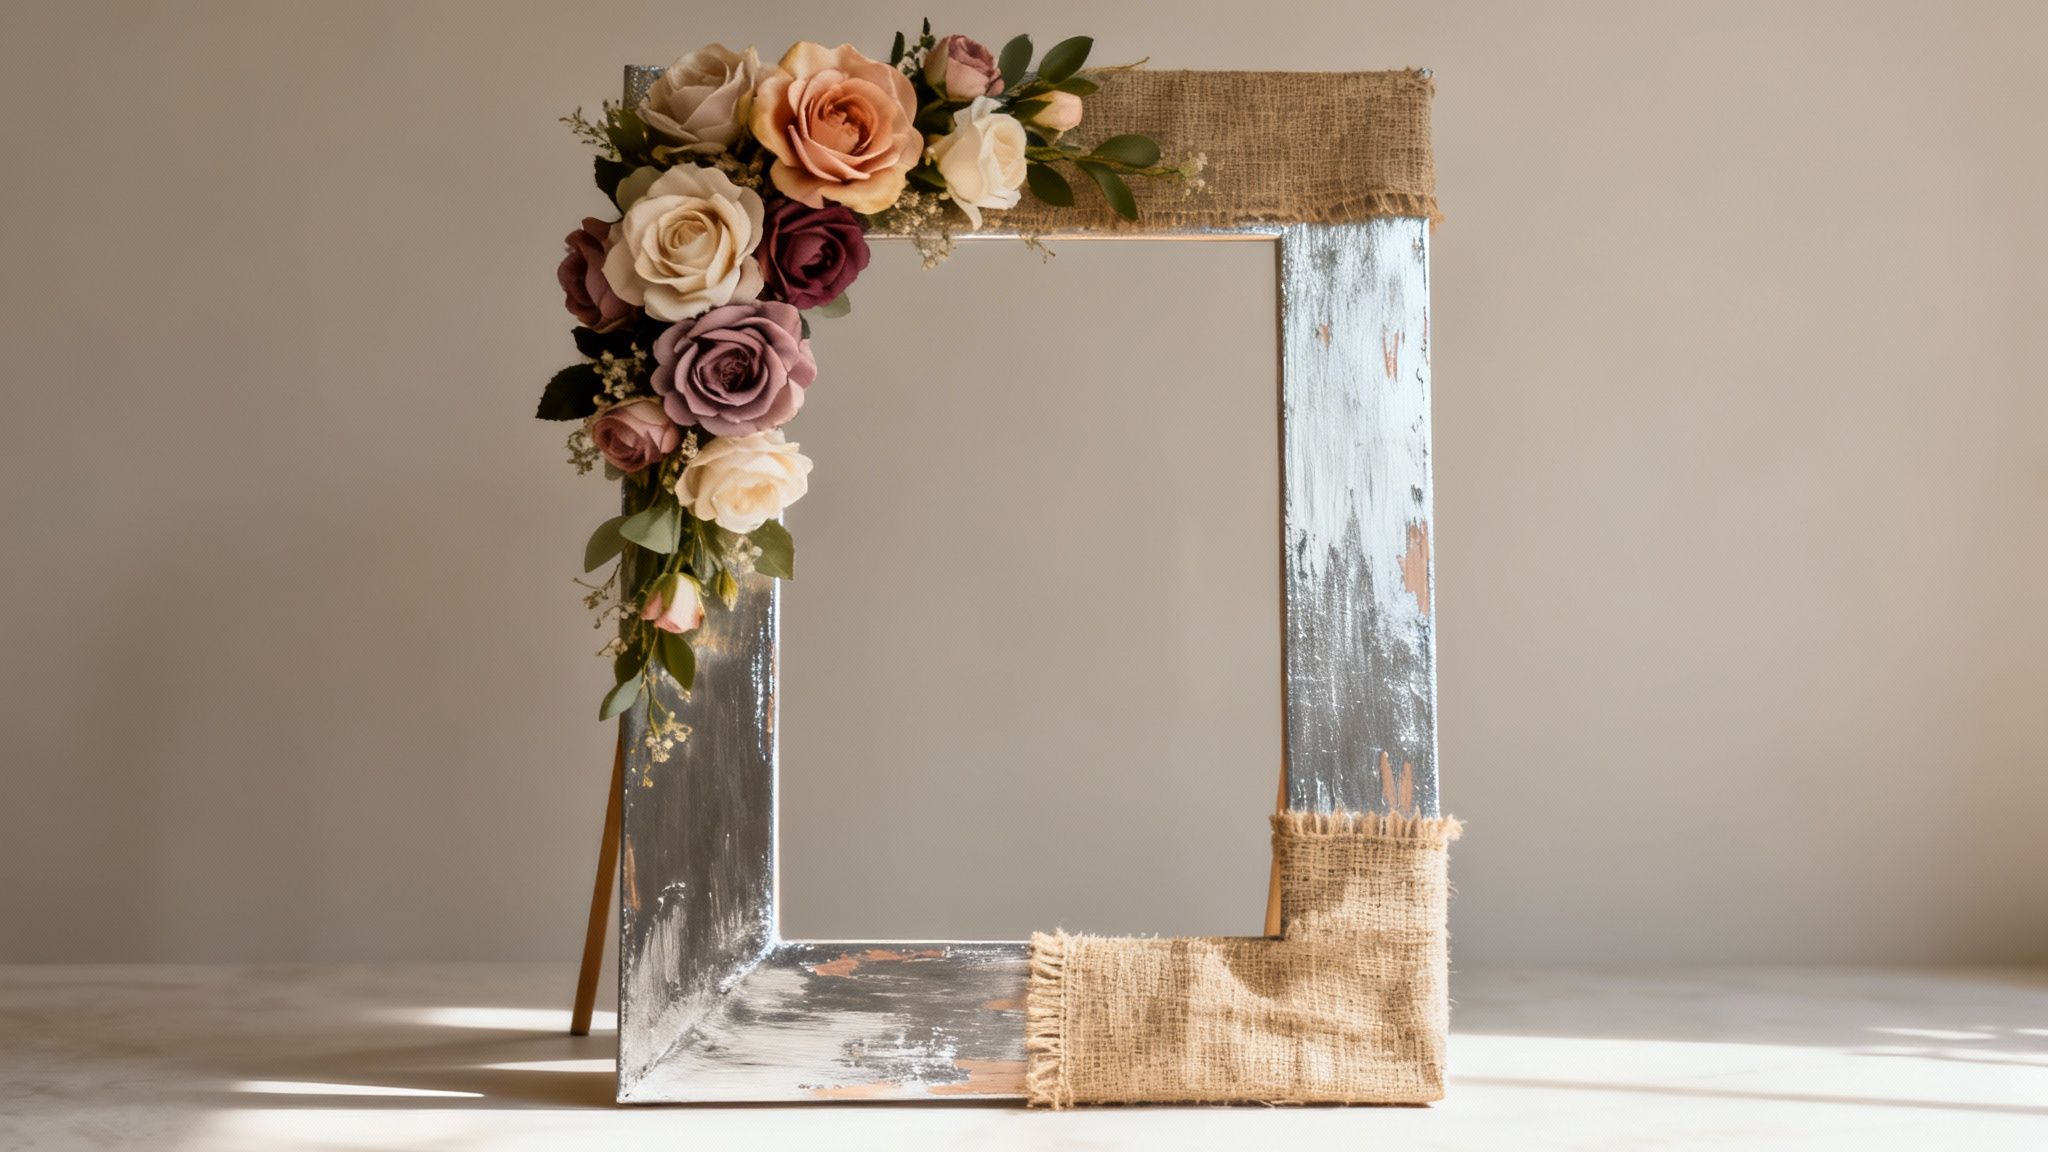
Start brainstorming and gathering things like spray paint, craft paint, glitter, faux flowers, custom vinyl lettering—whatever matches your vibe. For a rustic wedding, think burlap, lace, and maybe some delicate silk flowers. For a New Year's bash, go all out with metallic spray paint, sequins, and maybe some fun 3D numbers.
My Pro Tip: The sweet spot for a sturdy yet manageable frame is a 3/16-inch thick foam board. It gives you enough rigidity to hold decorations without being a heavy burden for your guests after they've taken a few photos.
Planning your decorations ahead of time helps create a cohesive, polished look instead of something that looks like a last-minute craft project. And don't forget the accessories! Once your frame is ready, you can pair it with some awesome props. You can even make your own—our guide to https://1021events.com/photo-booth-props-diy/ has tons of ideas to get you started.
Building a Sturdy and Stable Photo Frame
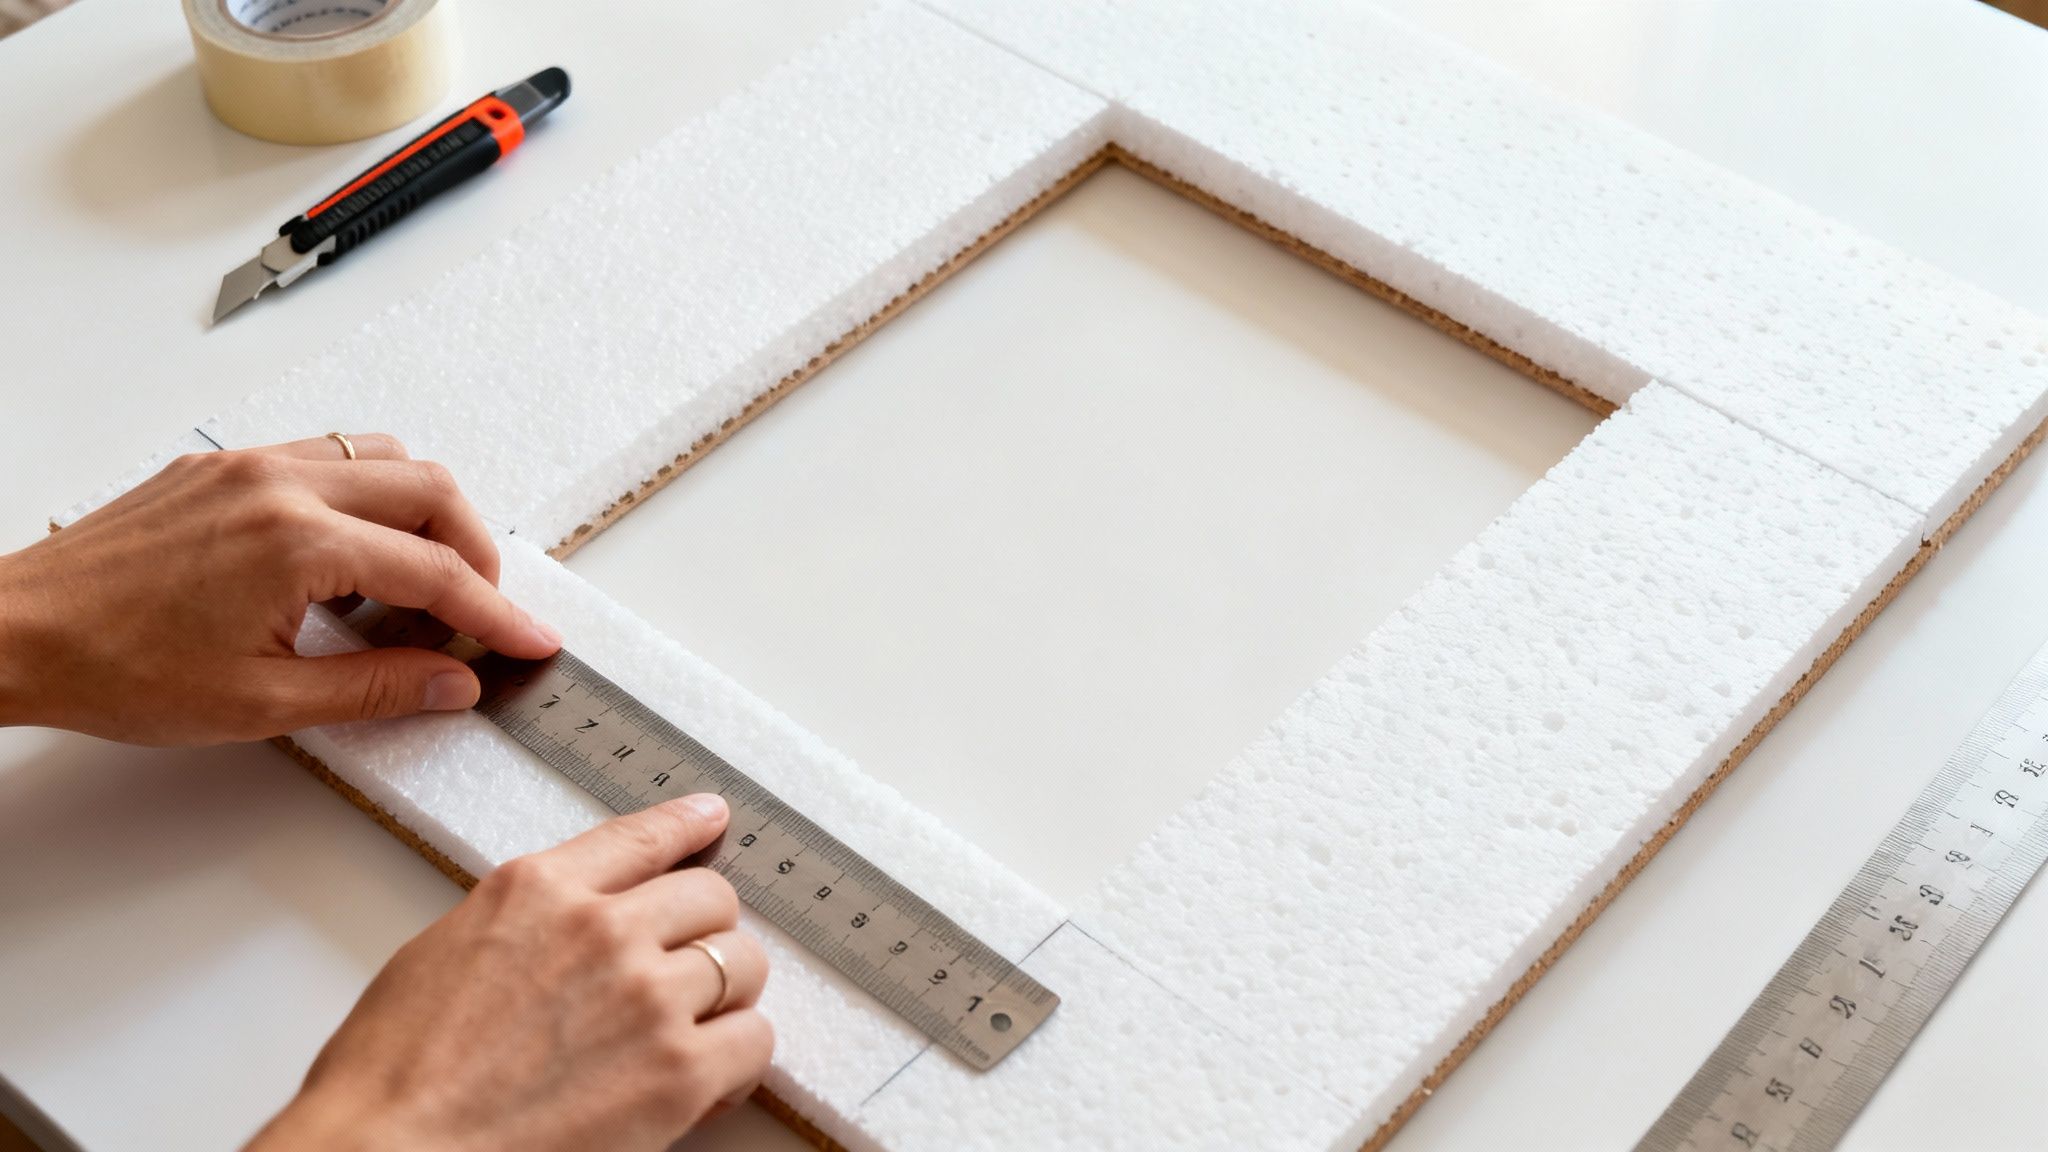
Alright, you've got all your materials laid out. Now for the fun part: bringing your DIY photo booth frame to life. A little care and attention here will turn that simple foam board or piece of cardboard into a party highlight that can actually survive a night of fun.
Let's start with the most critical part: measuring. Seriously, don't rush this. A crooked frame will stand out in every single picture. Grab a pencil and a long metal ruler to lightly mark out your dimensions—both for the overall frame and the inner window you'll be cutting out.
As a general guideline, I find a border width between 4 to 6 inches works perfectly. It gives you plenty of real estate for all your creative decorations but keeps the frame light enough to hold and the opening big enough for those awesome group shots.
Achieving a Clean and Professional Cut
The secret to making your frame look store-bought instead of home-made? Clean cuts. This is where a sharp craft knife and a self-healing mat are absolutely essential. Trying to hack through the board with a dull blade is the fastest way to get jagged, torn edges that no amount of paint can truly hide.
For perfectly straight lines, I always follow a few simple rules:
- Use a Metal Ruler as a Guide: Plant that ruler firmly along your pencil line. It gives your knife a solid, unyielding edge to follow and stops any accidental slips.
- Score Before You Cut: Don't try to be a hero and slice through the whole board in one go. Make a few light passes first. This "scoring" creates a groove that guides your blade for a much cleaner final cut.
- Change Your Blade Often: The moment you feel the blade start to drag or tear the material, stop. Swap it out for a fresh one. A sharp blade isn't just more effective, it's a lot safer, too.
Reinforcing for Party-Proof Durability
Let's be real—a flimsy frame just won't cut it once the party gets going. The corners are always the first to give, so they need a bit of extra love to keep from flexing or snapping right in the middle of a great photo op.
My go-to trick is to use wide duct tape on the back of the frame, running it diagonally across each corner. It’s a cheap, easy, and incredibly effective way to add strength exactly where you need it most.
Another great option is to cut small triangles from your leftover material and hot glue them to the back of each corner. This adds some serious rigidity and only takes a few minutes. It's a small step that dramatically increases the lifespan of your frame. For bigger builds, you might even find some good ideas from general DIY tips for installing building hardware; the principles of creating strong joints often apply!
Adding Handles or Supports
Think about how your guests will actually hold this thing. A big, flat board can get pretty awkward, especially after a celebratory drink or two. Adding handles makes the whole experience way more comfortable and user-friendly.
You could cut two hand-sized slots into the sides, maybe halfway up the frame. Just make sure to sand the edges or wrap them in tape so they aren't rough on people's hands. If you'd rather not cut into your design, you can just as easily glue or tape some sturdy cardboard tubes or wooden dowels to the back to serve as handles.
Paying attention to these little construction details is what elevates your project from a simple craft to a truly functional and durable party accessory. If you're thinking even bigger, our full guide on how to make a photobooth has plenty more ideas.
Creative Ideas for Decorating Your Frame
Alright, this is where the real fun begins. You’ve got this sturdy, well-built frame—think of it as a blank canvas, and you’re the artist. Decorating your DIY photo booth frame is all about capturing the specific vibe of your event and turning it into a true centerpiece.
Whether you're going for rustic chic or all-out glam, my best advice is to pick a theme and just run with it. Don't be afraid to mix different textures and materials. That's how you create something that’s not just visually interesting, but also uniquely you.
Nailing the Foundation: A Smooth Paint Finish
Before you even think about adding the fancy embellishments, a great paint job is your absolute best friend. Seriously. A smooth, even coat of color sets a professional-looking base for everything else you're going to add. For a foam board or cardboard frame, spray paint is easily the fastest and simplest way to get that flawless coverage.
Here are a few quick tips I've learned for a streak-free finish:
- Prime first! I can't stress this enough. A light coat of primer helps the paint stick way better and makes your color pop, especially if you're painting a light color over a dark surface.
- Use light, sweeping motions. Hold the can about 8-10 inches away from the frame. Move back and forth in a steady, smooth motion to avoid blotches.
- Multiple thin coats beat one thick one. This is the golden rule of spray painting! It prevents those annoying drips and ensures an even, much more durable finish. Just be patient and let each coat dry completely before you add the next.
A well-decorated frame isn't just a prop; it’s a key part of the guest experience. When guests see the effort, they’re more excited to jump in and start snapping photos, turning a simple corner into the party's main event.
Elevating Your Frame with 3D Elements
Now, let's talk about adding some dimension. Flat frames are fine, but adding 3D elements is what really makes them stand out and look amazing in photos. You want things that can pop off the surface and create interesting textures.
For a Romantic or Rustic Wedding Frame:
- Faux Florals: Grab a hot glue gun and attach silk flowers and greenery. I love clustering them in one or two corners for an elegant, asymmetrical look that frames faces beautifully.
- Burlap and Twine: For that charming, rustic texture, try wrapping sections of the frame in burlap ribbon or some simple twine.
For a Fun Birthday or New Year's Frame:
- Glitter Bomb: Coat the frame in craft glue and just go wild with glitter. Pro-tip: Seal it with a clear spray sealant afterward to keep the sparkle on the frame and not all over your guests.
- Faux Gems and Sequins: Add some bling with adhesive gems or sequins. They create a touch of glam that catches the light perfectly in pictures.
This whole idea of customizing a DIY photo booth frame is a small part of a much bigger trend. The global photo booth market is a booming industry, expected to grow from USD 584.7 million to over USD 1.4 billion by 2035. That growth is fueled by people wanting personalized experiences, where unique accessories like your handmade frame play a starring role. You can discover more insights about the growth of the photo booth market and see where things are headed.
Adding That Personalized Touch
Personalization is what makes your DIY photo booth frame feel genuinely special. Adding names, dates, or fun phrases elevates it from just another prop to a meaningful keepsake from your event.
You can pull this off in a few different ways. Hand-painting the lettering gives it a charming, artistic feel. If your handwriting isn't your strong suit (mine isn't!), stencils are a fantastic way to get clean, uniform text. For an ultra-sharp and professional look, you might consider ordering custom vinyl decals online—they're surprisingly easy to apply and look incredibly polished.
No matter which decorations you choose, remember that your frame is just one part of the whole picture. For some great inspiration on what to put behind it, check out our guide on creating a stunning DIY photo booth backdrop to really complete your setup.
Nailing the Perfect Photo Booth Setup
So, you've got this awesome, handcrafted frame ready to go. That's a huge win! But a great frame is really just the start. To make your photo booth the absolute highlight of the party, you need to think about the whole picture—literally. Getting the placement, lighting, and props just right is what separates a fun idea from an unforgettable experience.
Where you set this thing up matters more than you might think. You're looking for that sweet spot: visible and inviting, but not smack-dab in the middle of a major walkway. Putting it right by the front door, the bar, or the only path to the restroom is a classic rookie mistake that just creates a traffic jam.
Trust me, a corner of the main party room or a slightly sectioned-off area is usually your best bet. It feels like its own special zone, drawing people in without getting in everyone's way.
Get Your Lighting Right
Let's be honest, nobody likes a photo where they look like a ghoul. Good lighting is the secret sauce for amazing, flattering pictures, and you don't need a Hollywood budget to pull it off.
A simple consumer-grade ring light is a game-changer. They're pretty affordable these days and give you that soft, even light that magically erases harsh shadows.
Just position the light source to face your guests, placing it slightly above eye level. This little trick is what photographers use to avoid those unflattering shadows under the eyes and chin. And hey, if you're partying during the day and have a nice big window, let that gorgeous natural light do the work for you!
Think of it like a mini photo studio. When you create a space with great light and a cool backdrop, people feel more confident. That confidence translates into way more authentic, fun, and memorable photos. You're building an experience, not just a spot to take a picture.
Complete the Scene with Backdrops and Props
Your DIY photo booth frame needs something to frame! A backdrop is what makes the whole setup look intentional and polished. This doesn't mean you need to build a massive, expensive set piece.
A simple fabric curtain, a wall covered in colorful streamers, or even just some hanging fairy lights can create a fantastic background that really makes your photos pop.
And now for the fun part: props! Please, think beyond the standard mustache-on-a-stick (unless that's your theme, of course). Curate your props to match the vibe of your event. For a wedding, maybe you have elegant signs, floral crowns, or champagne glasses. For a wild birthday bash, bring on the funky hats, oversized sunglasses, and feather boas.
Just toss them all in a cute basket or a bucket where everyone can see them and easily grab what they want.
Taking these extra steps is what turns your craft project into a cohesive, engaging photo booth that people will be talking about long after the party ends. If you want to dive even deeper, our guide on how to design a photo booth has even more pro-level tips.
Got Questions About Your Photo Booth Frame? I've Got Answers.
Even the most straightforward DIY project can leave you scratching your head at some point. It happens to all of us. Let's walk through some of the most common questions I get about making these frames so you can get back to creating with confidence.
Probably the biggest question is about size. What's the sweet spot? While there's no single right answer, I've found that a frame around 36 inches tall by 24 inches wide is perfect for most events. This gives you enough room to frame two or three people comfortably without creating something too heavy or awkward for guests to handle.
How Can I Make My Frame Sturdy Enough for Another Party?
You spent all this time making something awesome, so of course, you want it to last! The secret to a reusable frame starts with a solid foundation. Opt for a thicker foam board or even a super lightweight wood panel instead of a flimsy poster board. Reinforcing the corners is also a must—trust me on this one.
Your choice of decorations plays a huge part in its longevity, too.
- Don't skimp on the glue: Use a quality hot glue gun or a strong craft epoxy. This will keep everything locked down, even when the party gets a little rowdy.
- Seal the deal: A quick coat of clear acrylic sealant spray over your paint and decorations is a game-changer. It protects against scuffs and can even save your frame from a minor drink spill.
- Store it smart: When the party's over, don't just toss it in a corner. Store your frame flat in a dry, cool spot—under a bed or in the back of a closet works great. This prevents it from warping.
With a little extra effort upfront, your photo booth frame can become a go-to prop for many parties to come.
What’s the Absolute Cheapest Way to Make a Frame?
Working with a tight budget? I've been there. The most wallet-friendly way to make a great frame is to get resourceful with reclaimed materials. A big, sturdy cardboard box is your new best friend—think appliance boxes or large moving boxes. They're free and surprisingly durable once you prep them.
My Go-To Trick: When I use cardboard, I always double it up. Cut out two identical frame shapes and glue them together. This simple step creates a much more rigid structure that can easily survive a night of photo booth fun.
When it comes to decorating on a dime, shop your own home first. Leftover craft paint, old fabric scraps, glitter you forgot you had, and even colorful wrapping paper can be used to create an amazing design without spending a single cent. It just goes to show you don't need a big budget to create a really memorable party detail.
Ready to take your event to the next level without the DIY hassle? 1021 Events offers professional photo booth setups, stunning backdrops, and a full range of event production services to make your celebration unforgettable. Let us handle the details so you can enjoy the party. Book your event at https://www.1021events.com.