
Why DIY Photo Booth Backdrops Are Game-Changers
Photo booths are everywhere these days! They’ve gone from simple picture-takers to full-blown interactive experiences. But here’s the thing: a lot of people miss out on the magic of a DIY photo booth backdrop. It’s not just about saving some cash; it’s about making your event truly unforgettable and personal. You get to create a visual story that matches your theme and really wows your guests.
Personalized Experiences That Shine
Let’s be real, rented backdrops can be a bit…blah. They often lack that special something that makes an event feel unique. DIY backdrops, on the other hand, give you total creative control. Picture this: a rustic wedding with a backdrop handcrafted from reclaimed wood. Or a birthday party with a bright, custom-designed balloon arch. These little touches turn the photo booth into a reflection of the event itself. Think about a corporate event with a backdrop featuring the company logo and colors – it’s a subtle way to strengthen brand identity and create a cohesive experience. You just can't get that kind of customization with standard rentals.
Instagram-Worthy Moments Your Guests Will Love
We live in a social media world, so creating Instagram-worthy moments is essential. A fun and engaging DIY backdrop encourages guests to interact, take photos, and share their experiences online. This spreads the word about your event and creates lasting digital memories. Plus, a well-designed backdrop is a natural conversation starter, helping guests mingle and connect. This creates a more lively and engaging atmosphere.
Creative Control and Cost-Effectiveness
DIYing your backdrop unlocks a world of creative freedom. You’re not stuck with pre-made designs or limited color schemes. Let your imagination run wild! This is especially helpful for themed events, where a custom backdrop can really tie everything together. And here's a cool stat: the global photo booth market is predicted to hit $1.2 billion by 2024. This boom is driven by the growing popularity of photo booths as entertainment, especially at weddings (where they're the second most popular form of fun!). Check out more stats here. This rising popularity, combined with the desire for unique experiences, makes DIY backdrops a super appealing choice.
The Psychology of an Irresistible Backdrop
Some backdrops just naturally draw people in. Think about what catches your eye: vibrant colors, interesting textures, interactive elements, and personalized details. A DIY approach lets you include all of these, transforming your backdrop from just a background into an experience. This means your photo booth becomes more than just a place to snap pics; it becomes the life of the party! By understanding what makes a backdrop visually appealing and engaging, you can create a photo booth experience your guests will absolutely love.
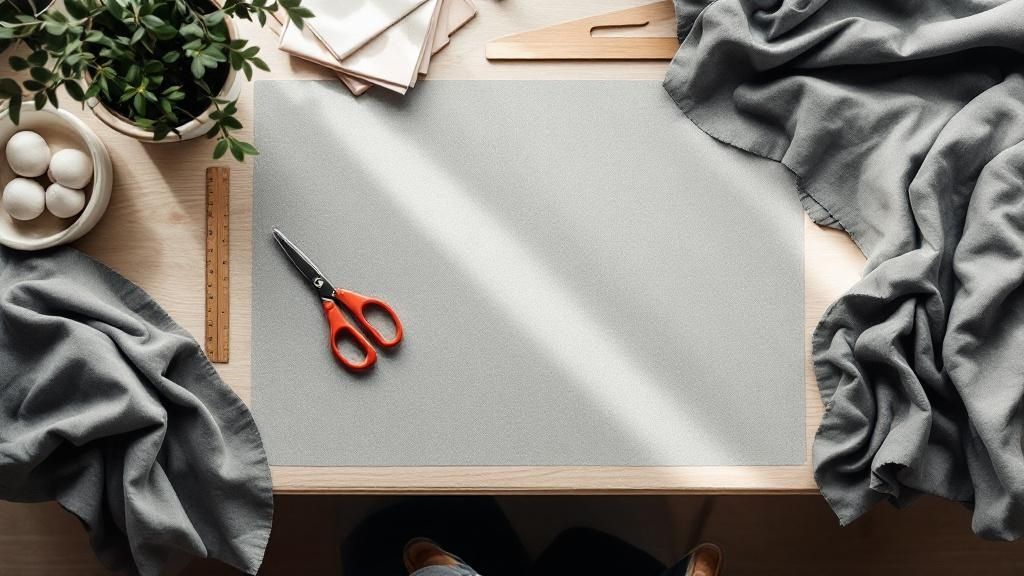
Essential Materials That Actually Matter for Backdrops
Creating a killer DIY photo booth backdrop doesn't have to drain your bank account. It's all about picking the right stuff. This guide breaks down the must-have supplies that take your backdrop from amateur hour to professional-grade, making your photo booth the star of the show.
Fabric, Paper, or Vinyl: Making the Right Choice
The base of any awesome backdrop is, well, the material itself. Each has its own pros and cons, affecting everything from how it looks to how long it lasts. Let's check out three popular options: fabric, paper, and vinyl.
-
Fabric: Super versatile and comes in tons of textures, from budget-friendly muslin to fancy velvet. Muslin is lightweight and easy to handle, perfect for simple backdrops. For a touch of elegance, velvet adds depth and richness. But, fabric can wrinkle, so you might need to steam or iron it.
-
Paper: A cost-effective option, especially for one-time use backdrops or big, bold graphic prints. Seamless paper rolls give you a clean, even background. The downside? Paper isn't as tough as fabric or vinyl and can rip easily. Seamless paper comes in various sizes and colors, giving you creative freedom.
-
Vinyl: This stuff is durable and a breeze to clean, ideal for busy events. It's also wrinkle and fade-resistant. The catch? Vinyl can be pricier than paper and might cause glare under bright lights. You can find vinyl backdrops in a wide range of styles and designs, readily available online and in photography stores.
To get a better idea of how these materials stack up, peep the infographic below. It compares the cost, durability, and weight of paper, fabric, and vinyl backdrops.
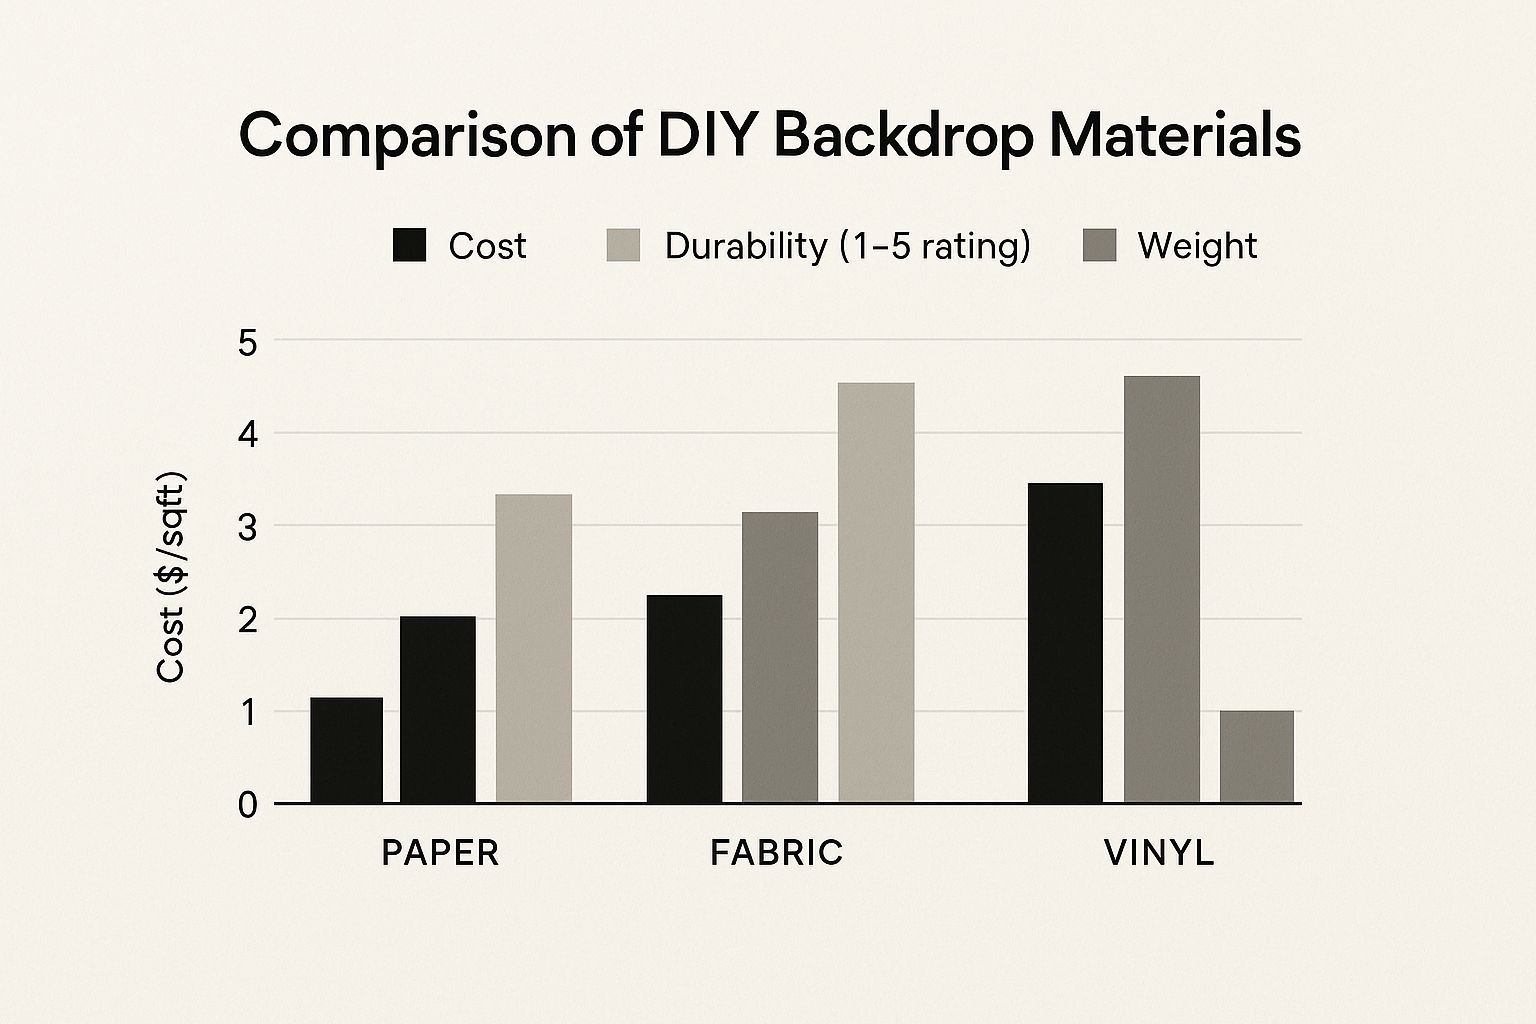
As you can see, paper is the cheapest but not the strongest. Vinyl is the toughest but comes with a higher price tag. Fabric strikes a balance between cost and durability, but its suitability really depends on what kind of fabric you go with.
Backdrop Stands: The Backbone of Your Setup
A solid backdrop stand is essential for keeping your masterpiece upright and steady throughout your event. Check out these popular choices:
-
Telescopic Stands: Adjustable and easy to move around, making them great for different backdrop sizes and venues.
-
Crossbar Stands: These offer a wider base for extra stability, especially for heavier backdrops.
-
Frame Stands: Create a clean, frame-like border around your backdrop.
Picking the right stand depends on how big and heavy your backdrop is, and what the venue is like. A flimsy stand can lead to a backdrop disaster (imagine it collapsing!), so investing in a good one is crucial.
Mounting Hardware and Lighting: The Finishing Touches
To attach your backdrop to the stand, you’ll need reliable mounting hardware. Clamps, clips, and ties are all key for keeping your backdrop smooth and wrinkle-free. Also, think about how lighting will play with your chosen material. Soft, diffused light is usually more flattering, while spotlights can highlight certain areas. The right lighting can take an ordinary material and make it look amazing.
Multipurpose Materials and Storage: Thinking Long-Term
If you want a backdrop you can use again and again, think about versatile materials like sequins, shimmering fabrics, and neutral-toned linens. You can easily adapt these to different themes with simple extras like flowers or props. Storing your backdrop properly is just as important. Get some storage bags or containers to keep your backdrops safe from dust and damage, making them last longer.
Don't Forget the Little Things
Don't underestimate the impact of simple additions! Everyday items like fairy lights, balloons, or even repurposed materials can add unique flair and depth to your backdrop without breaking the bank. These small details can truly elevate your DIY photo booth backdrop.
Before we wrap up, let's take a quick look at a handy comparison table:
Essential DIY Backdrop Materials Comparison: This table breaks down the costs, durability, and best uses for different backdrop materials, helping you make the best choice for your project.
| Material | Cost Range | Durability | Best For | Difficulty Level |
|---|---|---|---|---|
| Muslin Fabric | $ – $$ | Low-Medium | Simple backdrops, draping | Beginner |
| Velvet Fabric | $$ – $$$ | Medium | Elegant events, adding texture | Intermediate |
| Seamless Paper | $ | Low | Single-use, bold prints | Beginner |
| Vinyl | $$$ | High | High-traffic events, easy cleaning | Beginner |
As the table shows, each material has its strengths and weaknesses. Consider your budget, how durable you need it to be, and what kind of event you're hosting when making your decision.
Remember, the goal is to create a backdrop that looks amazing and makes a lasting impression. By carefully choosing your materials, you're well on your way to doing just that!
Step-by-Step Guide to Trending Backdrop Styles
Creating a DIY photo booth backdrop is way more than just throwing some fabric up – it's about designing a whole vibe. This guide walks you through three super trendy styles: sequin, rustic wood, and floral. Each one is guaranteed to level up your photo booth game and give you some amazing photos.
Creating a Glamorous Sequin Backdrop
Sequin backdrops are all about glitz and glamour. They catch the light perfectly and add extra sparkle to every shot. Here’s how to DIY one:
-
Materials: Sequin fabric, backdrop stand, zip ties or safety pins, and maybe a decorative border if you’re feeling fancy.
-
Assembly: Drape your sequin fabric over the backdrop stand. Secure it nice and tight with zip ties or safety pins so there are no wrinkles. A decorative border like ribbon or lace adds an extra touch of elegance.
-
Tip: Go for a really dense sequin fabric so you get maximum sparkle. You could even use a couple of layers for a richer, more luxurious effect.
Building a Rustic Wood Panel Backdrop
Rustic wood is all about that natural, down-to-earth feel. Perfect for outdoor events or themed parties. Here’s the lowdown:
-
Materials: Wood planks (mix up the sizes and textures), backdrop stand, screws or nails, sandpaper, and maybe some stain or paint.
-
Assembly: Arrange the planks on your backdrop stand to make a cool design. Secure them with screws or nails. Sand down any rough edges for a polished look. Stain or paint the wood to match your event's color scheme if you want.
-
Tip: Different sizes and textures of wood add depth and visual interest. Small shelves or hooks for props or flowers are a nice touch too.
Designing a Romantic Floral Backdrop
Floral backdrops add a touch of romance and whimsy. Here's how to make your own:
-
Materials: Faux flowers (different types and colors), floral wire, backdrop stand, wire cutters, and maybe some greenery.
-
Assembly: Use floral wire to attach the flowers to the backdrop stand. Mix up the flower types and colors to create a layered look. Add some greenery to make it look more natural.
-
Tip: Pick flowers that match your event’s colors and theme. Good quality faux flowers will last longer and you can use them again.
Speaking of trends, photo booths are huge right now, and that's had a big impact on backdrop choices. Sequin, floral, and rustic wood are definitely fan favorites, each with their own unique look. Explore this topic further. Sequin is all about glamour, rustic wood brings that natural vibe, and floral is a romantic classic.
Achieving Professional Results: Spacing, Color, and Assembly Tricks
No matter which style you go for, a few simple tricks will give you a professional finish. Spacing things out the right way creates depth. Color coordination makes your backdrop pop and works with your lighting. And secure assembly means your backdrop will look great all through your event. Master these things and your DIY backdrop will not only look amazing but also work perfectly, making your photo booth the place to be.
Stunning Backdrops Under $50 That Look Expensive
DIY backdrops don't have to scream "budget." You can absolutely create amazing DIY photo booth backdrops without emptying your wallet. Seriously, some of the coolest backdrops are made with everyday, affordable stuff. Let's look at how to get that high-end vibe without the high-end price.
Transforming Dollar Store Streamers Into Elegant Curtain Walls
Yep, you read that right. Those basic dollar store streamers can become elegant, flowing curtain walls. The secret? Pick colors that match your event's theme and mix up the textures. Try combining metallic streamers with matte ones for a cool, shimmery effect. Overlap different colors to make it visually interesting.
-
Cost Breakdown: Streamers (various colors/textures): $5-10; Tape or Command Strips: $5.
-
Sourcing: Dollar stores, party supply stores, or online retailers like Amazon.
-
Modification Techniques: Play with streamer lengths and how close together they are for a layered look. Twist or curl some streamers to add texture and make them stand out.
This easy and affordable trick can make any spot photo-ready. The flowing streamers add a fun, elegant touch, making your pictures really pop.
Repurposing Thrift Store Finds Into Sophisticated Backgrounds
Thrift stores are a goldmine for backdrop potential. An old picture frame, a patterned sheet, or even a vintage tablecloth can become a totally unique and eye-catching backdrop. Imagine an antique lace curtain for a vintage, romantic look. Or an old door with peeling paint for a rustic, chic vibe.
-
Cost Breakdown: Thrifted item: $5-20; Paint or other embellishments (optional): $5-10.
-
Sourcing: Local thrift stores, antique shops, or online marketplaces like eBay.
-
Modification Techniques: Repaint or refinish the item to fit your event's theme. Add some extra flair with flowers, ribbons, or lights to make it your own.
This approach isn't just easy on the wallet; it’s good for the planet too, giving old items a new life. Plus, it gives your backdrop some real character and a unique story.
Embracing Nature: Branches, Flowers, and Organic Displays
Nature provides some seriously beautiful and inexpensive backdrop options. Branches, seasonal flowers, and leaves can be arranged in tons of ways to create a stunning display. Think dried branches for a rustic, bohemian vibe. Adding seasonal flowers brings in vibrant color and a touch of romance.
-
Cost Breakdown: Foraged branches/flowers: Free (if permitted in your area); String or twine: $5; Floral wire (optional): $5.
-
Sourcing: Your backyard, local parks (with permission), or affordable florists.
-
Modification Techniques: Weave string or twine through the branches to hold everything together. Attach flowers with floral wire to add pops of color and texture.
This brings a little bit of the outdoors into your event and offers a personalized feel that you can't get from store-bought backdrops. Speaking of personalization, people are really into custom photo booth experiences these days, which is making the photo booth market explode. Get this: the global photo booth market was valued at around $818.2 million in 2024 and is expected to grow at a CAGR over 8.8% through 2034. Check out more stats here. This desire for custom experiences, where event organizers want the photo booth to perfectly match the theme and what guests want, shows how powerful the DIY approach can be.
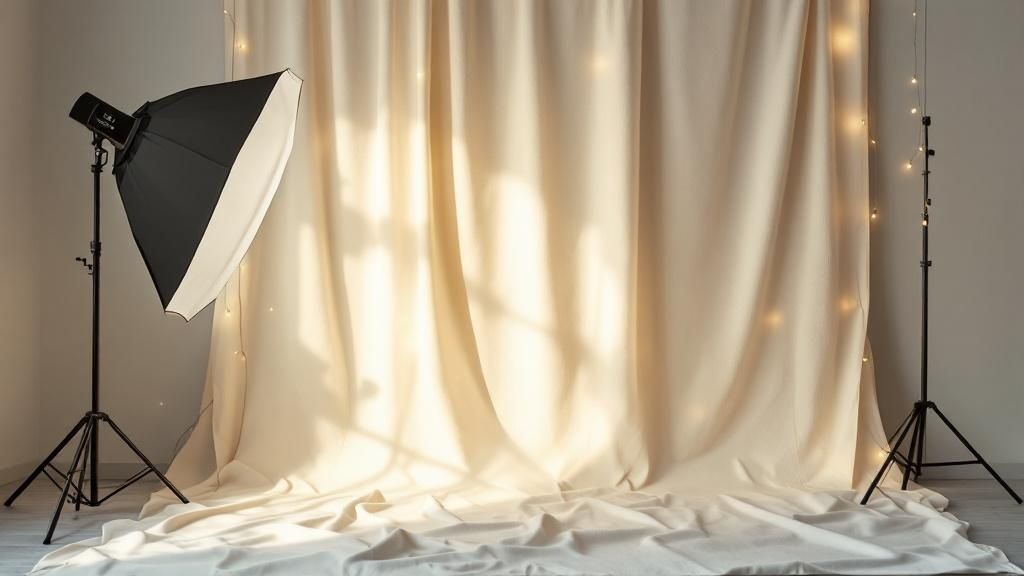
Enhancing Your Backdrop With Inexpensive Lighting and Layering
Simple lighting can totally upgrade your DIY backdrop. String lights, spotlights, or even carefully placed candles can add depth and drama without adding to the cost. Layering different materials also creates visual depth and makes things more interesting. Combine sheer fabrics with heavier materials to create a layered effect that catches the eye. These budget-friendly tricks can turn a simple backdrop into something that looks professionally done. By playing with lighting and layers, you can create a photo booth backdrop that isn't just pretty, but also perfect for taking stunning pictures.
Advanced Techniques for Next-Level Backdrop Designs
Taking your DIY photo booth backdrop to the next level goes beyond simply picking out materials. It's about incorporating advanced techniques that'll really impress your guests. Think lighting, modularity, interactivity, and even how to transport your masterpiece safely. These techniques can turn ordinary materials into amazing photo experiences.
Integrating Technology and Lighting
Lighting can totally transform a simple backdrop. Think about adding LED lighting systems that react to movement – a fun, interactive element guests will love. For something more subtle, strategically placed uplighting can bathe the backdrop in color, bringing out its texture and depth. This adds another layer to the photo booth fun.
Another cool option? Projection mapping. This technique projects images and patterns onto your backdrop, letting you change things up throughout your event. Picture switching from a starry night to a bustling city – the options are endless! Projection Mapping Central is a great resource for exploring this technology further. It creates customizable and interactive backdrops that are guaranteed to wow.
Modular Backdrop Systems and Quick Changes
If your event has different themes or sections, modular backdrop systems offer tons of flexibility. You can create separate panels that are easily rearranged or swapped, giving guests different photo ops. This is especially handy for events that go from day to night or have segments with unique themes.
For even faster changes, think about quick-change systems with Velcro, magnets, or clips. This lets you switch backdrops smoothly without any interruptions. It means more variety and happy guests!
Interactive Elements and Dimensional Design
Get your guests involved with interactive elements. Think hanging props, chalkboard walls for personalized messages, or even a digital interactive display. These touches turn the backdrop from just a background into a whole experience.
Dimensional backdrops with different textures and depths also add visual interest. Use materials like wood, fabric, flowers, or even repurposed items to create a 3D effect that’ll make photos pop. Imagine layered floral arrangements or geometric shapes – now that's unique!
Weatherproofing and Transportation
For outdoor events, weatherproofing is key. Use durable, water-resistant materials and make sure the backdrop is secured against wind. A sturdy stand is essential. This way, your backdrop will look great no matter the weather.
Transporting your backdrop takes a bit of planning. Disassemble modular pieces, roll up flexible materials, and use protective covers to prevent damage. For a really intricate backdrop, a custom carrying case might be worth it. This protects your hard work and makes setup at your next event a breeze. Careful planning and these advanced techniques can truly elevate your DIY photo booth backdrop, making it a memorable part of your event.
Perfect Backdrops for Every Event Theme and Style
DIY photo booth backdrops are an awesome way to add a personal touch to your event and create some truly unforgettable moments. By matching your backdrop to your event's theme, you can transform a simple photo op into a real statement piece that reflects your unique style. Think about everything from colors and materials to little details that speak to your event's vibe.
Matching Your Backdrop to Your Event's Theme
Whether you're planning a fancy wedding, a milestone birthday bash, a corporate get-together, or a holiday celebration, your DIY photo booth backdrop should fit right in with the overall theme. For a bohemian outdoor wedding, imagine a backdrop made of flowing fabrics, macrame, and natural elements like branches and flowers. This sets a whimsical, romantic mood that's perfect for the occasion.
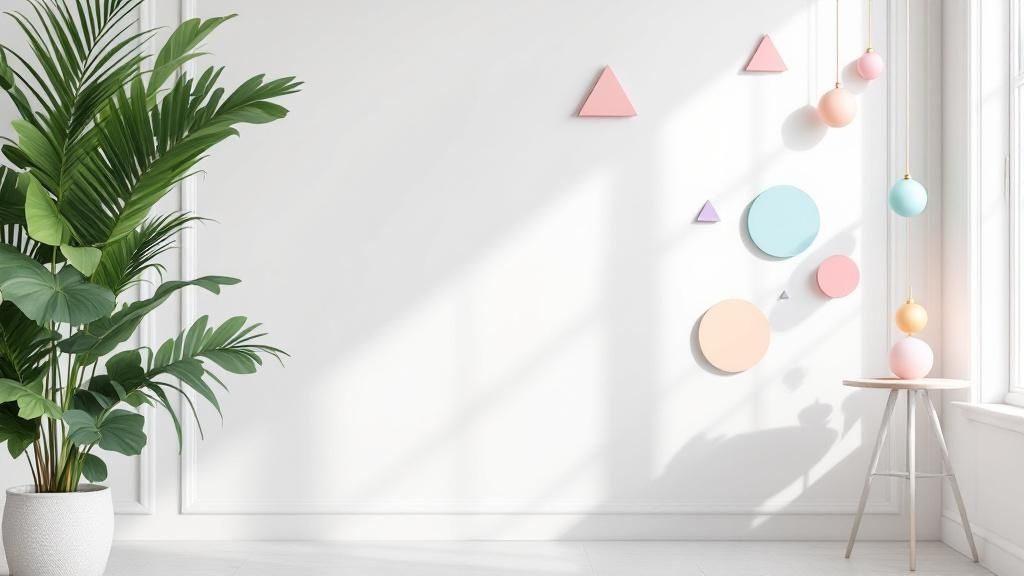
For a retro birthday party, a bright backdrop with geometric patterns, bold colors, and vintage props can transport your guests back in time. This creates a fun, nostalgic vibe that adds to the party atmosphere. A corporate event, on the other hand, might call for a sleek and modern backdrop, maybe featuring the company logo. Using clean lines, metallic touches, and subtle lighting makes for a professional yet engaging photo opportunity.
The Power of Color and Material
Picking the right color palette is key to creating a visually appealing backdrop that goes with your event's theme and makes your guests look great. Soft pastels work beautifully for spring weddings, while rich jewel tones are ideal for holiday parties. The backdrop material also matters. Flowing fabrics like chiffon and velvet add a touch of elegance, while rustic wood planks create a more natural, down-to-earth feel.
The growing popularity of photo booths, and the desire for personalized experiences, has really boosted the photo booth market, including DIY backdrops. Interestingly, Europe is a huge market for photo booths and related accessories. The European photo booth market is expected to hit $393.31 million by 2028, with a CAGR of 8.3% from 2023 to 2030. This growth reflects how common photo booths have become at events and the investment in creative, budget-friendly backdrop solutions. Learn more about this trend here. It just shows how important it is to create personalized and engaging photo experiences.
Adding Personal Touches and Cultural Considerations
Adding personal elements to your DIY photo booth backdrop makes it even more special. Think about adding a monogram, a favorite quote, or photos of the guest of honor. These small details can really elevate the backdrop and create a lasting memory. At a wedding, for instance, you could include photos of the couple from throughout their relationship, which adds a sweet touch to the celebration.
Also, be aware of cultural considerations when you're designing your backdrop. Make sure your design connects with your guests and respects any cultural traditions. Including traditional patterns or symbols can add a unique cultural touch to your event while showing respect for your guests’ heritage.
Theme-Based Backdrop Ideas and Materials
To help you get started, here’s a table with a few ideas:
Theme-Based Backdrop Ideas and Materials: Quick reference guide for popular event themes with corresponding backdrop styles and materials
| Event Theme | Backdrop Style | Key Materials | Color Palette | Estimated Cost |
|---|---|---|---|---|
| Wedding | Romantic Floral | Faux flowers, greenery, sheer fabric | Pastels, white, ivory | $50 – $150 |
| Birthday | Festive Balloons | Balloons, streamers, ribbons | Bright colors, metallics | $25 – $75 |
| Corporate | Modern Geometric | Vinyl, wood panels, metallic accents | Neutral colors, brand colors | $75 – $200 |
| Holiday | Winter Wonderland | Faux snow, snowflakes, string lights | White, silver, blue | $50 – $125 |
This table gives you a starting point for brainstorming your own unique DIY photo booth backdrop. Remember, the most important thing is to let your creativity flow and design a backdrop that perfectly captures the feel of your event. By following these tips and thinking about all the elements that make a great backdrop, you can make sure your DIY photo booth is the star of the show.
Key Takeaways
Creating a killer DIY photo booth backdrop is way easier than you might think. This section breaks down the essential steps and tricks for backdrop success, giving you a practical guide from initial idea to the finished product. By keeping these key takeaways in mind, you’ll be totally set to build a backdrop that takes your event up a notch and captures amazing memories.
Essential Materials and Timing
Before you jump in, round up all your materials. Having everything prepped beforehand makes the process much smoother and prevents any last-minute scrambling. A materials checklist is your best friend:
- Backdrop Material (fabric, paper, vinyl)
- Backdrop Stand
- Mounting Hardware (clamps, clips, ties)
- Lighting (soft, diffused lighting is ideal)
- Decorative elements (flowers, ribbons, lights)
Remember, timing is key. Kick off your DIY project well before your event, giving yourself plenty of time for design, construction, and any unexpected bumps in the road. This keeps stress at bay and makes sure your backdrop is ready to go when you need it. For simple backdrops, a few days might be enough, but more intricate designs could take a few weeks.
Troubleshooting and Budgeting
Even the best plans can run into snags. Thinking ahead about potential issues and having solutions ready can stop small setbacks from becoming huge headaches. Here's a quick troubleshooting guide:
-
Wrinkled backdrop: A handheld steamer works wonders on fabric backdrops. For vinyl, a low heat iron can do the trick.
-
Unstable stand: Make sure your stand is the right size and strength for your backdrop's weight and size. Sandbags can add some extra stability.
-
Lighting issues: Do a test run of your lighting beforehand. Adjust the placement and brightness to get rid of glare and shadows.
Budgeting is essential for DIY projects. The total cost will depend on the materials you use and how complex your design is. Set a realistic budget and stick to it. Remember, you can create awesome backdrops without breaking the bank.
Photography and Storage
The whole point of your DIY photo booth backdrop is to get amazing photos. Get the most out of your backdrop by considering these photography tips:
-
Lighting: Soft, diffused light makes everyone look their best by minimizing shadows.
-
Color coordination: Pick colors that go with your event's theme and what your guests are wearing.
-
Visual depth: Using different layers and textures can create a backdrop that’s more visually interesting and dynamic.
After your event, storing your backdrop properly will keep it in great shape for future use. Clean it based on the material. Fold or roll it carefully to avoid wrinkles, and store it in a cool, dry place inside a protective covering. This way, all your hard work doesn't go to waste!
Scaling for Future Events
Once you've got the hang of making DIY photo booth backdrops, think about using your skills for bigger events or even turning your hobby into a side hustle. Invest in quality, reusable materials and create a system for quick setup and takedown. This way, you’ll be ready to create stunning backdrops for any occasion.
Ready to level up your events? 1021 Events specializes in creating unforgettable experiences, offering everything from custom photo backdrops and photo booths to professional DJ services, uplighting, and awesome visual effects. Visit 1021 Events to find out more and make your next celebration truly special.
